Introduction
In part one I described how light can be used to direct a viewer’s attention to specific locations on a model railroad. I also discussed recreating natural daylight. In this article I will explore the artistic side of lighting design and its subtle effects on the subconscious mind and its ability to create attention-grabbing visuals. The art of lighting design is one that most of us are exposed to everyday, though when it’s well executed often it slips past our conscious perception. I’ll continue to draw upon the similarities of a theatre’s stage and a model railroad, and how lighting can be better executed in modeling. I’ll discuss the lighting system on my layout, but it is important to remember that the art of effective lighting design is using any tools at our disposal to create a lighting environment that enhances the visual image of the subject being lighted. Lighting is about the thought behind it, not the tools used.
Reviewing the Five Goals of Lighting Design
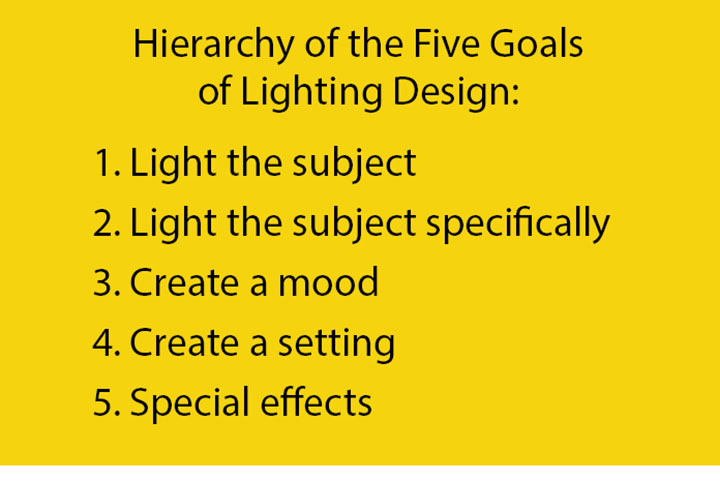
As I discussed in Part 1, I’m approaching lighting through a hierarchy of five basic goals. Lighting the subject, then lighting the subject specifically to draw attention, are the first two goals. The third goal is to create a mood. Here lighting design becomes more artistic rather than practical. Mood is the goal of creating a setting. Settings are developed by recreating the effects light has on physical objects in nature. The last goal is the incorporation of special effects, which I will tackle in the third part of my series.
Properties of Light
Light can be described by, intensity, distribution, color, and movement. Intensity is the brightness of light, and distribution is the angle from which it strikes a subject.
Color is simple on the surface, but for a lighting designer it is a complex topic with much artistic theory behind it. Our perception of color fundamentally depends on which of the different wavelengths of light in the visible spectrum reach our eyes. The perceived color of an object depends on the wavelengths of light striking the object, and the object’s ability to reflect those wavelengths back to our eyes. Most light is a combination of many wavelengths, white light generally being thought of as a combination of all visible wavelengths, representing all the colors. If a green object is lit with white light, it only will reflect back the green wavelengths, thus giving it its perceived color green. This is important in lighting design because as we stray from only using white light, we can change the color of objects by limiting the available wavelengths to reflect back. This is a powerful tool of the designer.
In nature this effect is present during sunset when the sun sinks low on the horizon and becomes bold golden amber. The color of the sun changes as many of the purples, blues, and greens in sunlight are refracted away by the atmosphere leaving mostly reds and yellows. Objects that are already reds and yellows appear brilliant in those colors, while more neutral objects become golden. Objects that are deep blues and purples only have the ability to reflect wavelengths that are no longer present so they tend to become grayer and less brilliant.
Modifying the color of a light can be done most easily with theatrical gel, which is a dyed plastic polyester or polycarbonate sheet, resistant to heat and available in thousands of different colors. Gel is used extensively in the entertainment industry to control the color of white light sources.
In lighting design the final property is movement, which describes any type of change in lighting conditions over time. It includes changes in any of the properties of light. For example, a change in intensity of a fixture is a type of movement. Changing the angle of a light by either physically moving it or by shifting between two light sources with different forms of distribution is also a type of movement. In theatrical design, these changes in intensity and particular fixtures used at any given time are examples of movement. Movement of color is also a common tool used in theatre and also one that nature provides examples of constantly. As the sun rises in the morning, cool twilight gives way to delicate pinks and lavenders, then vibrant ambers and oranges before the sun rises in the sky.
Creating a Mood
Referring back to the psychological power of light, we can use light as a tool on a model railroad to influence a viewer’s mood or perception. Our life experiences in the natural world train us to expect lighting conditions to be correlated with things like time of day, sunrise and sunset, weather conditions, and many other situations. Some are more apparent while others more subconscious. A brilliant amber sunset or a soft pink sunrise has very obvious variations on lighting conditions, which we can replicate to clearly tell a story to a viewer. The difference between a sunny day at high noon and mid morning or afternoon is a much more subtle variation in condition. Viewers might not consciously perceive it, but it will affect the mood of the layout. Changes in lighting conditions made very slowly tend not to be entirely noticed consciously but still change the mood affecting a viewer on a more subconscious level.
Creating a Setting
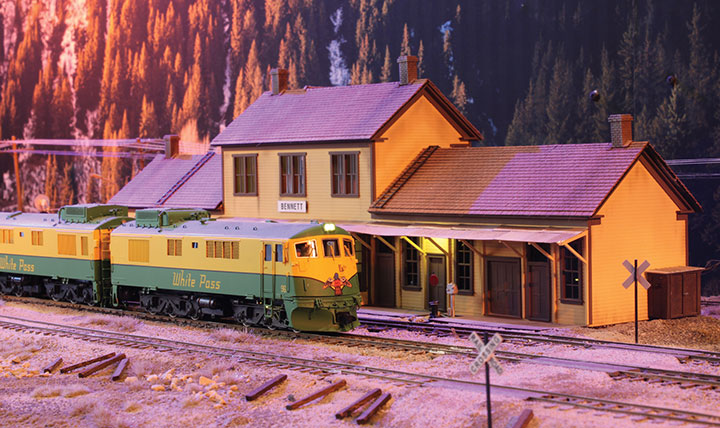
The fourth goal of lighting design is to create a setting. Much like theatres build a set on their stage, the scenery on a model railroad serves as a set. Scenery’s purpose is to create a backdrop and environment for the model trains to run in, but also serves to show the viewer where in the world the trains are meant to be portrayed. Light also has an influence on a viewer’s perception of a setting and can be used to enhance the setting created by the scenery.
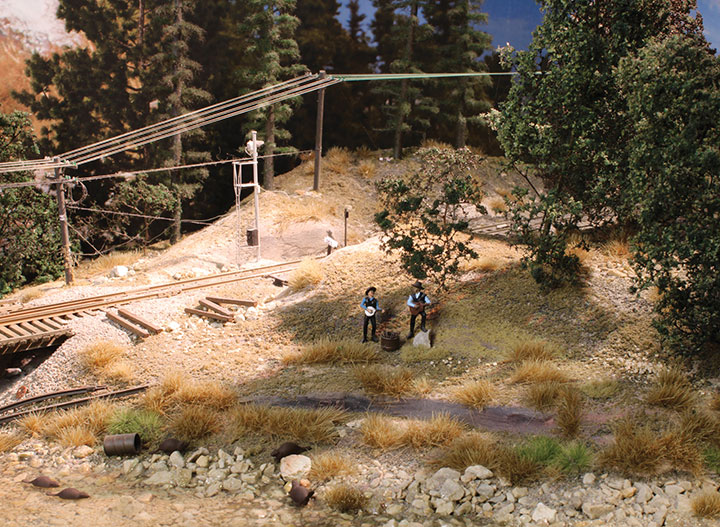
Both natural and artificial light in the world interact with physical elements on the ground, creating recognizable light patterns. In a thick forest for example, sunlight might only hit the ground in stark beams of light where it penetrates the tree canopy, while the rest of the light at the ground is soft and diffuse. In a less thickly wooded area, sunlight on the ground projects the pattern of the leaves overhead, or in the winter, the pattern of branches. In lighting design these are referred to as breakup patterns, mimicking the natural look of light after it passes though other objects. In cities with tall buildings, strong sunlight fills the streets between buildings where its angle aligns but leaves the other streets in deep shadows. Sunlight also reflects off of skyscraper windows projecting the pattern of the glass on the streets below. Near water, sunlight reflects up to subjects, an angle of light, which is not very common in nature, yet very common near water. If the water is moving, the uplight is often broken up in a shimmering pattern. All of these things can be used to influence a viewer’s perception of the setting of a layout.
Practicals
In theatrical lighting the term practical refers to any lighting fixture on the stage that actually works as intended and isn’t a simulation. They could be a lamp on a table or a wall sconce on a set wall. As this relates to a model railroad, practicals are anything on the layout that illuminates as it would on a prototype. Streetlights, building interiors and exteriors, signals, locomotive lights, and so on.
There’s nothing new about the idea of lighting up a structure with interior and exterior lights, but adding the lighting element of movement to the structure is something that isn’t done nearly as often. In the simplest form, having a master switch for all of the structure lights to turn on in the evening and off in the morning elevates the realism of a scene. Looking at the real world though, we know that building lights turn on and off at different times and different rooms have their own cycles. Adding control to a layout’s practicals gives the illusion of a miniature world actually being used by its inhabitants. I’ll discuss control further in Part 3.
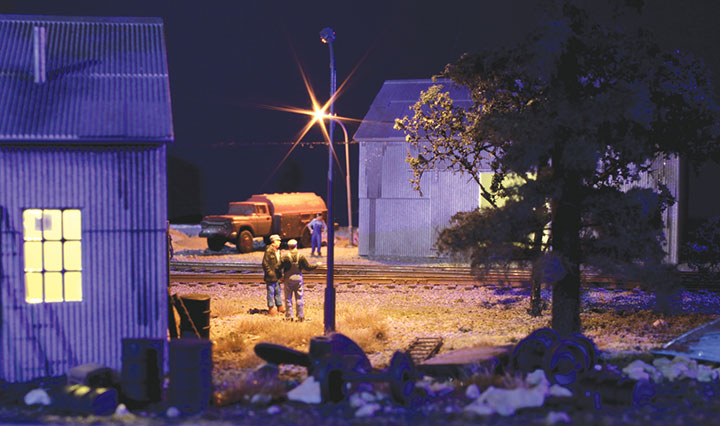
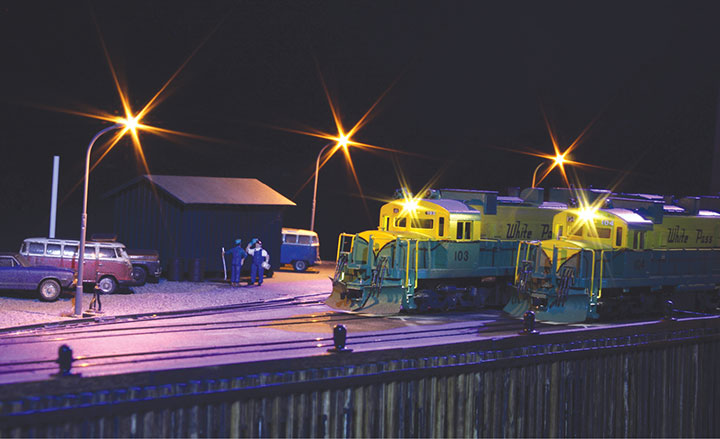
In both Bennett and Skagway on my layout, I included streetlights to light the areas where people might need to see at nighttime. By controlling their intensity I was able to program them to emulate the high-pressure sodium lamps that they represent. When they are initially turned on, an arc strikes in the lamp causing it to flash like a welder. As the lamp warms up, it becomes brighter until it reaches its full intensity. These details in movement add realism to the lighting design.
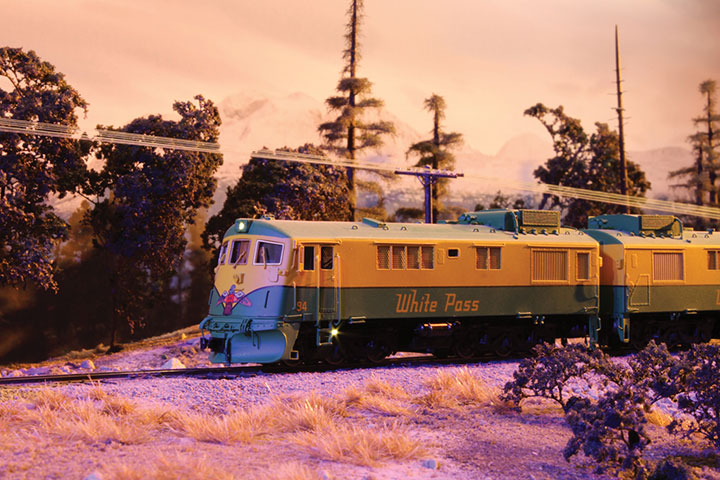
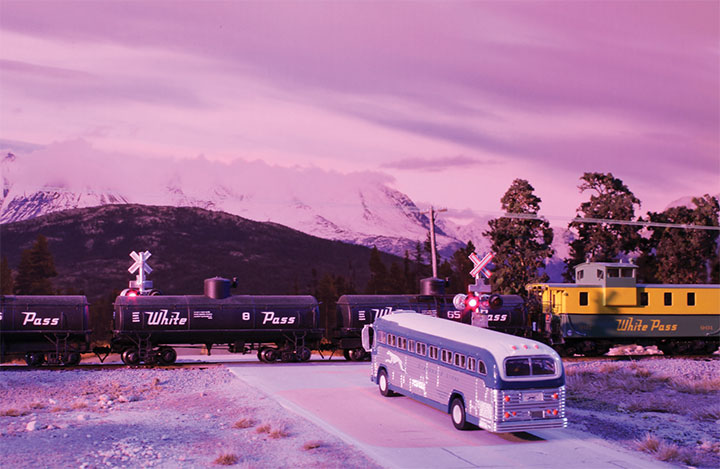
Recreating Sunset
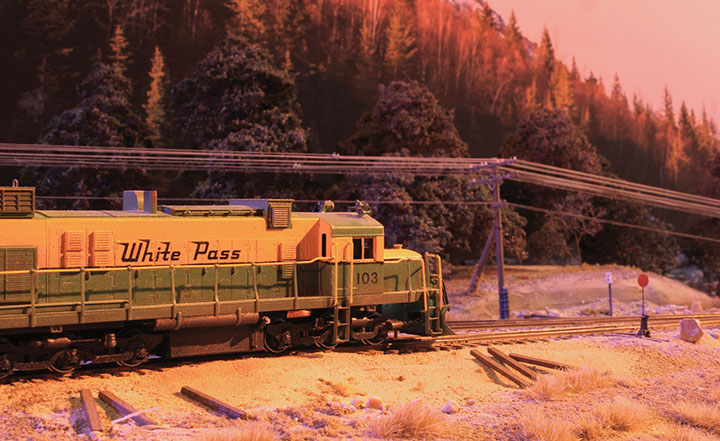
Sunset is one of the most dramatic lighting effects that nature creates every day. No two sunsets are truly alike, but all of them tell the story of passing time. Recreating the sunset in a model railroad is a dramatic effect creating a stunning mood.
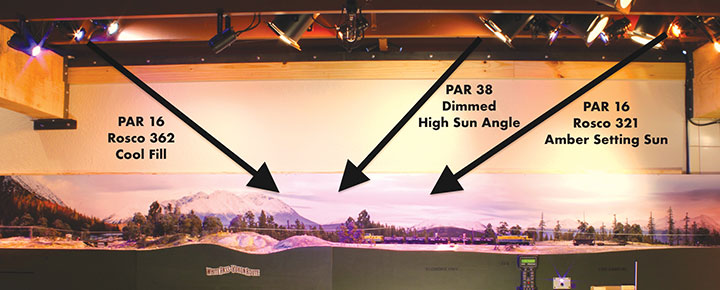
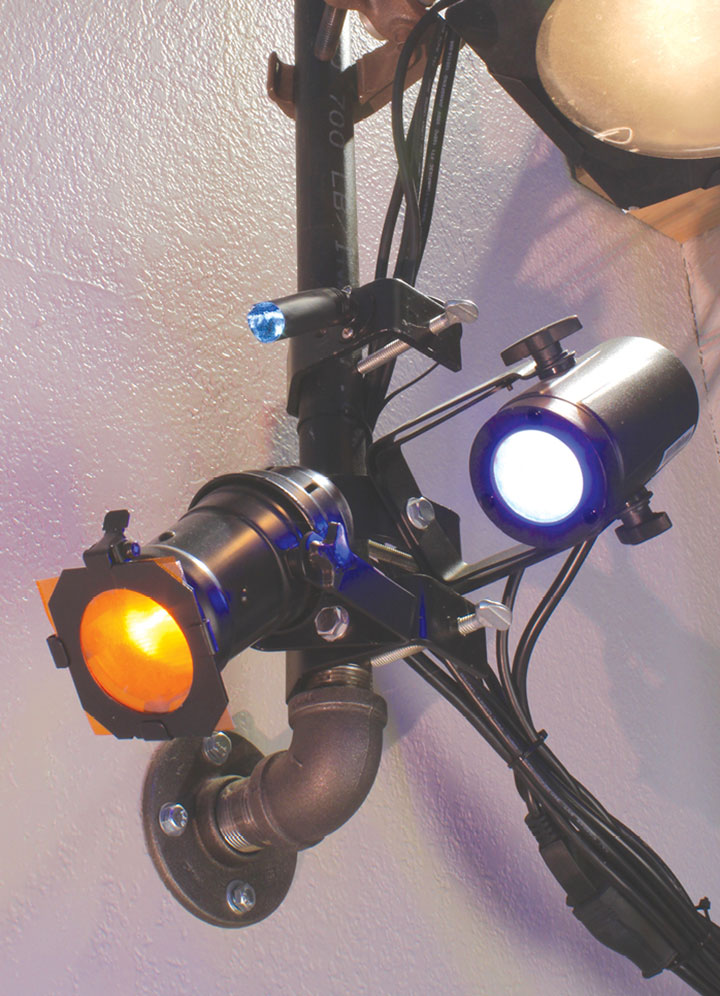
Sunset involves controlling several properties of light; direction, color, and movement in timing. During sunset the angle of direct light drops as the sun sinks to the horizon. I started to create the look by adding a PAR (Parabolic Aluminized Reflector) 16 fixture from a low angle. This low angle replicates the sun on the horizon and creates the contrast and dramatic shadows from a subject lit intently from a single side. This fixture is gelled with Rosco 321, a deep rich amber color gel, though still containing low amounts of the remaining visible spectrum. Sunsets come in several variations of color, but this one I find faithfully replicates the stereotypical golden color. It’s important that it also contains some part of the rest of the visible spectrum so that other colors can still be seen, keeping everything on the layout from becoming a monochromatic mess. From the opposite angle I’ve used another PAR 16, which is gelled with Rosco 362, a light blue to replicate reflected skylight. This fills the shadows created by the low angle light. I’ve also lowered the intensity of the high angle PAR 38 fixture that serves as sunlight when the layout is in a daylight look. The dimmed PAR 38 now blends nicely with the blue fill allowing the drama of the low angle amber to shine through.

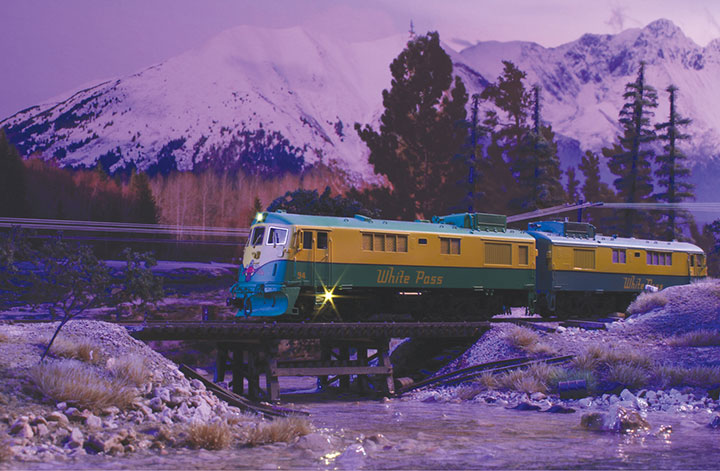
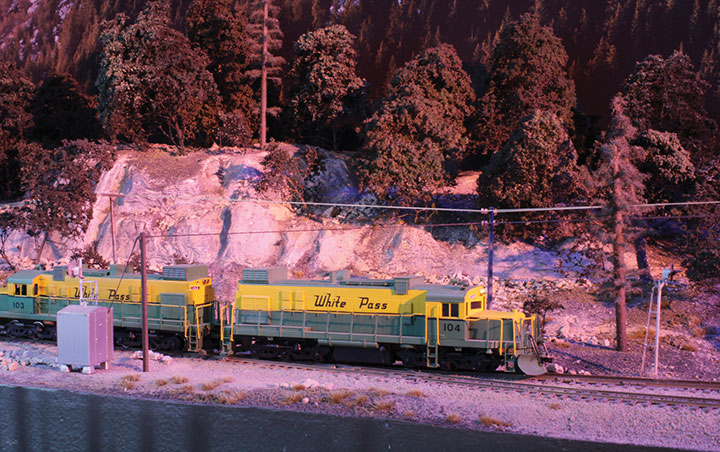
Night Lighting
Recreating the look of nighttime is a challenge in any form of lighting design because of the obvious problem that true nighttime is just dark, absent of most light. If we wanted to be totally realistic, there isn’t much challenge here. However, to recreate the mood of night while still providing enough light for the viewer to see, a designer needs to create a stylized representation of reality.
There are several key elements of a moonlit night in nature that can be used to create a stylized representation. Moonlight itself is a relatively high color temperature white at a very low intensity. The lack of reflected skylight as during daytime, coupled with the direct form of moonlight, results in high contrast and deep shadows. The color temperature of moonlight and our eye’s sensitivity to blue light at low intensity gives moonlight a cool appearance. These elements of mood can be recreated in a lighting design while simultaneously raising the overall intensity to a comfortable viewing level.
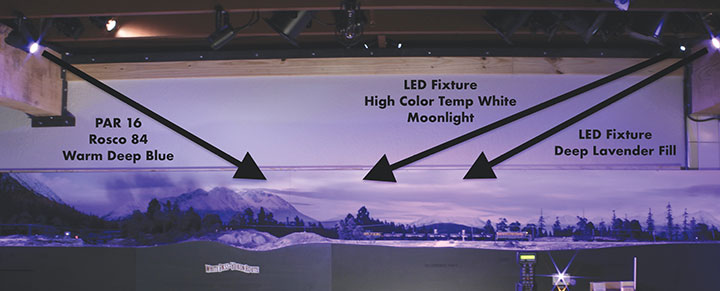
On my layout, I created the nighttime look so that it faithfully recreated the elements of natural night-light, but somewhat artistically stylized. I did this to allow me to raise the overall intensity to a comfortable level. To build the look, I started with a small LED fixture that uses a single high color temperature white LED. These little fixtures are marketed for use in jewelry cases and are perfect for this application. A significant advantage that LED fixtures have in creating a night effect is that when an LED is dimmed, its color temperature doesn’t shift down becoming oranger. Instead they’re able to emit a low intensity high color temperature light. I mounted these lights at a low angle and close to the backdrop. Doing so casts shadows forward and leaves the models in some darkness on their front side. This creates that deep contrast appearance of moonlight. A PAR 16 fixture was placed low and to the front, near the aisle to fill in some of those deep shadows. I used Rosco 84 gel to color this light in a deep blue. This specific color appears deep blue but still has a somewhat high transmission of reds, giving it a warmer look. The light has a cold dark mood to it without simply appearing blue. From the opposite low angle I used the color changing LED fixtures and set them to a similar blue color but shifting them slightly lavender. This deep lavender color is nearly the same as the blue, but creates a slight contrast in color on the various shadows to add interest. These three lights replicated across the layout create the night look.
Conclusion
After exploring the third and fourth goals of lighting design, mood and setting, we’ve really come a long way from the most basic level of layout illumination. In so many ways understanding these concepts doesn’t have to mean that a complex lighting system is the only way to accomplish them, but rather they are things to understand to make thoughtful decisions with whatever lighting systems are being used. In Part 3, I will describe the control system to operate the lighting through a twenty-four hour period, then explore the fifth goal of lighting design, which is the inclusion of special effects. Special effects can extend to many different ideas but I’ll look specifically at the Northern Lights effects that I installed on my layout, and how on top of the rest of the lighting they can enhance the realism and fascination of a scene.
This video on lighting design is well worth watching.