In 2004, I attended a National Narrow Gauge Convention in Santa Clara, California. The most interesting part for the time was the room with the model manufacturers, and one of them was Paper Creek Model Works (out of business). They sold cardboard kits, designed on the computer and laser processed, so I bought an O scale Randsburg Barbershop kit. After returning home to Germany, I cut out all the parts with a fine knife and glued them together, and later installed the barbershop on my Rio Grande Southern layout.
Sometime later, I wanted to build a workshop for the repair and maintenance of tractors and bulldozers for my sawmill, and remembered the Paper Creek kit. Since I have no software on my computer like Paper Creek Model Works, I had to think of another option.
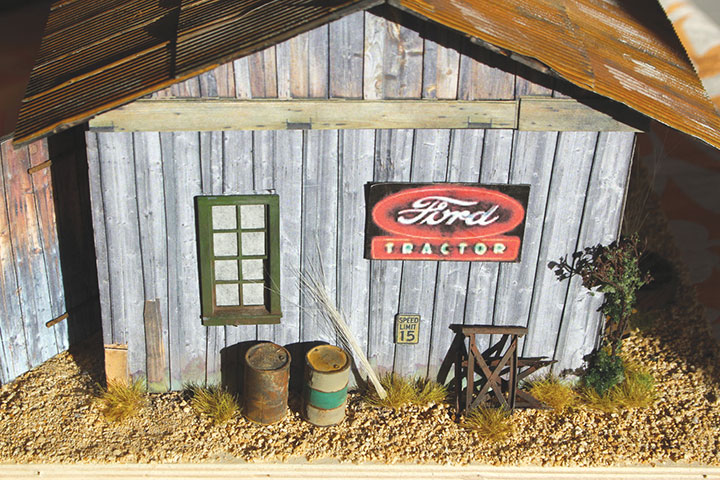
I am living in the countryside in Germany, and many farmers have barns or small huts in their fields to store agricultural equipment such as harrows and plows. Most of these wooden structures are 30 or more years old and are weathered accordingly. In the course of time, the weathering gave the wood a wonderful color, has cracks, parts have broken out, and some boards are missing or have been replaced by new ones. I photographed such walls with my digital camera, then uploaded the images to my computer and edited the photos so that the walls were roughly O scale. (See Dieter’s article in the May/June 2018 Gazette.)
Each image was printed out twice and glued onto 1mm-thick black cardboard. One copy served as the basis for the wall, and I cut the second copy into boards that were nailed over the cracks of the wallboards.
The edges were then blackened with a marker and glued to the same place on the base wall, using rubber cement because it can be rubbed off easily at the edges after drying.
The inside walls of the workshop consist of 0.5mm-thick and 6 to 7mm-wide basswood strips. I colored one side of the strips with Copic Marker warm gray #3 or #4. The individual strips were then placed with the colored side down in a right-angle device, and then the cardboard wall on the black cardboard side was coated with white glue and glued to the untreated side of the strips in the device.
After drying, I cut out the windows and doors, and used the cutouts with the shed doors as a workshop door.
After that, the individual walls were put back into the fixture with the cardboard side down and 4- x 4mm-thick supports and frames were glued in place.
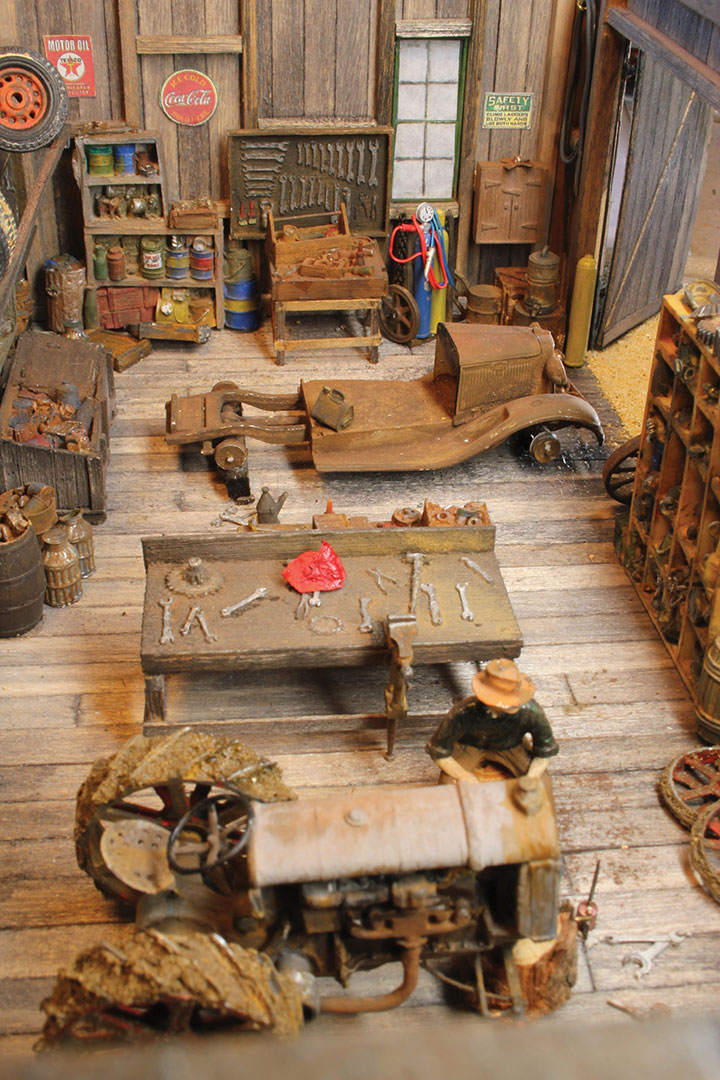
I assembled every single wall of the workshop with shelves, workbenches, tools, and advertising signs before assembly. The shelves and workbenches came from Rusty-Rails, were painted individually and glued to the walls. Only after I had all the walls completely finished did I glue them together into a building.
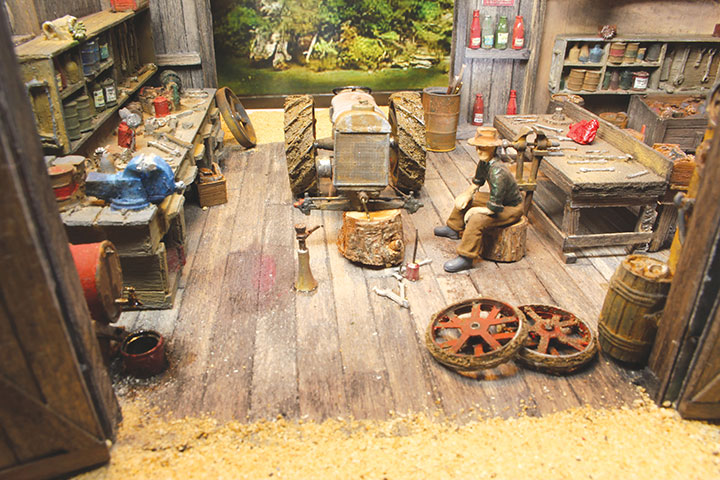
The floor of the workshop consists of individual 5- x 6mm planks, all weathered before being glued down to the base of 10mm-thick plywood.
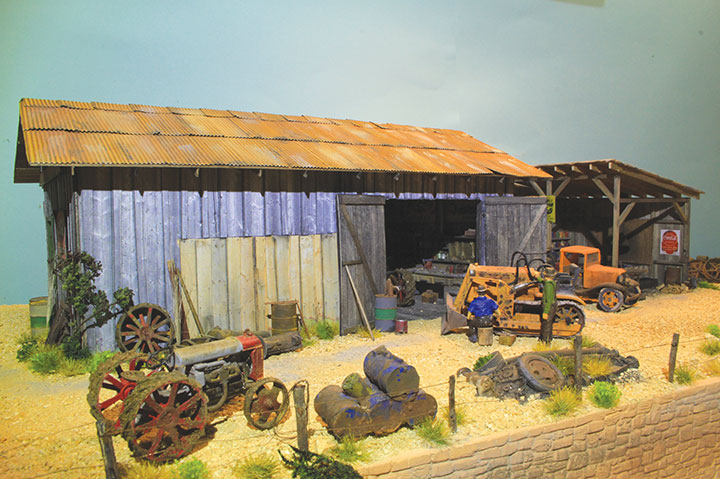
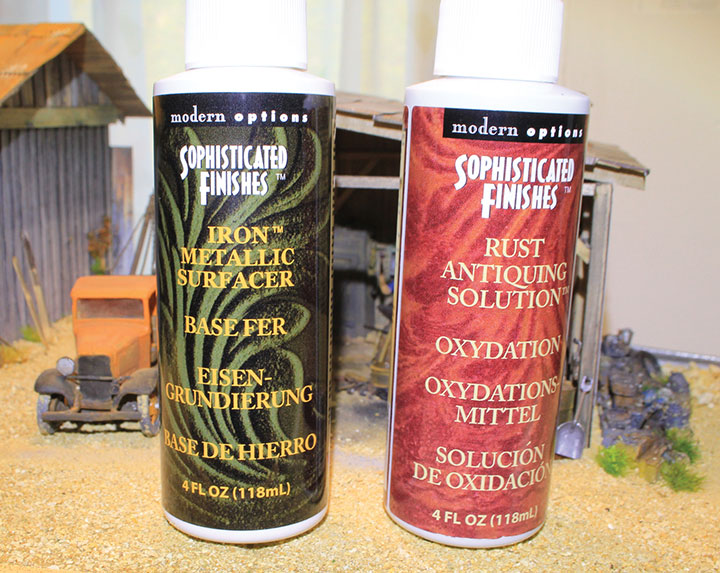
The roof was made of supports covered with thin strips of basswood. Then I glued corrugated aluminum sheet metal from Builders in Scale in place. I had previously coated the corrugated aluminum with Instant Rust, and after drying for about 12 hours, was coated with an oxidizing agent from the same manufacturer, giving me real rust.
The tractors were assembled from O scale white metal kits from Wiseman Model Services.
The bulldozers are perfect copies of prototype 1940 machines by Tamiya. I painted all their parts with the Instant Rust and after drying, coated them with the oxidizing agent.
Then I glued grains of sea salt at various points on the bulldozer and tractor parts and painted them with acrylic yellow or yellow orange, grey and red.
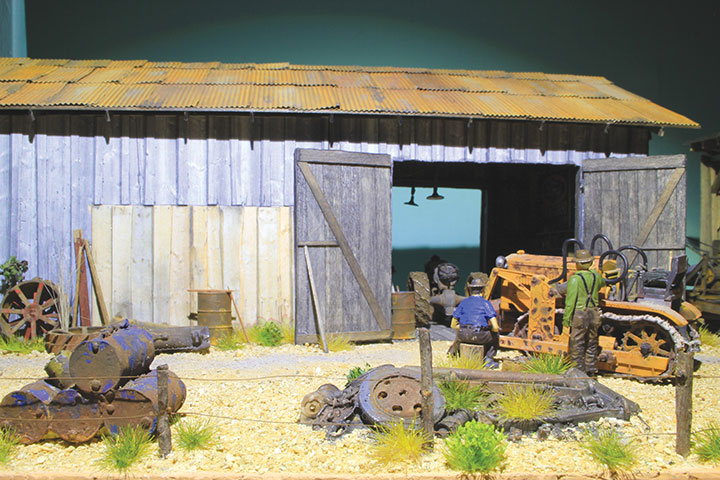
After the paint dried, I removed the salt grains, leaving rusty spots. Finally, the links of the bulldozer tracks were covered with earth, and some tracks of oil were brushed in the area of the hydraulic pipes. In the end, everything was aged accordingly with chalk powder mixture.
A lot of scrap and parts that are no longer needed are stored around the workshop, which is installed on a hill on the new section of my Basin Creek Lumber Railroad. Also, a bulldozer is parked on the side of the workshop so it can be dismantled for parts.