Given the COVID 19 restrictions we have been living under, and not being able to socialize with fellow model railroaders, led me to look for a project to pass the time. I looked through my kits and other building supplies for some inspiration for a structure that would fit in an undeveloped area on my 1:20.3 F scale layout, and found a couple of old Western Scale Models kits — a small vertical boiler, a single cylinder steam engine, and a set of four resin walls that were from a very old, small depot kit once made by Big Train Backshop, that looked like I could work with. Since I model in 1:20.3 scale, a stamp mill would be huge and where would I put it? Also, while I have always wanted to model a stamp mill, would it fit into my West Side Lumber Company logging railroad? But heck, there were plenty of mines in the Tuolumne area, so why not?
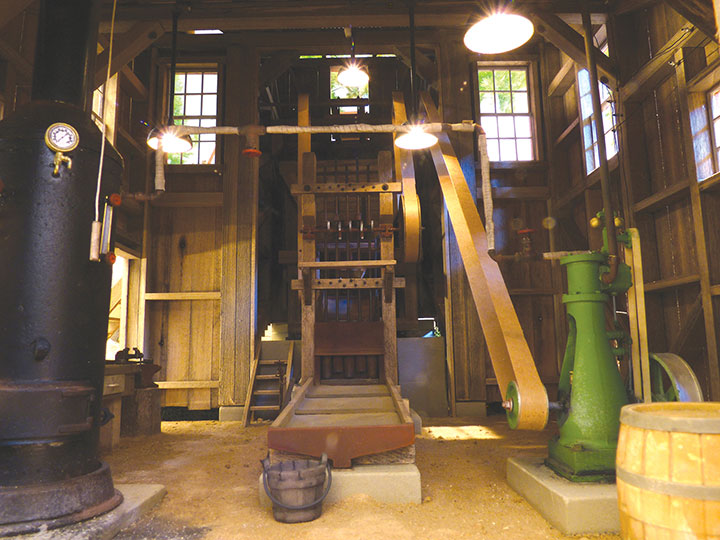
Looking through the front doors at the interior of the stamp mill ready for work.
Next I had to do some research on stamp mills. The internet has an abundance of information to get me going. I found plenty of good details for the stamp mill machinery, but nothing on a mill small enough for my restricted area. So I went to my Gazette DVD and did a search for stamp mills. Guess what? There were plenty of excellent articles, but only one was just right. In the January/February 1998 issue, there is an excellent article by Gene McKay titled “The Paymaster Mine Stamp Mill.” While the structure is small, it is still interesting, and the stamp was a very small two-hammer machine. Somehow, it was powered by a boiler and engine almost exactly the same size as my Western Scale Models kits. Gene had written a complete description of his HO mill and had a nice drawing of the timber framing and machinery. Gene also mentioned that the prototype was once located northeast of Lewiston, California. Presently there is a recreation of the mill, and a museum at Weaverville, California. I also found a drawing for a mine car in the March/April 2001 Gazette titled “Trent Engineering & Machinery Co. ‘A’ Class Car,” drawn by Tim Stolle in 1:20.3 scale.
The following photos and descriptions take you through the building and planting of the mill on my layout.
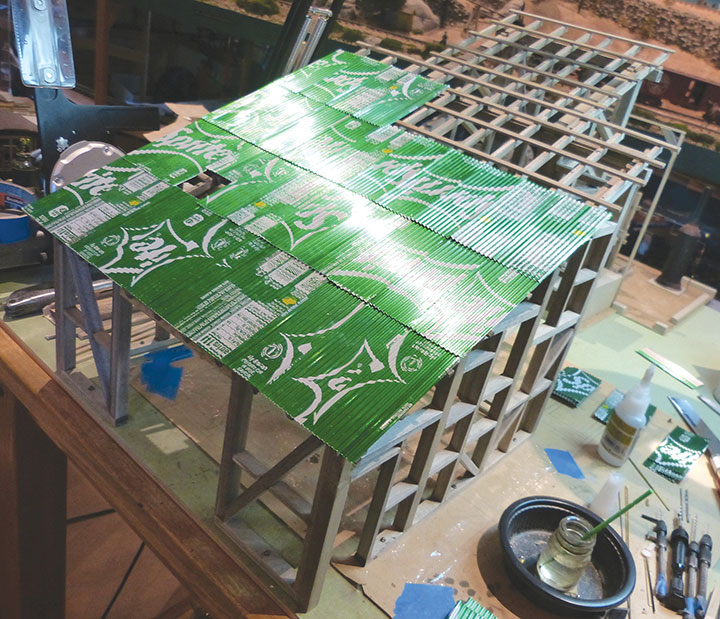
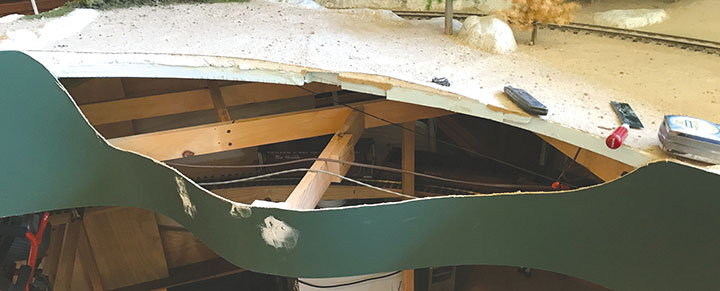
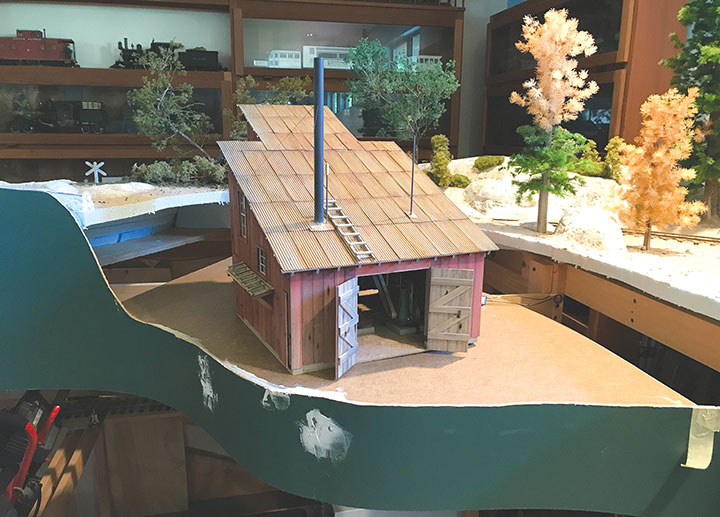
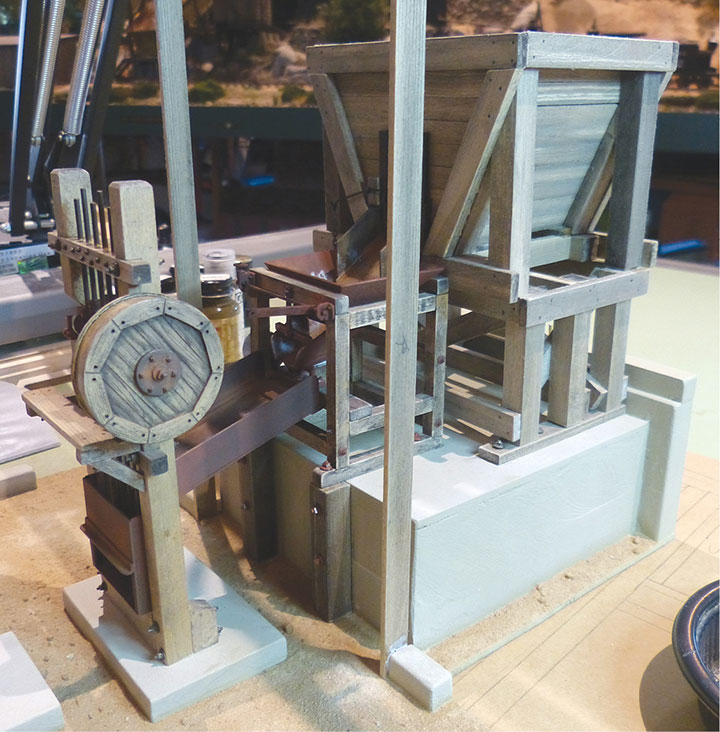
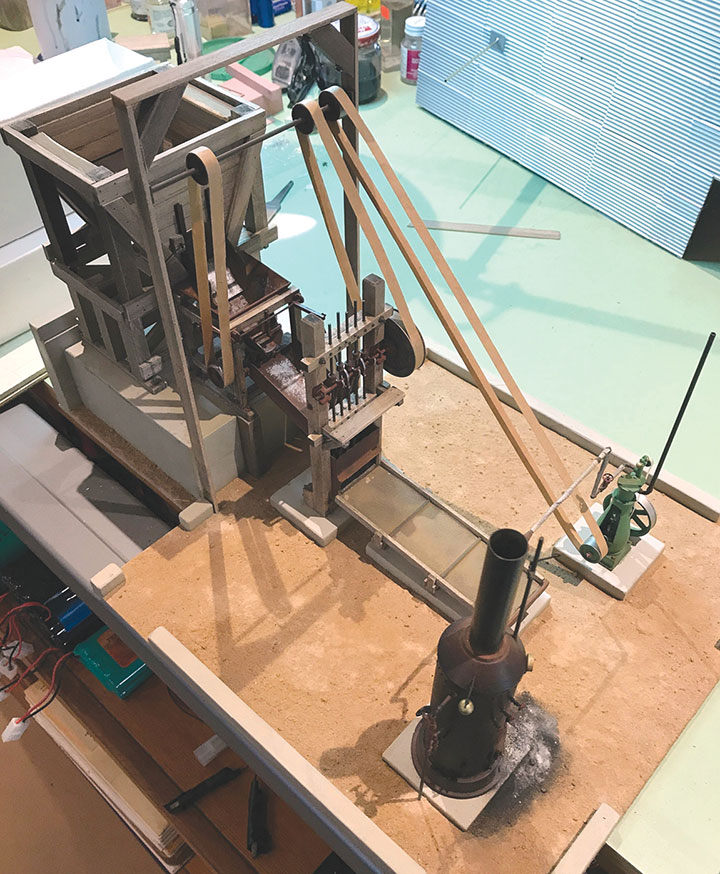
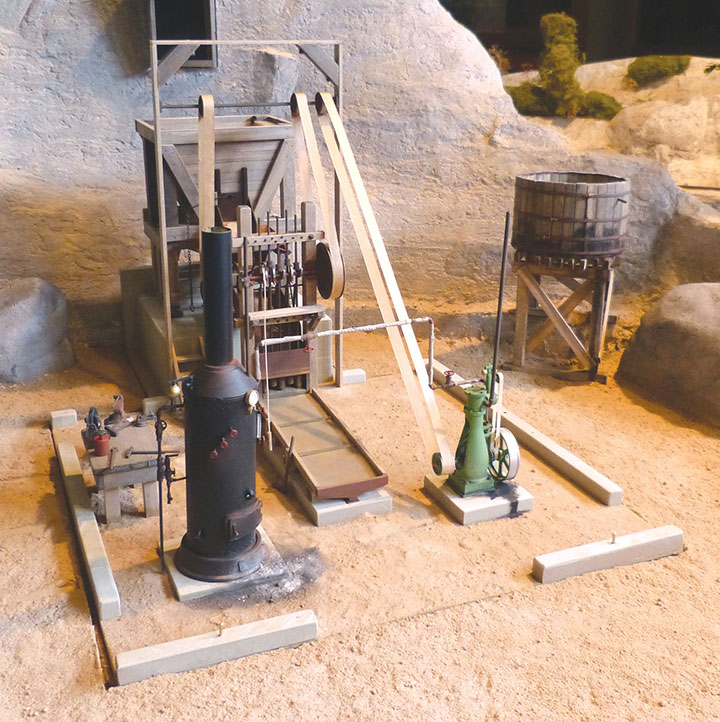
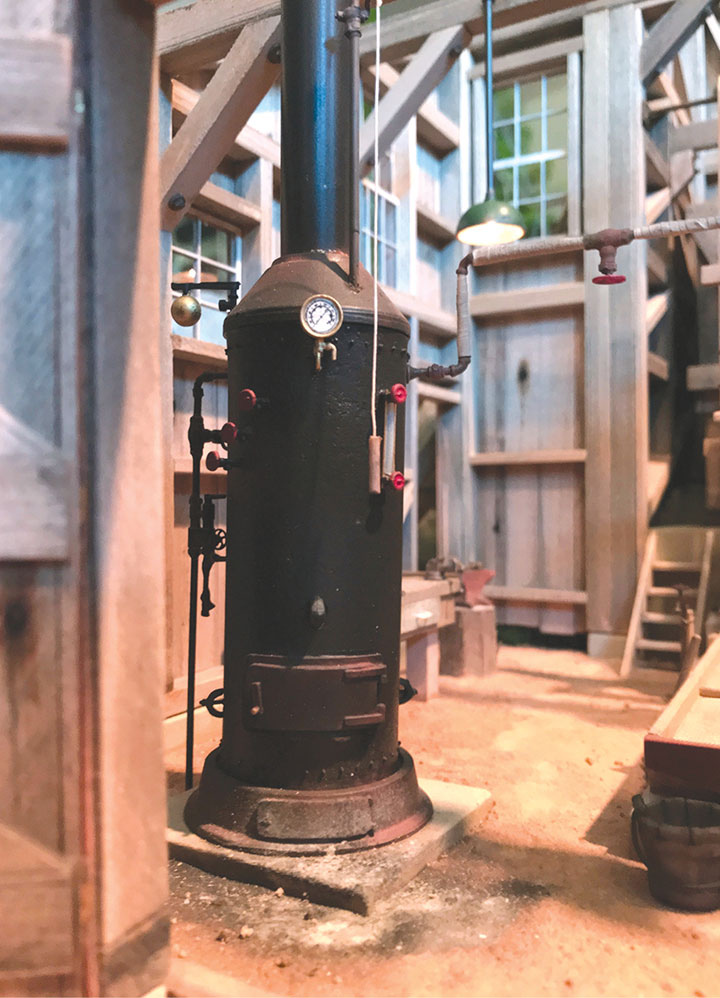
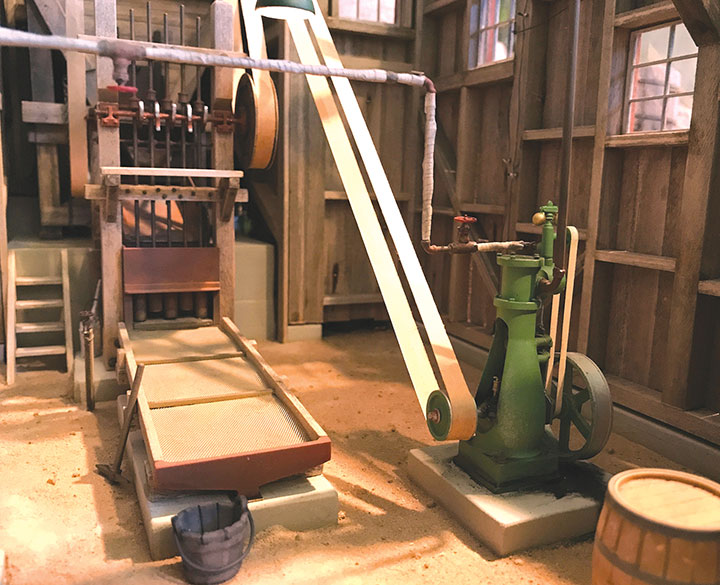
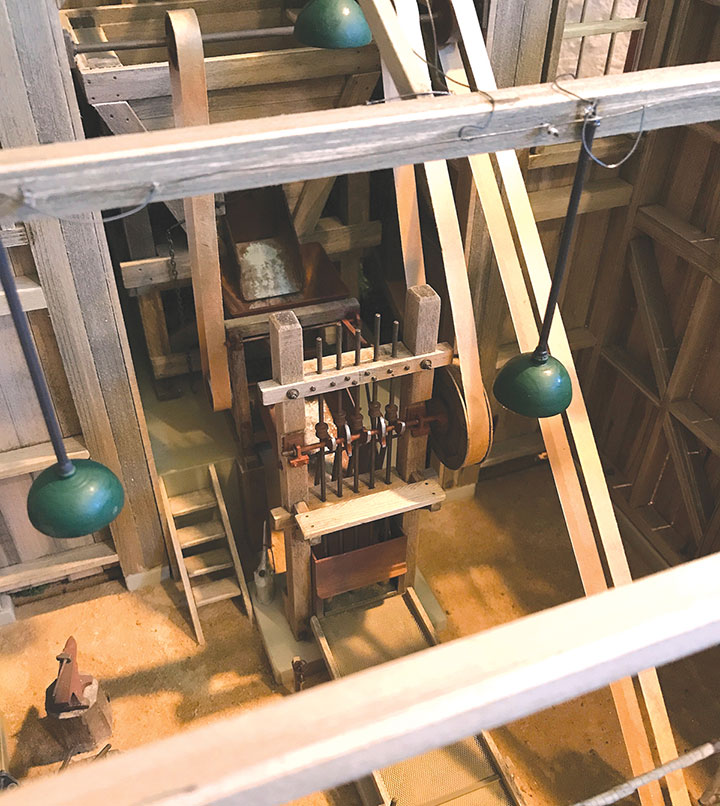
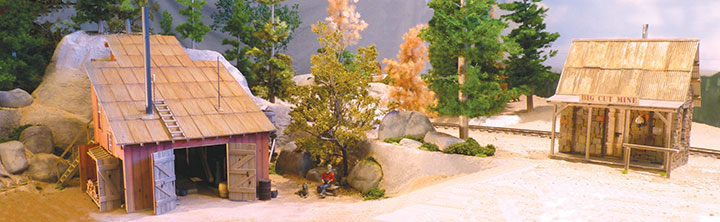
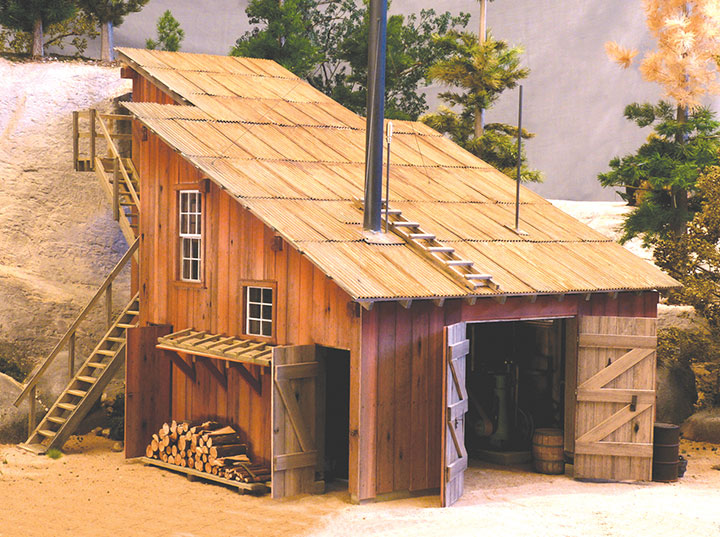
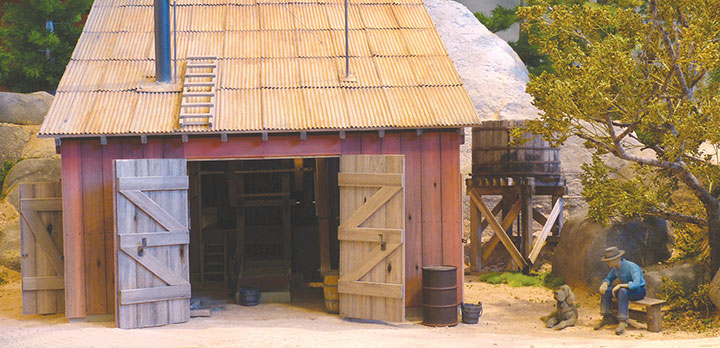
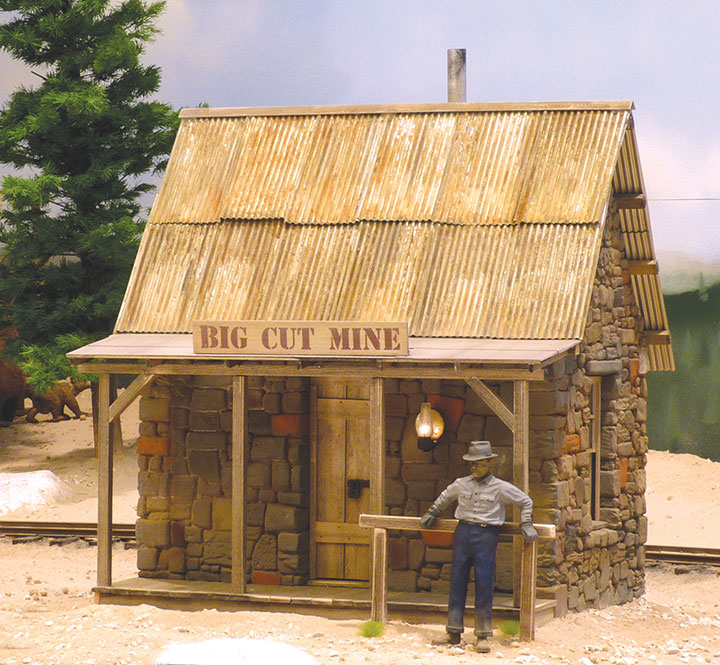
Notice the beautiful green art work that was carefully applied to the corrugated aluminum roofing panels. Actually, the panels are made from soda cans that were processed through a tool that is used in the craft hobby. The natural aluminum side is on the bottom. This side will be sprayed with silver paint. Then it will be “rusted” with Modern Masters Metal Effects Rust, a two-part process. First is a coat of actual metal-bearing paint. It contains a fine iron powder. The next application is an activator that actually causes the surface to rust. You can vary the amount of rusting by thinning the iron paint with water. The building timber framing was constructed from scale 8- x 8-inch posts and beams. The mill turned out larger than the space I had planned for it. This photo shows how I pulled the fascia out about a foot to give enough area for the structure. It didn’t even require modifying the fascia since it was concave in this corner area. I simply popped it out and added a bit of structural support to keep it there. The original curve of the fascia is visible. The area behind the curve was cut back to enlarge the space for the mill.Here is the mill at its final location. You can also see the rust effect on the roof.Here is the stamp mill, rock feeder and hopper. I didn’t have kits for these parts, so I had to build them. I chose to move up to a five stamp mill. I think it fits the model better, and I found plenty of five stampers to copy, but none with only two stamps. Also note the “concrete” foundations.This shows the completed mechanical system and power source. I chose to leave the floor dirt simulated with tile grout, which I use for dirt on my layout. The amalgamation table has been placed in front of the stamps. Also, the boiler, steam engine and belt drive have been added.This view shows the mill equipment being placed in its spot on the layout. Also visible is the small water tank used in the milling process. Since space was tight, I had to live with a very small mountain for the mine entrance. It was squeezed in between the mill and the railroad behind it. Here’s a close-up of the boiler from Western Scale Models. Wild West Scale Model Builders has acquired WSM and has released some of the mill equipment in 1:20.3 scale.This photo shows the amalgamation table and the steam engine. Here’s an overhead view. The light shades were turned from ABS plastic. Note the knob and tube exposed wiring on the cross beam. Lamps are 1.5-volt micro bulbs.This is where the ore is dumped into the hopper from the mine behind the mine car.This view shows the area the mill and office occupy. The mill is reached by a dirt road that runs in front of the office.The mill was painted with thinned out mineral red. The lumber was first stained with an alcohol/India ink mix. I then applied knots with straight black or brown ink, applied with the tip of a wire. Some knots are drilled out for missing knots. Nail heads are simulated by first dotting where nails are to go with a soft lead drafting pencil. Then they are burnished with the butt end of a small drill. That gives a shiny silver head. Subsequent paint and weathering tones that down. All doors have small operating hinges. The window mullions were laser cut to my drawings. The front view of the mill with its big doors lets you see the inside details. After a busy day, an old miner and his dog catch a break under the small oak tree.This little building was originally meant to be a small railroad station. I used the cast resin walls and built everything else to be the mill office. The lettering was done with a decal I made on my printer. The porch light was built up from scrap plastic.This view shows the rear with its interesting bump out that houses the hopper. One of the additions I made to the original plans was adding the stairs and landing. The little mine car was scratchbuilt from styrene with wheels turned from ABS.