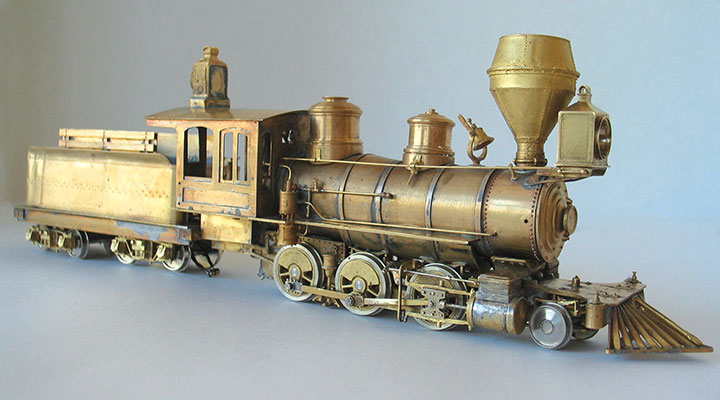
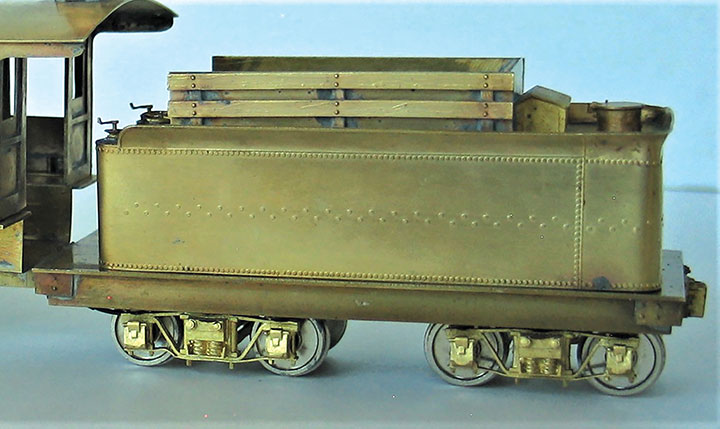
The last major step in building Colorado Central #10 is the tender. CC #10’s tender is quite short, which is typical of the era. This meant that a Kemtron tender would be much too long. Also, Kemtron tenders are scarce. They also have a wood floor and I prefer a brass underframe.
I initially planned to make my tender shell from sheet brass and punch in the rivets. However, I have a number of flat, etched wrappers I have accumulated over the years, and I found one with a rivet pattern similar to #10’s.
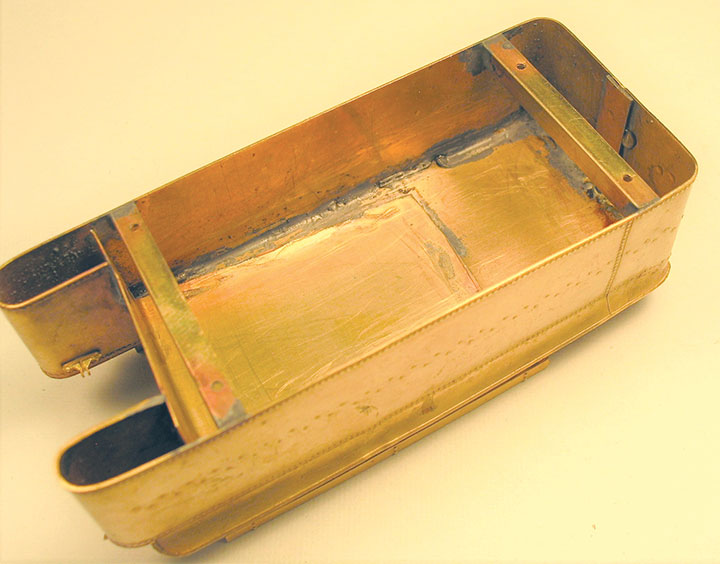
The wrapper is for a D&RGW C-21, which was too long and had to be shortened quite a bit. After careful measuring, I cut a large piece out of the center and then soldered the two shortened halves together. I also soldered a brass strip behind the joint for reinforcement because edge to edge butt joints between thin brass sheets are inherently weak.

I then bent my wrapper to the proper shape around a brass rod and fabricated the top from brass sheet. After the shell was complete, I soldered brass angles inside to act as combination braces and mounting strips. I drilled and tapped these strips for 0-80 screws to hold the shell to the frame. The floor is .032-inch- thick sheet brass, with brass bar stock and Kemtron end beam castings completing the frame.
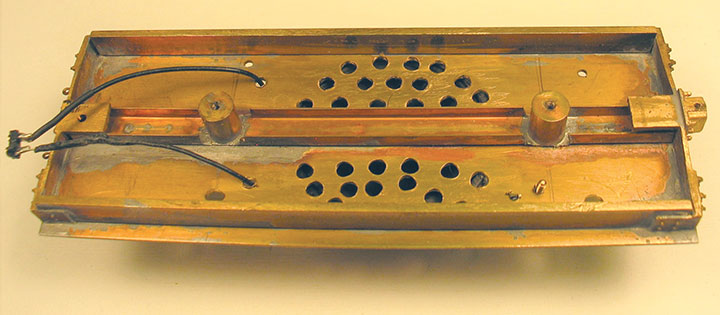
After the shell was complete, I fabricated brass sheet to cover the coal bunker area. This forms a box which encloses the speaker for better sound quality. This makes it difficult to add a coal load later, but the noticeable difference in sound quality is worth it.
I drilled holes in the floor for the speaker. I don’t put much underbody detail on tenders because I don’t want the trucks hitting anything and causing any mechanical or electrical problems.
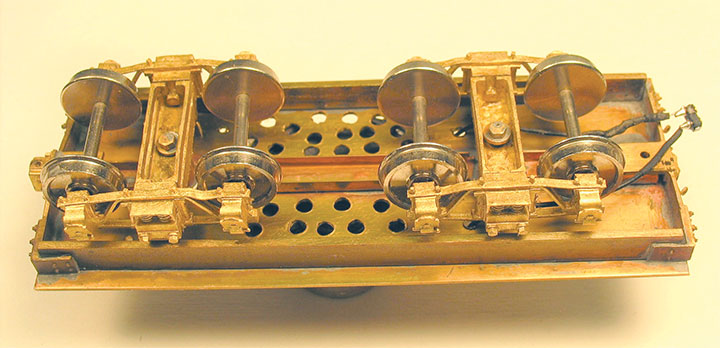
Still keeping things simple on the underframe, I turned short lengths of brass rod to act as bolsters. I drilled and tapped them for 1-72 screws, and then made my own shouldered screws to hold the trucks in place. This type of screw can be difficult to find, but making them is fairly simple, as shown in the photo. I’ve also used this method to make driver crankpin screws, which are also hard to find commercially. This is a perfect place to use solder paste.
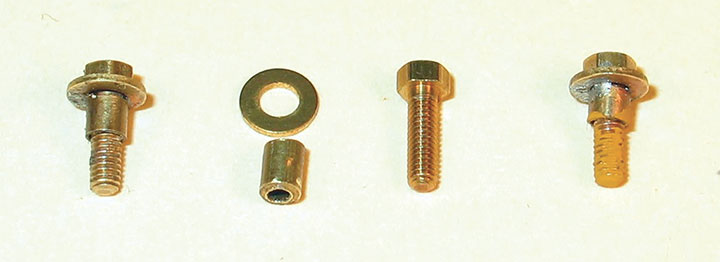
Note the use of Tix Anti-Flux, which is the orange color on the visible threads in the photo. It dries quickly and prevents the solder from flowing into the exposed threads. It’s useful for keeping solder out of unwanted places. This is especially helpful when soldering next to a working part, like a hinge.
The coal fences on the tender are Precision Scale castings backed with brass sheet, and the other details are from the Backshop and Kemtron.
This completes the construction of the major components of CC #10, although some small details will still be added. I’ll discuss these and other thoughts and ideas next time, along with photos of the completed locomotive.