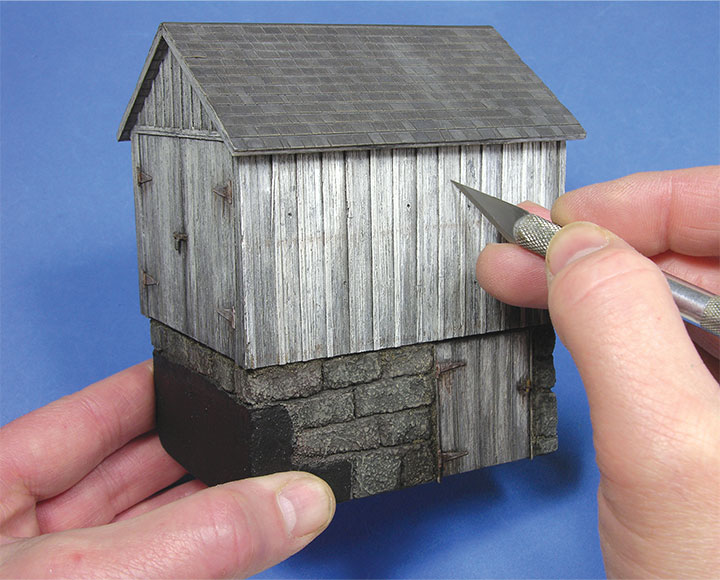
An appealing aspect of O scale buildings, even true for the relatively small shed example of this article, is the ample surface area to add a variety of weathering detail and texture. This article illustrates using several #2 paint brushes, a #11 hobby knife blade, needle, and 220 grit sandpaper to finish and weather board-and-batten wood siding and a slate roof.
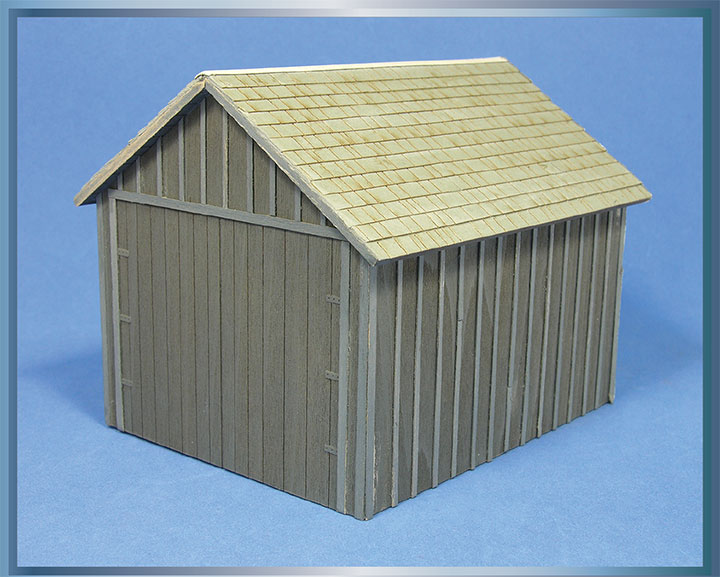
The structure is an Ohio River & Western tool house and handcar shed laser-cut kit produced by Matt Woods of Iron and Timber Model Works. I supplemented the walls with scale 1-inch-thick basswood battens (which provided a bit more relief than the laser-cut ones) and left off the front deck and rails (making it more of a storage shed than one directly related to a railroad).
Specific steps in finishing the wood sides and slate roof are illustrated step-by-step in the following photos and captions.
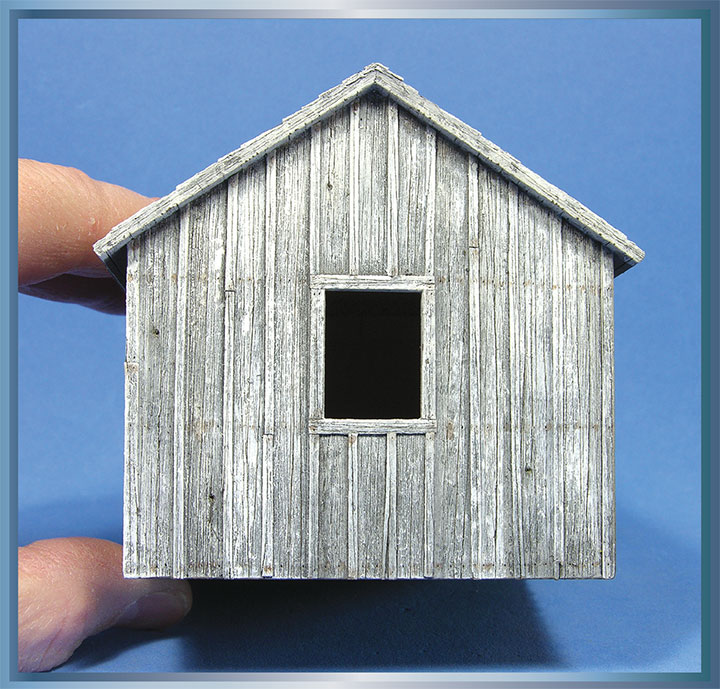
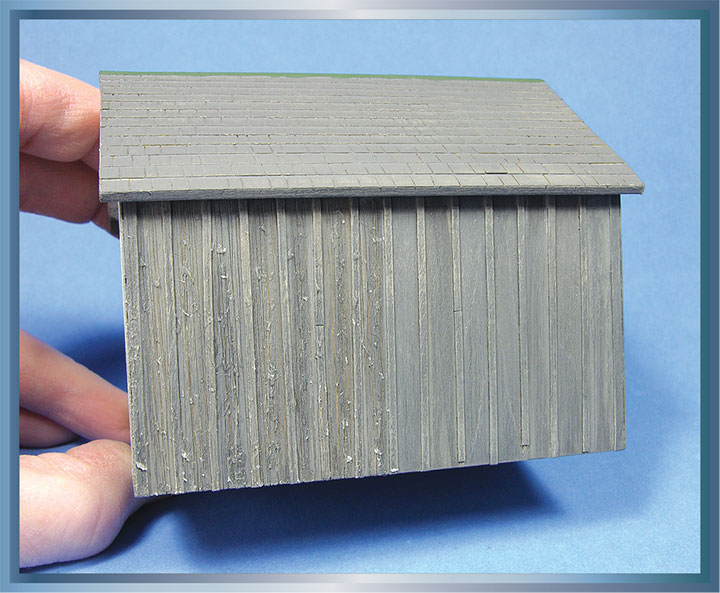
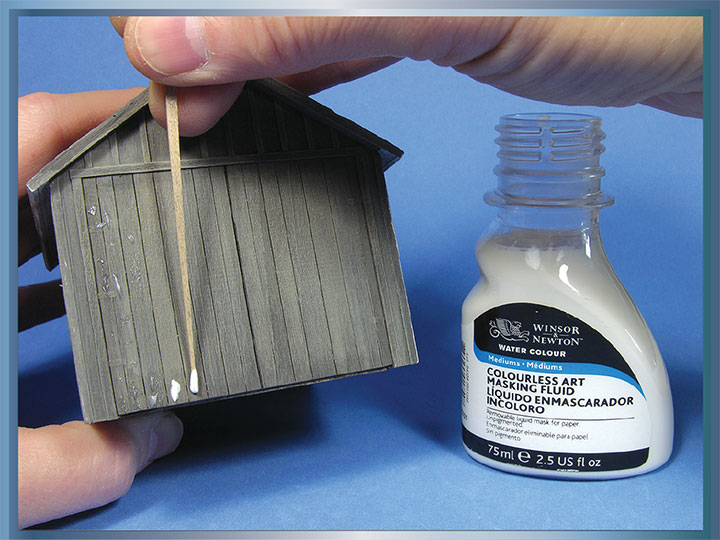
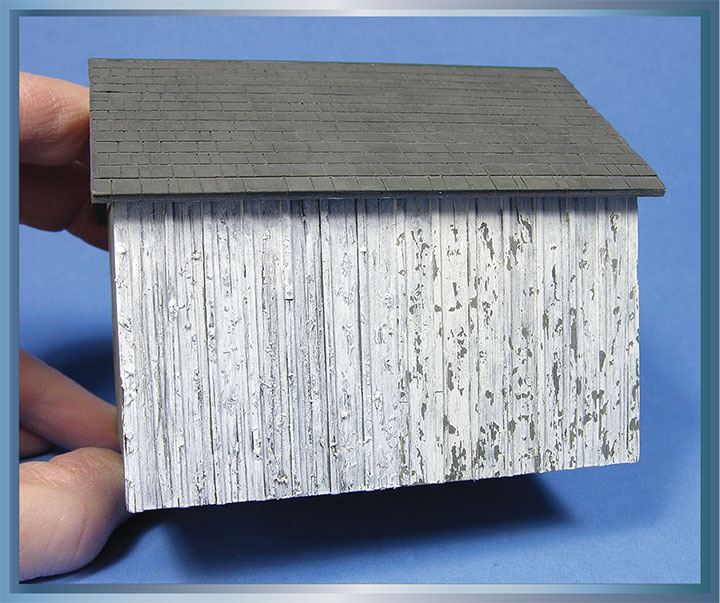
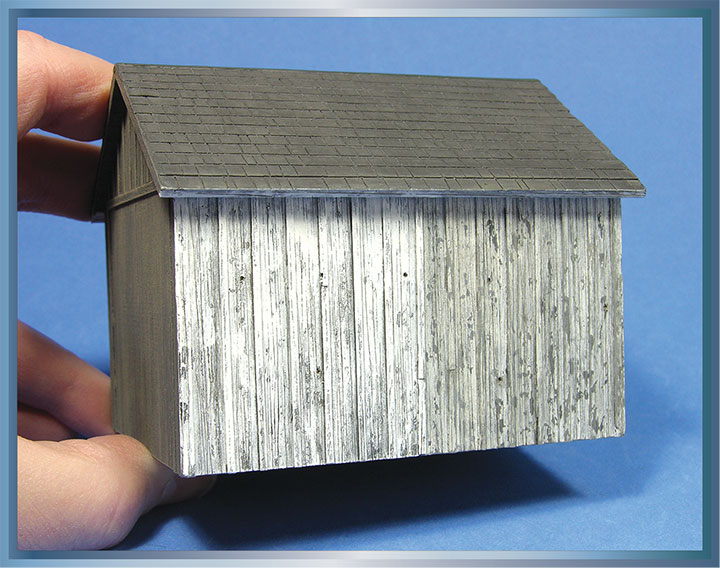
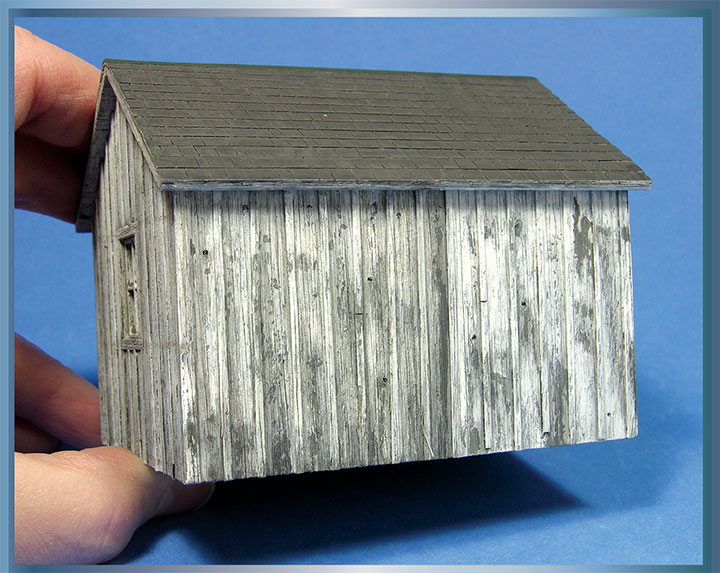
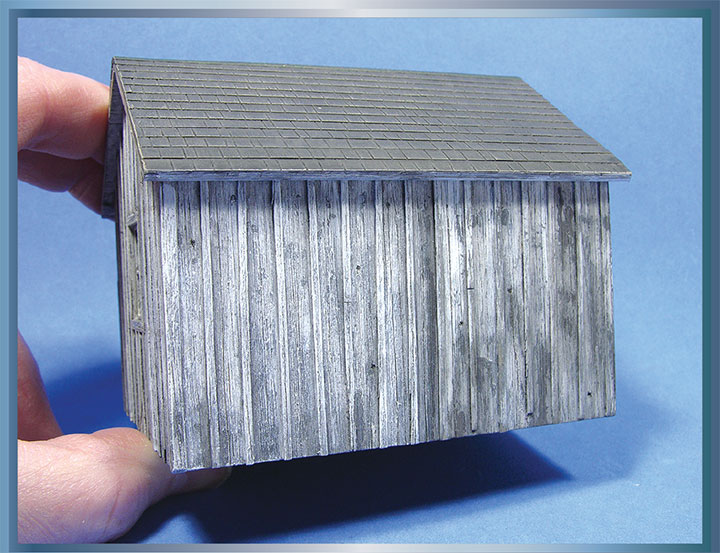
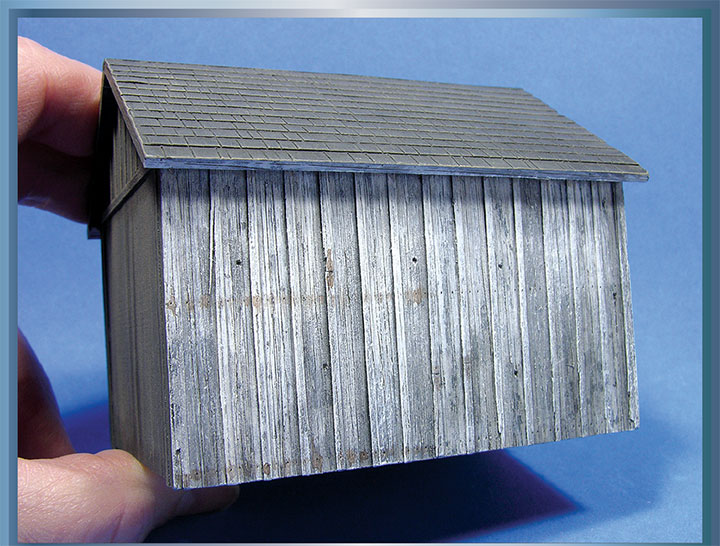
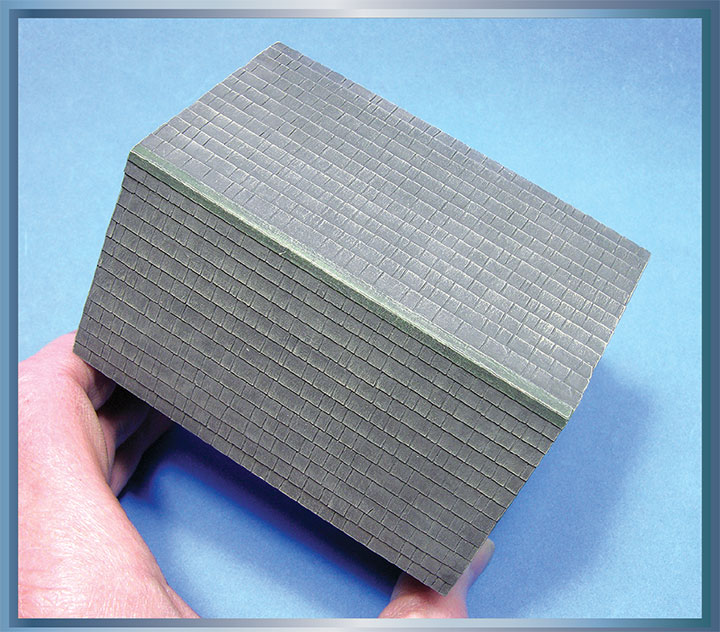
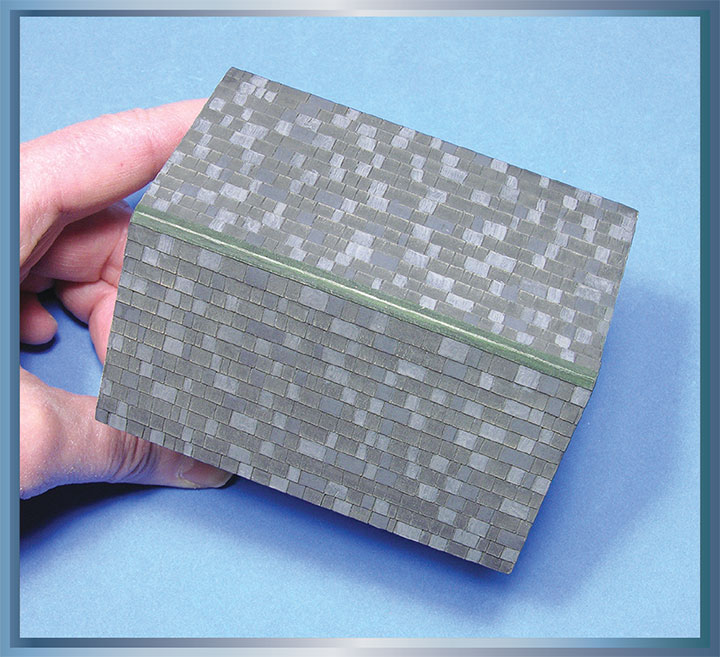
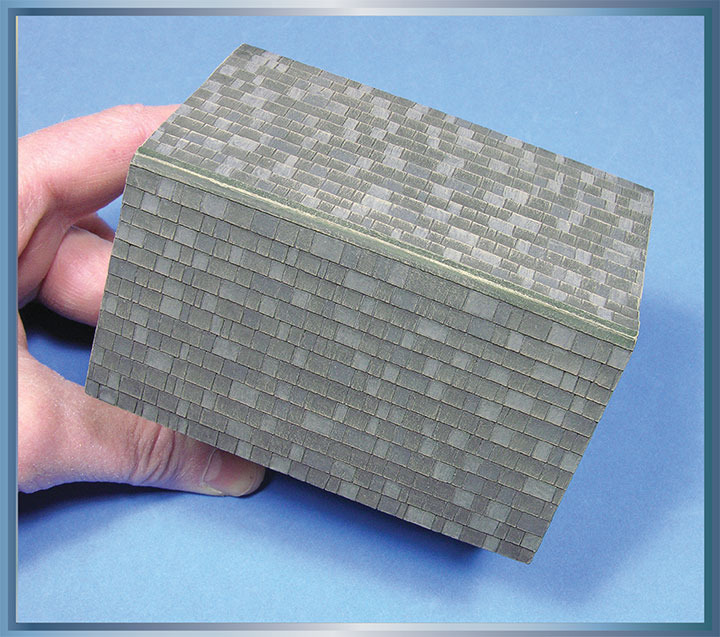
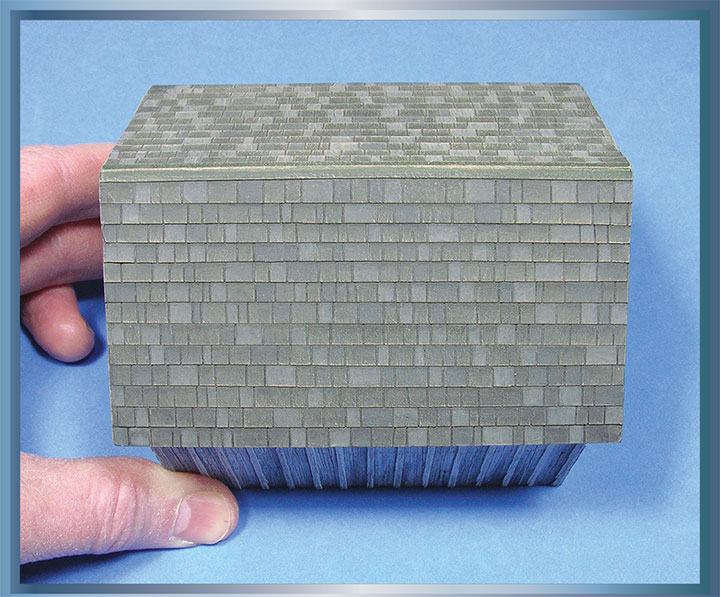
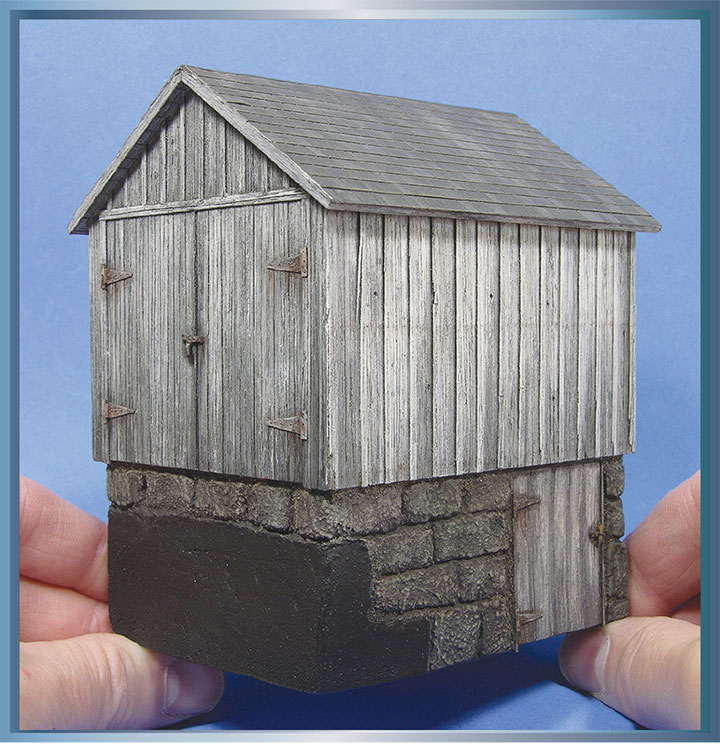
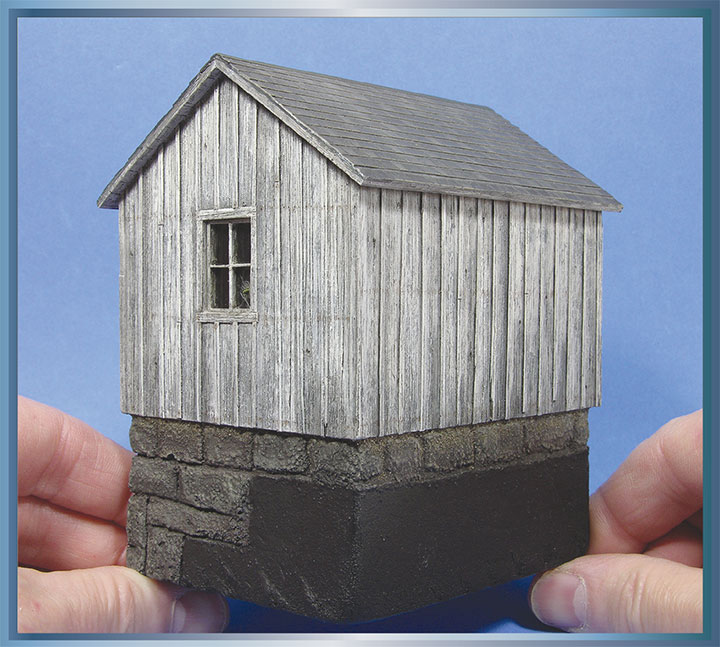
Defining some of the board-and-batten siding’s woodgrain and lengthwise splits is the last step in finishing the exterior of the shed.The laser-cut shed’s wooden walls were supplemented with scale 1-inch-thick battens left over from another project. Both the walls and battens were primed with grey acrylics. The slate roof is laser cut from a cardstock product, and yet to be sealed with a coat of dark grey acrylic paint.Before starting my model, I practiced the finishing steps on a mockup of the sides. An alternative would be to work on the backside of your building (defined as the portion of building least likely to be seen). I practiced the seven finishing steps on the shed’s backside (save for adding the window), before moving onto the three other sides.I coated the walls and roof with dark grey acrylic that’s streaked along the boards and battens, and down the slate shingles, from the peak to lower edge. Then I used thin paint to create this streaking effect. After the paint dried, I used a #11 hobby knife blade to add woodgrain to the boards and battens (as shown on the left side of the shed). I applied selective wood-graining using a sharp hobby knife, by lightly scoring the surface of random boards with two or three lines along its entire length. Then I applied a masking agent to simulate peeling paint (also shown dry over the distressed portion of the wood).I used a toothpick to apply dots, blobs, and dashes along the length of each board and batten. My preference is the latex-type art masking fluid, which starts white and dries clear. It’s water soluble, and doesn’t string like rubber cement, but is a bit more expensive.Following application of the masking, I applied a thick coat of white acrylic. I used a wide square brush, covering several boards with one downward stroke. After a couple of hours, the paint should be dry enough to remove the masking material (right side of wall). The masking blobs can be rubbed off or pulled off with pieces of masking tape.Next, I added additional woodgrain with a hobby knife blade to further roughen the sides along with knotholes, which can be simulated with various sized drill bits. The blade can also be used to scrape some of the painted surfaces to interconnect the peeling areas (or alter their shape). Following this texturing, a thin acrylic black wash is applied (right side of photo).To produce heavily weathered boards (particularly along the bottom of each side), I applied stain selectively along with additional distressing and sanding to further erode and discolor the white paint.With all the weathering completed (unless you overdo the dry brushing in this step), the final step is to accent woodgrain texture, edges of battens, and the upper board areas protected by the roof’s overhang. I apply the same white used for the initial base coat, but so sparingly that it will take two or three dry brushing applications to complete the highlighting.Nail heads can be indicated with a needle in a pin vise and punched along a straightedge or piece of masking tape. To indicate rust staining around the nail head, a thin wash of burnt umber acrylic is applied in dabs and streaks along the nail line (left side of wall). Should the pattern be too bold or uniform, it can be removed with a swipe of a small brush dampened with rubbing alcohol, or over-brushed with a bit of the same white acrylic used for dry brushing highlights.Following the application of black acrylic for the slate shingles and green for the copper ridge cap, a medium tan acrylic was dry brushed over the entire surface of the roof to accent edges of individual slates, along with roof edges (including the peak). Dry brushing was also added along the roof’s diagonals, in a repetitive X-pattern. The highlights shown were developed in two to three dry brushing applications (meaning build up the highlights rather than trying to apply them in just one sitting).Lightening and darkening the base black color and brushing several grey combinations on individual slates results in this type of checkerboard pattern. And even though this pattern doesn’t look that realistic, there are a number of old houses that feature this stark contrast. Some slate colors tend towards a purple-lavender grey hue, so I was sure to have a reference photo or two available before undertaking this step.With just one wash of very diluted black acrylic (as shown on the foreground side of the roof), the checkerboard pattern is muted and laser-cut lines between the cardstock shingle strips darkened. A wide brush is used to apply the wash swiftly over the roof surface (along its length). Then I let it dry for several hours. If the wash was too weak for the dampening effect, apply another wash. The brush I used was wide enough to cover the entire roof in two horizontal strokes. Avoid the temptation to work the wash with the brush, as that can be done in the next step.Using the same diluted black acrylic and a pointed brush, I selectively apply stain to darken light slates and accent the slots between them (both laterally and along the lower edge of each row). At this point, I may also lightly dry brush the tan again to accent selective areas of the roof.Following mounting on a carved pink insulation foam base with embankment stonework and lower door, the shed was ready for final details. The hinges and door latch were made from cardstock and wire, and the roof was rain-streaked with some light grey chalk (brushed down irregularly from the ridge cap).The kit’s laser-cut window was finished in the same fashion as the walls, and following glazing with 0.015-inch clear styrene, was yellow-glued into place. My shed is now ready for installation in a model hillside.