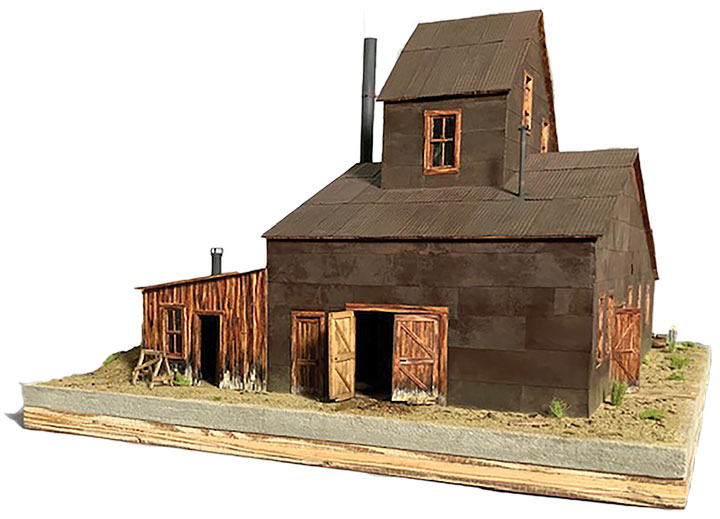
After reading Keith Pashina’s Quartz Hill Mining Company article in the March/April 2007 GAZETTE, I asked Keith and Joe Crea if they had taken measurements of the mine, prior to its collapse. Fortunately, Joe had the detailed information that allowed me to build my O scale model of the Quartz Hill Mine that I call the Crea Mine.
I began by making a building shell from aircraft plywood stained dark brown to darken the interior when viewed through the windows and doors. Before installing the roof, the flooring was modeled where it was going to be visible through the open doors. The floor is board-by-board scale lumber that was distressed by drawing a fine-tooth razor saw at an angle across the boards, and by notching the edges of random boards to show additional wear. I then brushed on Raw Umber acrylic paint, and wiped it prior to drying. Then I followed up with a light coat of Grey acrylic that was also wiped prior to drying. After the floor distressing and painting were completed, the boards were installed using random board lengths.
Before installing the building’s metal cladding, the window and door materials were cut and framed using sanded scale lumber, colored prior to assembly and placement on the model. All the windows and doors are made of individual boards, and the doors have doorknobs, face plates, or hand holes for opening the door. Some of the windows were modeled as partially open, and a couple of windowpanes are broken and covered over. The weathered wood is an acrylic six-color process, with each color allowed to dry overnight, prior to applying the next color. The only exception was the final color. Each color was thinly brushed on using quite a bit of water. I started with Titanium White, so the wood didn’t show through. The second color was transparent Raw Sienna applied to not completely obscure the white. The third color, Neutral 5, was applied even lighter, allowing much of the transparent Raw Sienna to show through. Burnt Sienna was the fourth color applied, still allowing areas to remain where the previous colors could be seen. The first four colors were applied using a sable #1 brush. The final two colors were applied with very little water, using a Shaper #1/0 brush to cut in sharp edges between the existing colors. The fifth color applied, was Burnt Umber. The final color was Ivory Black and was applied very sparingly.
Kodak Kodalith Ortho 4x5 sheet film was used for window glazing, but unfortunately, the film is no longer available, but an Ortho Litho sheet film manufactured by Vesta is available as a substitute. The boiler and stove stacks were made from Evergreen Styrene tube, with pipe joints scored into the stacks with a fine-toothed razor saw.
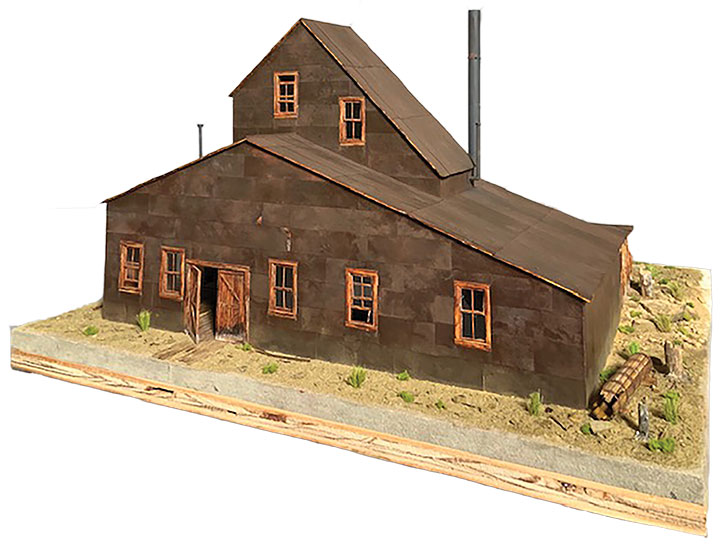
Builders in Scale plain foil was cut into scale 30-inch-wide x 72-inch-long strips for the metal wall cladding, and 30-inch-wide x 96-inch-long corrugated strips for the roof. I first used full strength PC board etchant to remove the sheen from the foil and to provide tooth for the paint. As soon as the metal started to foam in the etchant, it was removed with tweezers and placed in water to stop the etching. After etching, the foil pieces were rinsed in water for 30 minutes. The sheathing was allowed to completely air dry on paper towels, and then wiped on both sides to remove the film left from the etching. Next, I lightly sprayed Rust-Oleum Espresso to one side of the sheathing and allowed it to thoroughly dry. At this point, the sheathing had a slight greyish tint showing through in areas, with the Espresso color providing the majority of the color.
Walthers Goo was used to attach the individual wall sheathing, starting at the lowest part of the wall, and working up to the roofline. The corrugated roof foil was attached in the same manner. I carefully staggered and overlapped the wall panels, and overlapped the roof panels, as in the prototype.
Bragdon Enterprises Dark Rust, Soot and Ash powders were used to complete the iron oxide purple color often seen in Colorado. I didn’t apply a fixative or dull coat finish to my model, as it visually erases the subtle chalk coloring. The lower wall sheathing was chalked with a shade matching the ground color, being careful to apply the heavier weathering near the ground level.
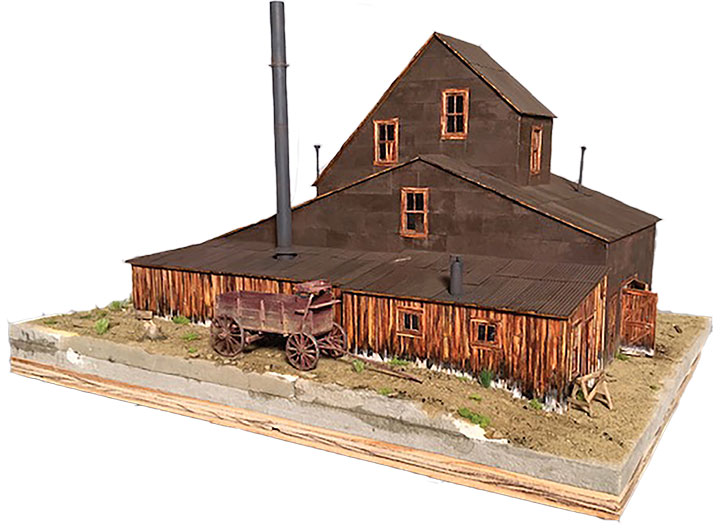
First, I try and arrange scenery and ground cover by studying what actually occurs in nature. My second ground cover rule is to apply less, and let the viewer’s mind fill in the rest. The ground cover began with a few large pieces of sandstone that were cut into the Homosote base, making them appear to be embedded in the earth. Next, a base cover of finely crushed (powdered) sandstone was put down, followed with a sparse sprinkle of small sandstone pebbles (more around the large rocks), and finished up with a few randomly placed small pieces of sandstone. All of the ground cover was attached using a mixture of white glue, dishwasher detergent and water, applied with an eye dropper. The taller weeds are made from jute twine, colored with brushed-on acrylic paint. I use sagebrush for tree stumps, with tree roots made from sheetrock putty that is shaped with dental tools. Woodland Scenics ground foam was used for the foliage that grows close to the ground. Actual coal was used at the boiler fuel feed door. I made a sawhorse, discarded crate and a damaged round wooden section of flue, to give the feeling of an active mine.