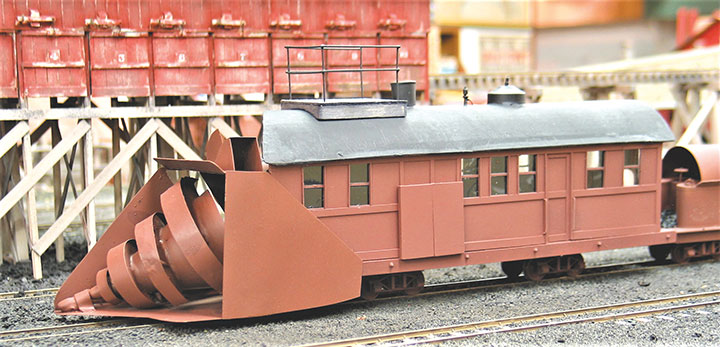
I like modeling maintenance of way equipment because it’s an interesting change of pace from building the usual boxcar or gondola. One of the most unusual pieces of maintenance of way equipment on the Colorado narrow gauge railroads was the Jull Centrifugal Snow Excavator, more commonly known as “The Jull.”
This strange machine was invented by a man named Orange Jull, who patented it in 1888. He was originally in business with the Leslie Brothers, of rotary snowplow fame, but broke away from them because of patent disputes.
I first learned of the Jull while reading about the snowplow trials at Hancock, Colorado, on the Denver, Leadville & Gunnison, successor to the famed Denver, South Park & Pacific. The trials took place in April 1890 and were a contest between the new Jull machine and a Leslie rotary snowplow to determine which would be the most effective at clearing snow from this high mountain railroad.
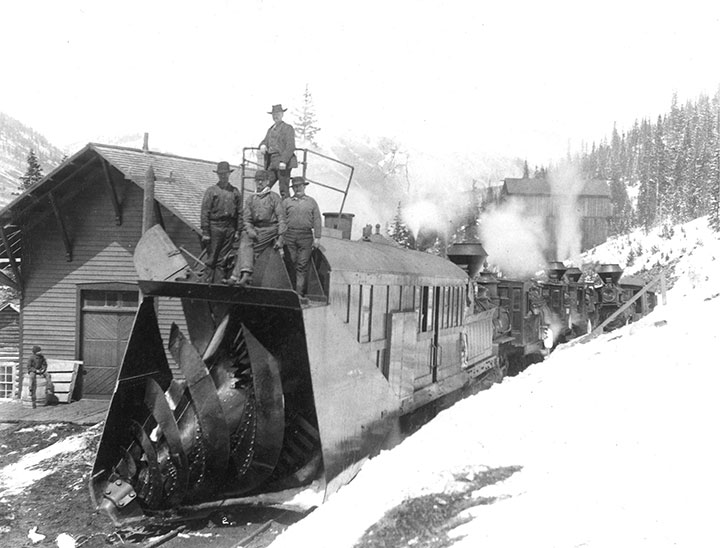
-Photo courtesy of the Denver, South Park & Pacific Historical Society.
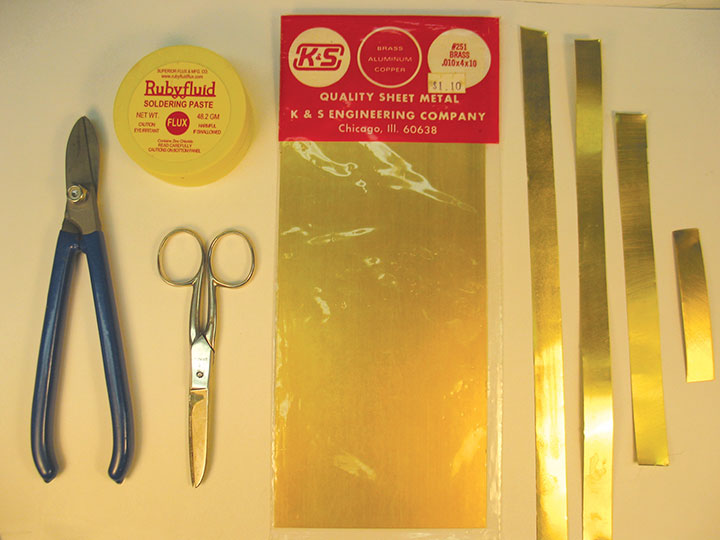
I wanted to model the Hancock Jull but couldn’t find enough information on its construction details. Some books had photos and partial drawings, but not quite what I needed. Noted photographer William H. Jackson was hired by the railroad to photograph the trials, but most of the photos are action shots with lots of snow being thrown, but very few showing the actual auger mechanism. The few photos showing the auger were tantalizing, but still not enough to start building. I recently obtained copies of the original November 1888 patent drawings of the mechanism, which provided the information I needed to start building the model. I wanted to make the auger and housing from brass, but because this was going to be a trial and error process, I made paper and cardboard patterns that I later transferred to brass sheet. I generally use .016-inch thick brass sheet in my models, but used .010-inch in my Jull because I knew there would be a lot of cutting and bending involved. I was able to cut the slightly thinner brass sheet easily, using a small shear for straight cuts and scissors for curves.
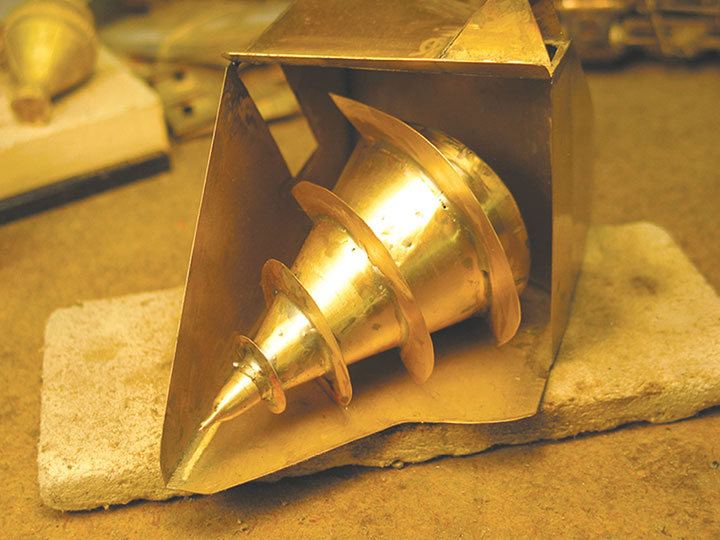
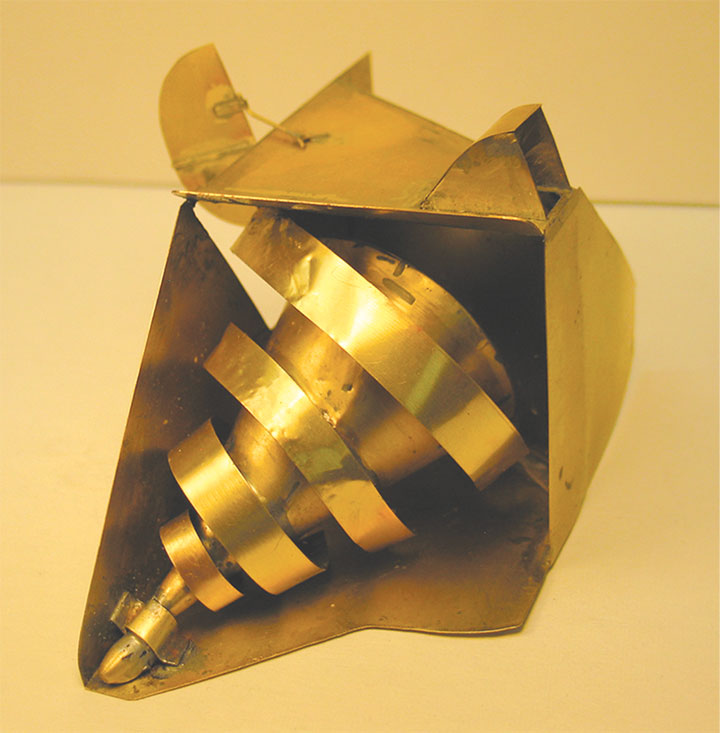
I started with the basic cone shape of the auger and quickly learned the cone shape presented a unique set of problems that didn’t get any easier as I went on. After I rolled the brass sheet into a cone shape and soldered it together, I soldered another sheet on the base, which gave the cone rigidity. I then turned a nose piece from brass rod to act as a bearing in the housing.
I cut the curved blades following the patent drawings and found that it was almost impossible to hold them in position to solder onto the cone. Standard clamps just slide down the cone, so I wound up holding the blades in position with my fingers. This worked okay because I use a resistance soldering machine which localizes the heat, but I still wound up with sore fingers. This wasn’t serious, but it did nothing to change my negative feelings about working on a cone.

Unfortunately, shortly after I finished the auger, I had the dreaded “uh-oh” moment. After all my planning and construction effort, I realized that although the auger and blades looked like the patent drawings, they didn’t look like the Hancock version. I had become so focused on the patent drawings I neglected to pay enough attention to the Hancock photos. Jull evidently modified his blade design from his patent drawings before the Hancock contest.
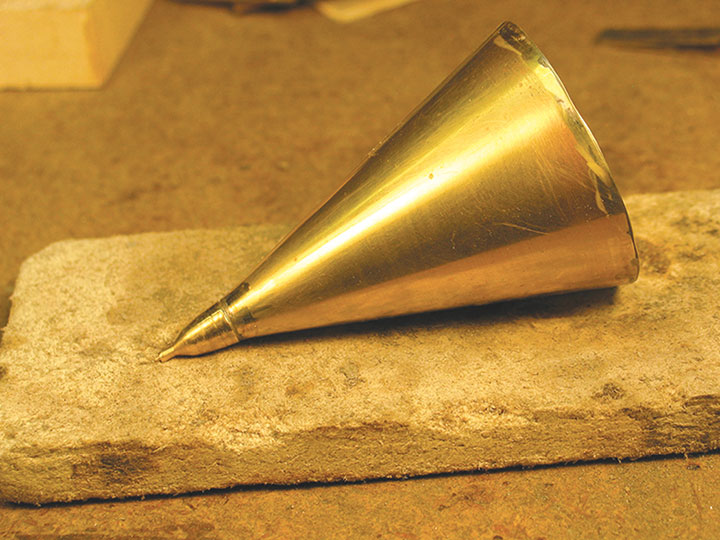
I tried many different ways to modify my blades to resemble the photos, but nothing worked. I reluctantly realized I would have to completely change the blades, so I unsoldered them and started over, keeping the original cone. I realized I would have to duplicate the look of the Hancock auger cosmetically, rather than correctly follow the patent drawings. I decided the best approach was to make the blades in two pieces rather than the compound curve of the single blades in the drawings. I made a series of rings that I slit to allow them to form a spiral on the cone. After soldering them in place, I soldered .006-inch shim brass strips on top of the rings to complete the blades.
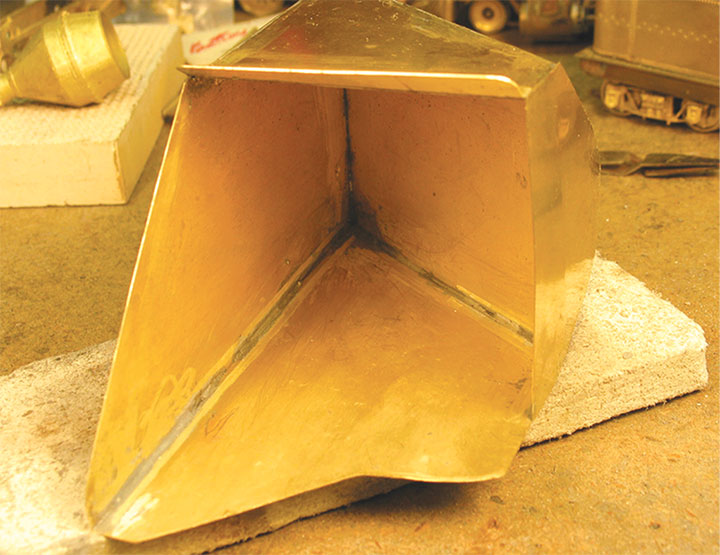
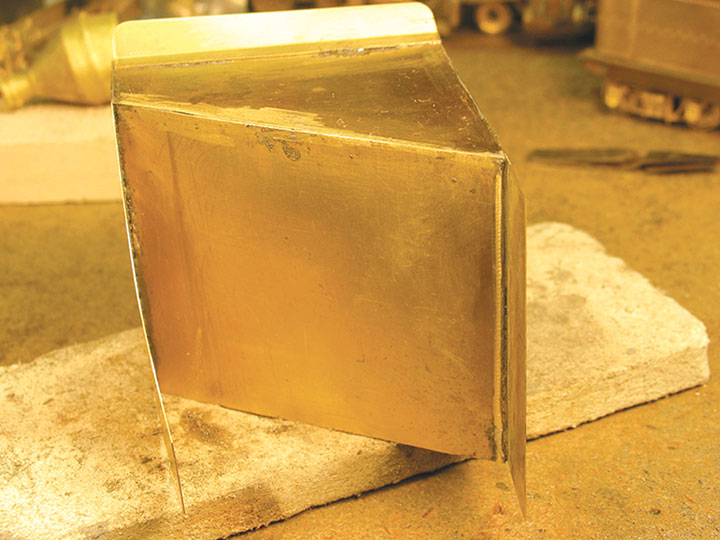
Now that the auger had the look I wanted, I started the housing and, compared to the auger, this was a straightforward process. The only difficulty was figuring the angle where the housing fits against the body. Because the auger is positioned off-center, the auger housing and the body meet at an angle, rather than straight across as on a rotary. Because I don’t do well figuring out angles, I was pleased when the housing fit the body perfectly when they were fitted together.
With the auger assembly now finished, I was ready to build the Jull body.