In the July/August 2014 Gazette, I described kit-bashing my HOn3 Rio Grande Southern caboose numbers 0400, 0401, 0402 and 0403. The prototype RGS had two other cabooses in its fleet (0404 and 0409), and I have always intended on adding them to my roster. With a change in the operating plans for my RGS model railroad, I found that I was short on cabooses. So, it was time to expand my caboose roster. Here I will describe how I added 0409 to my fleet. In the next issue I will show how I built a model of 0404.
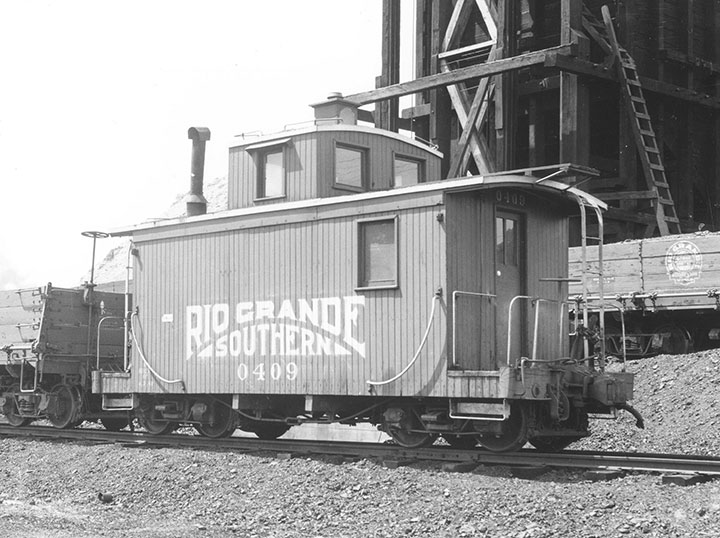
Photo courtesy Friends of the Cumbres & Toltec Scenic Railroad, Richard L. Dorman Collection.
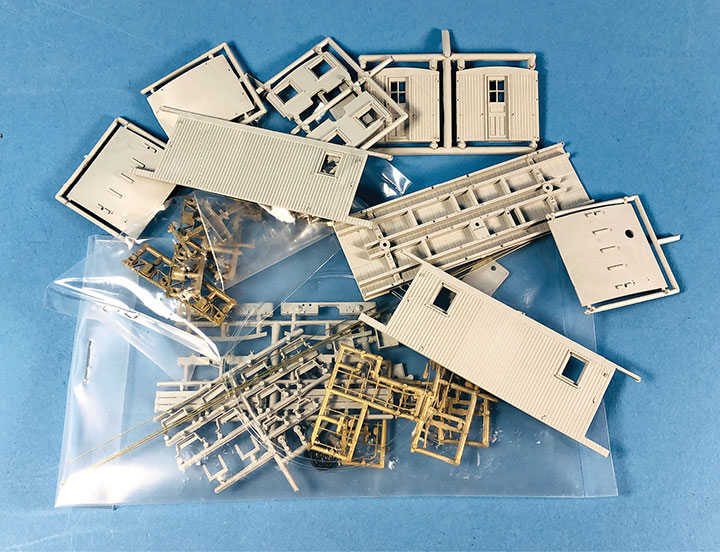
RGS caboose 0409 was a one-of-a-kind caboose. It was built in the RGS shops and loosely followed the D&RGW short caboose plans. What differentiated it from the other short cabooses was that it was about 1 foot shorter. In HOn3, there is no kit for this unique model, but the Precision Scale Company (PSC) D&RGW Short Caboose Kit #10674-1 can be used as a starting point for this kit-bash. Luckily, many years ago I had purchased one of these kits with the intention of turning it into 0409. Unfortunately, this kit is no longer available, so you will have to find one on the used market.
As with all my prototype projects, I started this one by conducting some research on the prototype. I found that caboose 0409 was modified slightly over the years it was in service. I wanted my model to appear like 0409 did in Fall of 1941, so I was particularly interested in photos from that timeframe. The following are the key spotting features that I found for my era:
I always knew that 0409 was about a foot shorter than the rest of the short cabooses, but wasn’t sure in what way. I was hoping to find a plan for 0409, but all that I could find was that the caboose had been dramatically rebuilt and modified shortly after the RGS was abandoned. I gave up on finding plans and went back to studying the available photos. Comparing the queen post locations against the width of the cupola of the various short cabooses showed that 0409 was about a foot shorter in the middle of the car. This missing foot explains why the cupola is smaller than the other short cabooses and has only a single window. The locations of windows and other spotting features were nearly identical between cabooses. Some back-and-forth email and phone calls with my friend and noted RGS modeler, John Bauer, helped confirm the hypothesis.
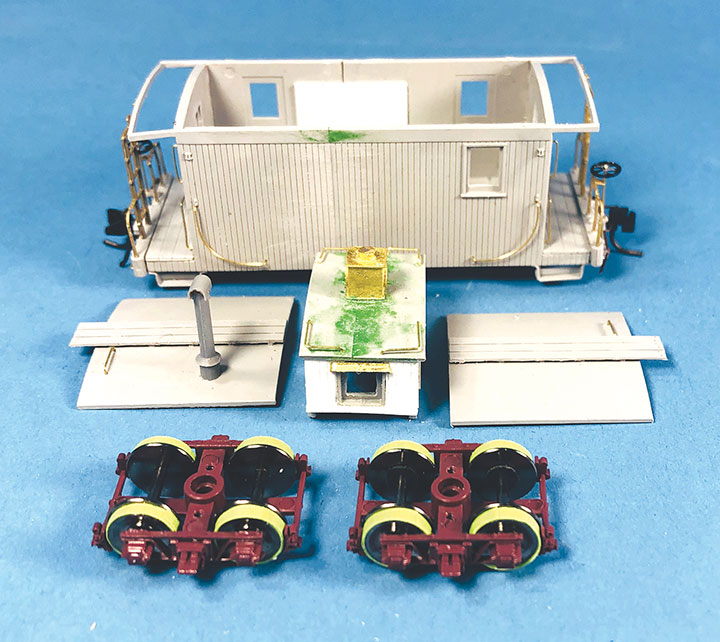
I needed to shorten the PSC kit by a foot in three places. (1) To keep the brake assembly, steps, and couplers in the correct locations, I had to take six inches out of the frame between the bolster and queen post on both ends. (2) The stock cupola would need new sides, and the cupola roof would need a foot removed from it. (3) The big question was what to do about removing a foot from the center of each side. My past projects have shown that I’m not very good at cutting a section out of a casting and reassembling it in a way that the cut cannot be seen.
I started shortening the kit with the hardest part first — the sides. Before using my miter box and razor saw to cut into the kit’s castings, I decided to practice sectioning and reconnecting scribed styrene until I felt my skills were good enough. Then with a deep breath, I cut a foot out of the kit’s sides. I chose to offset the cuts so that they weren’t exactly in the middle of the car. I did this because I thought the seam would be too obvious in the middle if I wasn’t able to hide the cut very well. After reassembling, with some putty and sanding, I managed to shorten both sides and was fairly successful in hiding the cuts.
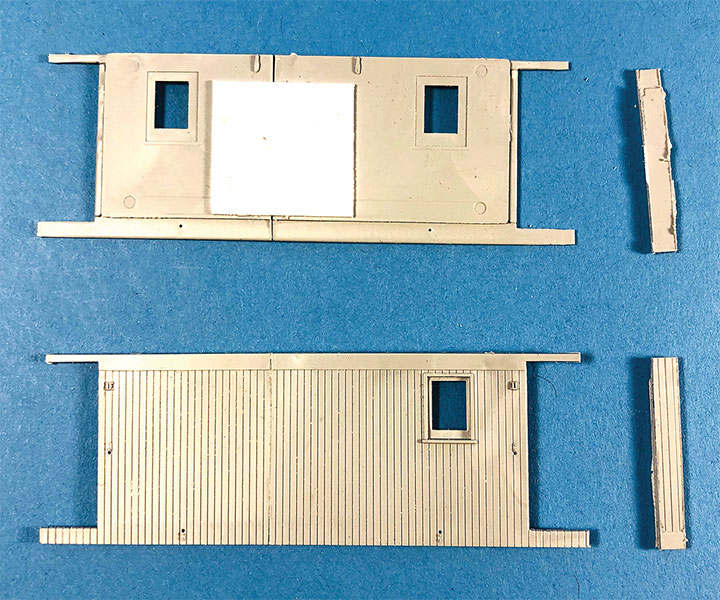
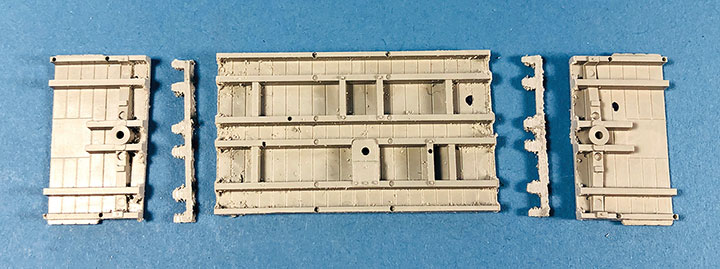
I then shortened the caboose frame by removing a scale six inches from just inside the bolsters. I sanded the joints to make sure they were square and glued them back together. While the glue was drying, I used a ruler to make sure the timbers in the frame were perfectly straight and didn’t form an angle at the joints. I used Squadron putty to help hide the sectioning, but didn’t spend a lot of time on this because any inconsistencies would be very hard to spot on the finished model. When I was done, I had a caboose frame that was one foot shorter and the same length as the caboose sides that I had already sectioned.
Sectioning the cupola roof was fairly easy. I simply cut a scale foot out of the middle of it. After gluing it back together, I used more putty to hide the joint. I was careful not to remove the bumps used for locating the grab irons.
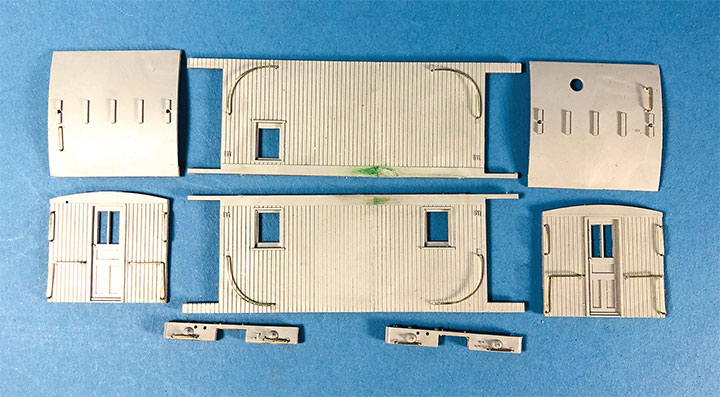
With the major parts modified, I set about building the caboose following the instructions. This is a really nice kit, but there are some obvious errors. The instructions say that all 10 grab irons are to be made using the 17-inch jig. Actually, only six 17-inch grab irons are needed, and the four end wall grab irons need to be made using the 21-inch jig. I installed all these grab irons while the caboose walls were flat.
The diagrams in the instructions for shaping the square end wall grab irons and the curved side wall grab irons were not very useful. I made mine in place which wasn’t too hard. For the curved grab irons, I shaped the .012-inch brass wire around the handle of my x-Acto knife.
From making RGS cabooses 0400 thru 0403, I remembered that the end doors and cupola windows had a variety of divided glass sections. Luckily for me, the PSC kit was almost perfect for caboose 0409. The stock cupola ends in the kit lacked mullions like the prototype, and the end doors had a single vertical mullion. The end doors in the kit have four panes of glass so it was a simple process to remove the two horizontal mullions.
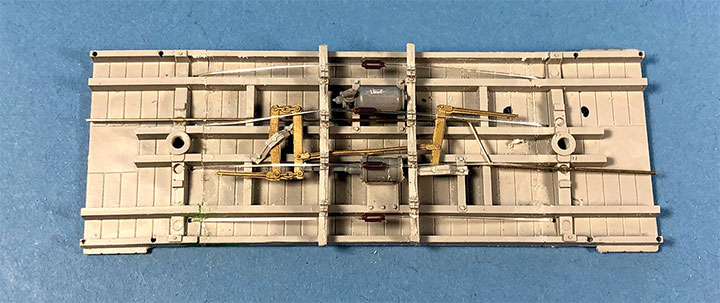
I continued following the kit’s instructions and assembled the under-frame, brake rigging and installed the couplers. The instructions have another error and reverse the locations of the queen posts. This is important to get correct, otherwise the brake rigging won’t fit properly. I also found that the kit’s turnbuckles were too brittle to use, so I substituted Grandt Line #5039 D&RGW turnbuckle castings. To keep the frame from bending and creating a humpback, I left the fishing line, so it was running snugly over the queen post beams. I then assembled the walls following the instructions. With the walls glued in place, I lifted the fishing line up to sit on top of the queen posts and tensioned them.
Using my scale, I found that ½ oz. of weight was needed to bring the finished model to an ideal 1.4 oz. final weight. I added a weight to the inside of the car. I then temporarily taped the roof sections in place with their ends flush with the ends of the car. This was done so that I could come up with a plan for scratchbuilding the cupola side walls.
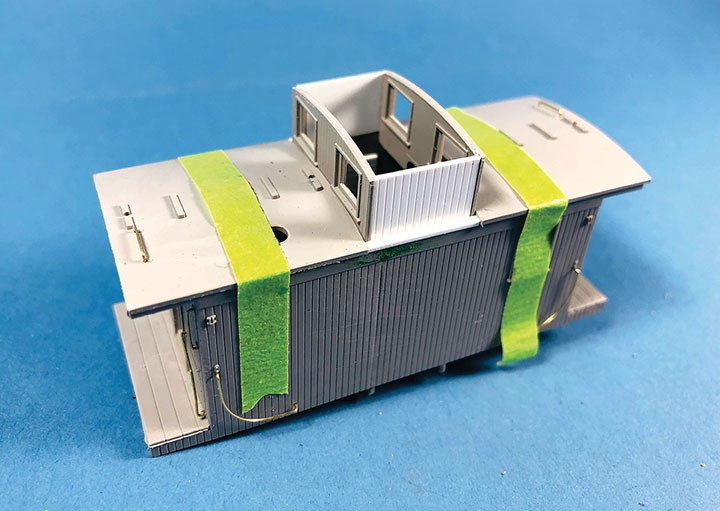
As with all my other cabooses, I wanted 0409 to have a removable cupola. I’ve done this so that I can access the inside if I were ever to add working marker lights. The stock PSC kit is well thought out and the cupola is a friction fit inside the roof panels. I wanted to keep this feature in my partially scratchbuilt cupola. The design of the cupola side walls is key to accomplishing this.
The cupola side wall casting in the kit has a .034-inch piece of trim that simulates the edge of the roof. This trim piece is key to making a friction fit for the completed cupola. There is no perfect Evergreen styrene strip for this, but a scale HO 2x3 will work. I stacked two strips creating a new strip that was an HO 4x3 inches. It worked out perfectly for mimicking the trim on the kit’s casting. With the most critical part figured out, I then temporarily added the cupola end castings in place as well as putting these side trim pieces in place. With this mocked up, I determined that I needed a pair of .020-inch styrene pieces that were .360x.540 inches for forming the inner cupola side walls. Using the model as a guide, I assembled the cupola pieces in place on the model. Being careful not to glue these cupola pieces to the rest of the model, I tacked them together with styrene glue. I then removed the assembly and added more glue to permanently create a solid cupola.
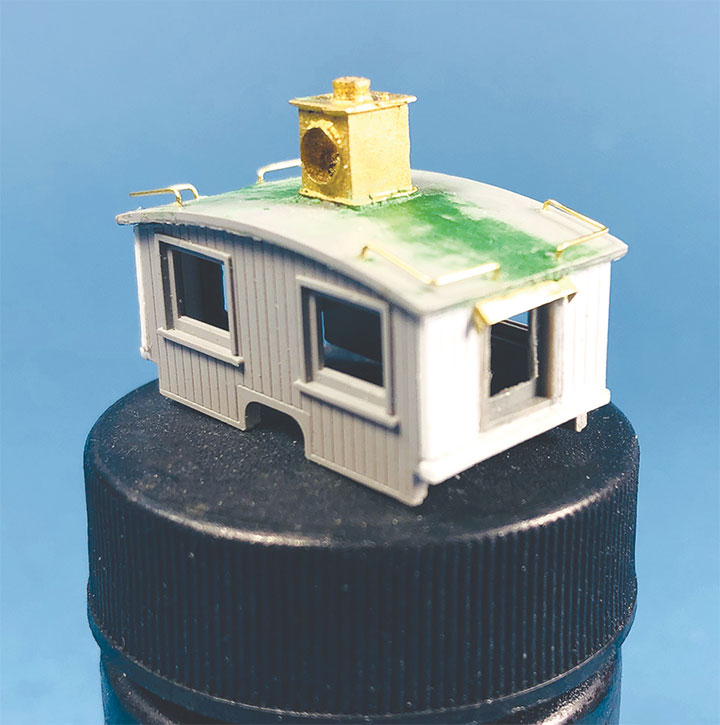
With the cupola walls partially assembled, I glued the modified cupola roof casting in place. On the cupola side walls, above the side trim and over the inner wall, I added a .320- x .560-inch piece of Evergreen #2040 v-groove styrene to simulate the siding. This completed the structural modification to the cupola.
After much head scratching and searching my parts bins, I discovered that modifying a Grandt Line #5241 Shed/Attic Window would result in a very close representation of the side cupola windows. I removed the mullions from the casting and made some slight changes to the window trim. Using a drill bit, then a hobby knife, I carved out an opening for this window in the center of the cupola sides. I then inserted the window from the inside of the cupola, so the framing showed. This is backwards from how you’d normally use this casting. With the window in place, I made an awning from Simpson Models 926-HO .006- x .046-inch brass stock. To complete the cupola, I added a Precision Scale #3432 Cupola Lantern to the center of the roof.
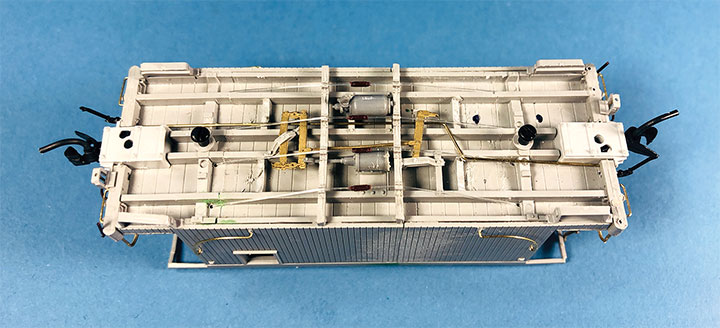
When I bought the kit for this project, I had also bought a pair of Blackstone B370106 3-foot 7-inch arch bar caboose trucks to replace the kit’s trucks. The Blackstone trucks are more free rolling and have wipers that can be used for working marker lights if I decide to add them later. With a pair of NWSL #108-4 .010-inch-diameter washers on each bolster, the trucks were installed, and the couplers sat at the right height. I needed to trim back some of the brake rods to allow for the trucks to swing freely. Shortening the frame resulted in the inner wheelset rubbing on parts of the frame, so I used a hobby knife to carve these frame members back.
I then installed the Precision Scale brass end railings and replaced the kit’s lever type coupler lift bars with Grandt Line #5185 rod type coupler lift bars since they better match the prototype. To make it easier to paint and glaze the windows, I didn’t glue the roof panels in place. I also didn’t install the end roof walk supports in favor of adding them after the roof panels were glued in place.
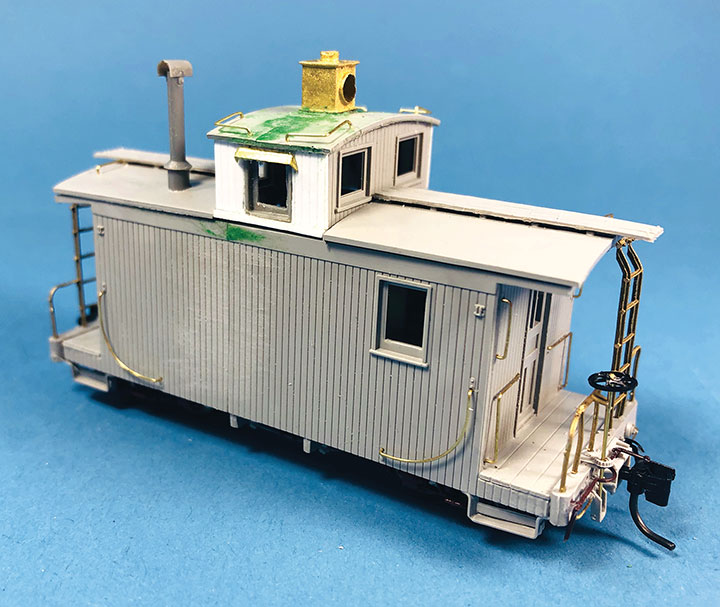
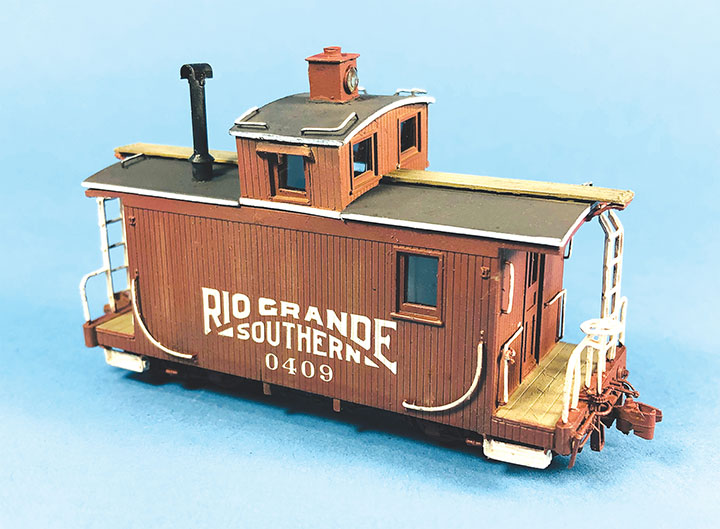
With the construction complete, I broke the model down into its separate components for painting. After priming, I randomly painted the model with various brown and gray earth tones to simulate old wood. Between coats, I used a PBL scratch tool to create streaking in these paint layers. I then masked off the walkways and roof walks. The roof panels where painted grimy black and the body painted boxcar red. The roof trim, grab irons, end railings, steps and ladders were painted white. I used Thin Film HOn111 RGS white decals to letter the caboose. Once I was done painting, I installed the window glazing and glued the roof panels in place. Then I added and painted the roof walk supports. I left the cupola a friction fit. MV Products .128 lenses with the foil removed were installed in the cupola roof marker light, and the model was complete.
This was a fun and fairly easy project. I’m happy to add another caboose to my fleet. In the next issue, I’ll describe how I built my last caboose, number 0404.
I’d like to thank John Bauer for his help with this project.