In the July/August GAZETTE I described building the mechanism for my On3 model of a Jull snowplow. I was happy to complete that challenging part of the model and turn to the more traditional construction of the body.
I used a combination of wood and styrene for the body and the frame. This is a method I’ve used in building passenger cars with good results. Basswood seems to offer more support when used for floors and roof bracing and is easily glued to styrene. In my experience, the relatively thin styrene sheet tends to warp, sometimes quite badly, unless braced or supported. I used 1/8-inch thick basswood sheet for the floor of the body, providing a solid base on which to glue the sides.
As I described in part one, the auger housing joins the body at an angle, so I used the floor to help establish this important angle. One side of the body is longer than the other, so this helped me determine that angle. This involved lots of measuring, cutting, and test fitting using cardboard patterns. I needed something thin enough to cut easily with scissors, but sturdy enough to hold its shape while fitting the various pieces together. The idea of using cardboard from cereal boxes occurred to me while eating breakfast.
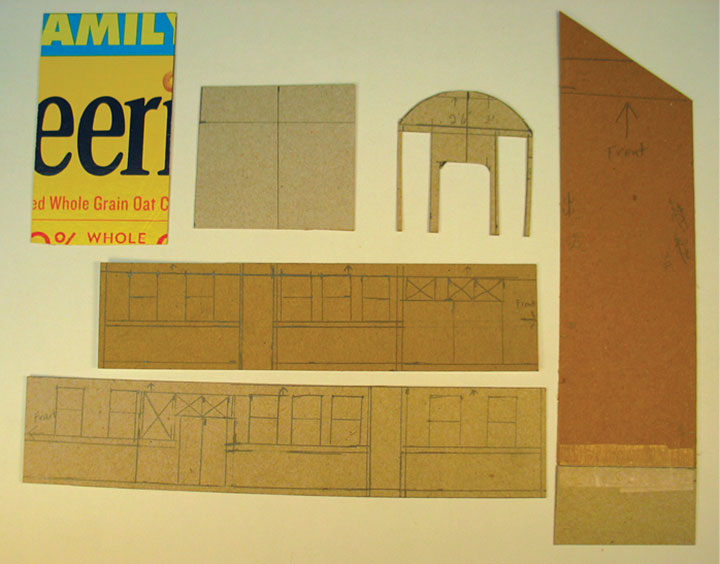
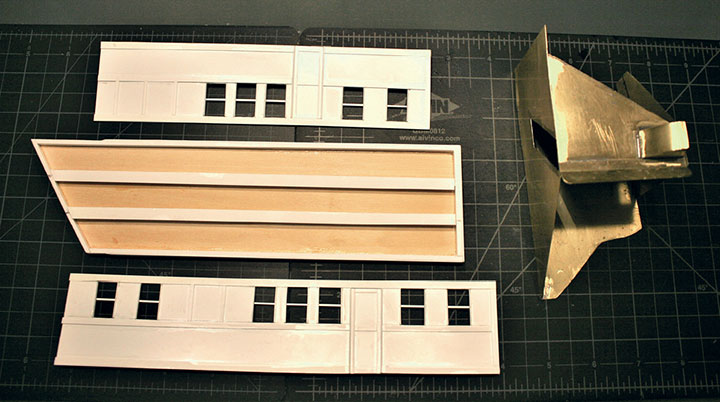
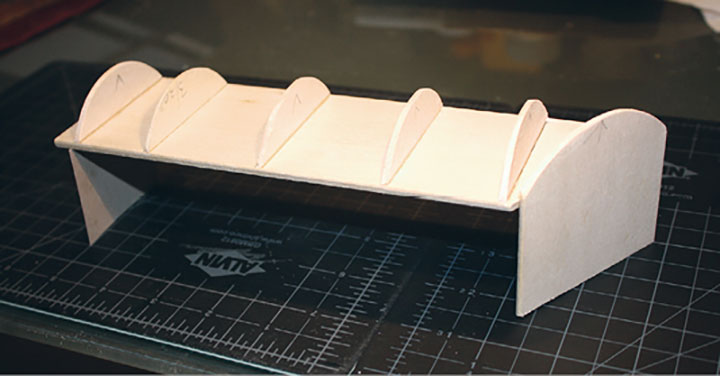
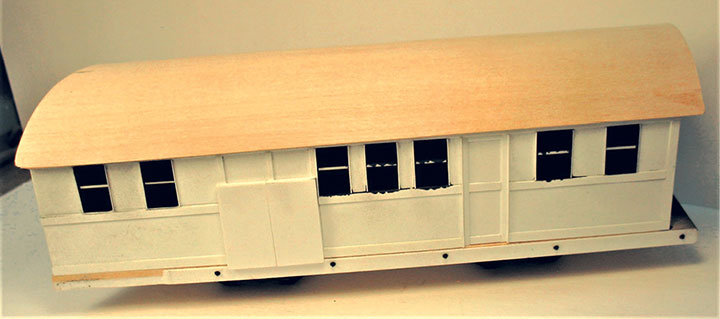
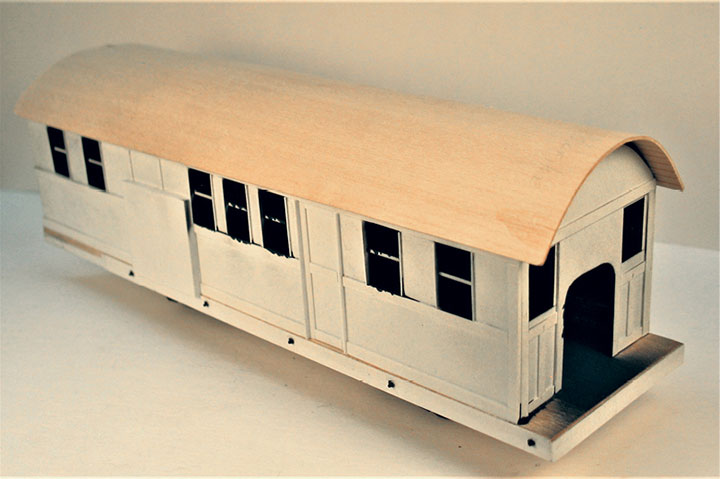
Once I was satisfied that the angle of the floor was correct, I used this as a pattern for the roof base, which has the same angle. The sides tended to bow inward, so the wood floor and roof base together kept the sides straight and parallel. As shown in the photos, the wood roof base has curved supports. These help to establish the roof curve and provide support for the thin scribed wood sheet. The scribed siding was easily bent into the curved shape and was glued in place with super glue. The sides, including the doors, windows and trim, were all fabricated from styrene.
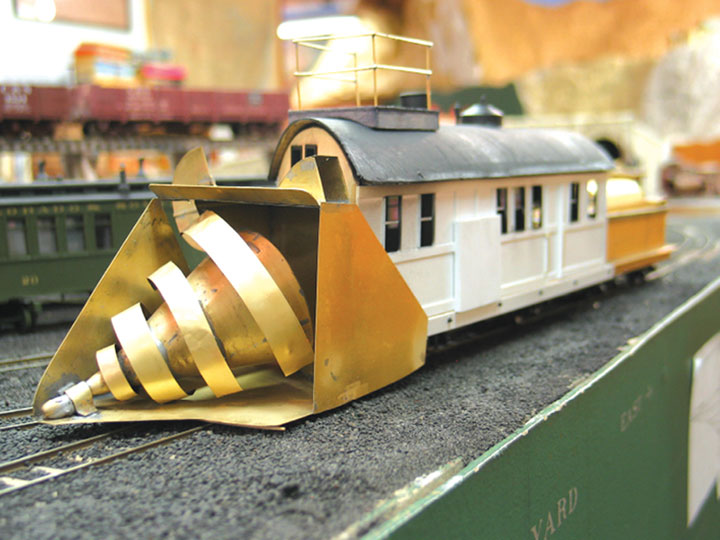
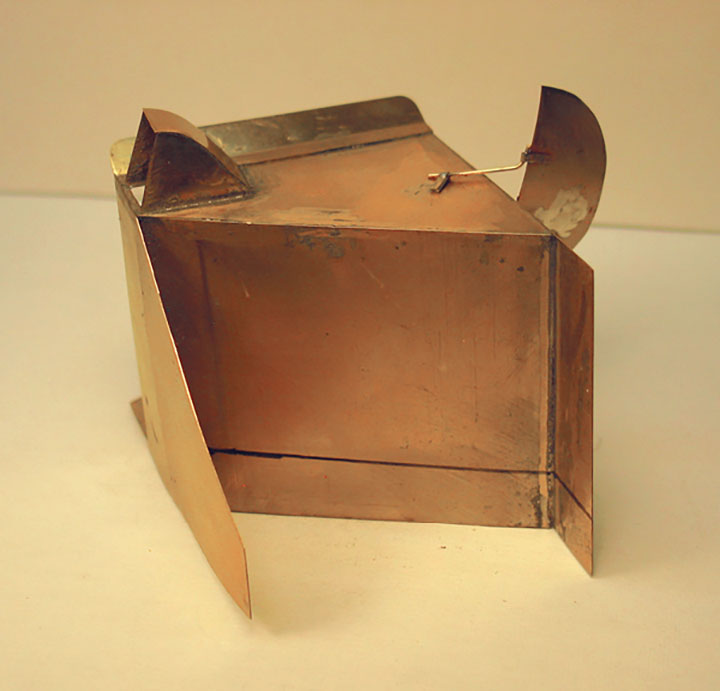
After the body was completed and trucks installed, the previously completed auger and housing assembly had to be attached to the body. As with everything else on this project, some adjustment was necessary. After the height of the housing above the rails looked right, I drew a line across the rear of the housing so I would glue the two sections together correctly when I moved them from the track to my workbench.
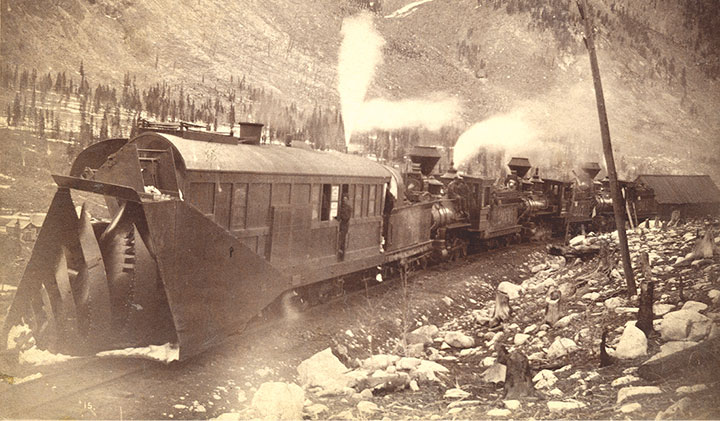
The Hancock Jull had 4-wheel trucks under the body, but these proved to be inadequate and were replaced with 6-wheel trucks after the Hancock snowplow trials. After I glued the brass housing to the body, I immediately saw the problem of using 4-wheel trucks. The heavy mechanism pulled the front down so much I had to add weights in the rear of the body to offset that problem. I kept the smaller trucks, however, because I wanted to duplicate the Hancock Jull.
After the body was complete, I built the temporary viewing platform from strip wood and wire pieces soldered together. I turned the stack and steam dome from brass rod and covered the roof with tissue paper.
The tender was next, but I won’t go into much detail because it’s almost an exact duplicate of the tender I built for Colorado Central locomotive #10, described in the March/April 2021 GAZETTE. The only difference is I used wood and styrene for the floor of the Jull instead of brass. I also used another etched C-21 wrapper from my parts bin.
Next time I’ll finish and paint the Jull and give some final thoughts on this interesting and challenging project.