This issue marks my 50th article in a row. (Many thanks Craig! Bob.) It’s been a long journey since I sent GAZETTE editor, Bob Brown, a handful of articles nearly 9 years ago. Back then, I couldn’t have imagined that it would result in becoming a GAZETTE columnist, but here we are. Through the years it’s fun, challenging, rewarding and at times stressful keeping up to the relentless bi-monthly deadlines. I’ve enjoyed strengthening friendships with fellow GAZETTE authors, Bob Brown, and other friends who have helped provide information and inspiration for my articles. For those of you that have read my articles over the years, I thank you. And to those of you that have been inspired by my articles and have even written to Bob, I’ve been truly touched. At this time, I’m not sure if I can make it through another 50 articles, but I still have plenty of ideas for projects that I’d like to do. For this issue it would seem fitting to either take a retrospective tour of my past articles or take a photo tour of my layout, but since writing about projects is more my style, I’m going to combine the two subjects. This time I’m going to write about taking a video of my layout using what I call the Flatcar Cam.
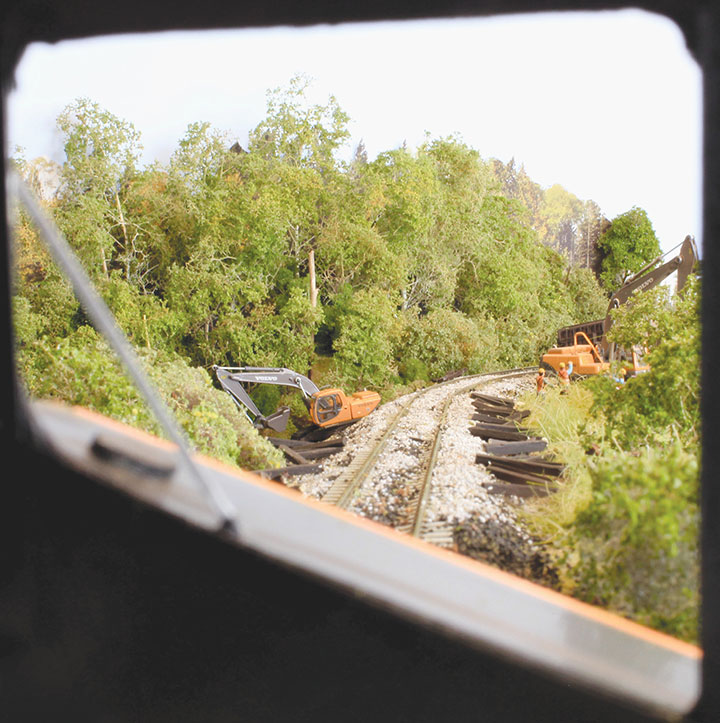
About a decade ago my parents gave me a small Polaroid video camera that was designed for filming action sports. I think they intended for me to use it while riding my dirt bike. But after watching endless motorcycle crash videos on YouTube, I felt that would be bad luck! Instead, I discovered that this camera was the perfect size to fit on an HOn3 flatcar. I pushed this car from one end of my layout to the other and the Flatcar Cam was born. I edited and posted this video on YouTube and it was popular enough to gain over 20,000 views. Most importantly, it really showed my layout in a whole new perspective. I could see the layout from the view of a scale engineer. Much of the scenery was breath taking, but on other parts of the layout I discovered blemishes that I never knew existed. In the end, it really created a whole new exciting facet to my hobby.
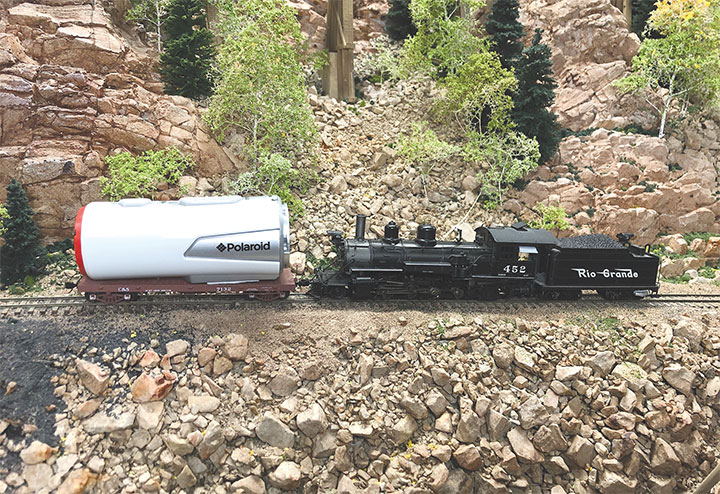
About a year ago, with a lot of new scenery completed on my model of Ophir, Colorado, I wanted to create an updated video. To my disappointment, after sitting in the closet for years, I couldn’t get my old camera to work. This started a search for a replacement. The Polaroid Cube camera was getting a lot of good reviews in the modeling press, but they were getting impossible to find as Polaroid was discontinuing them. I continued searching online where I found all sorts of options for dash cams, nanny cams and other small cameras. The angle of view, wifi ability, shapes and sizes seems to differentiate the options. The always popular GoPro was way too big for HOn3. I quickly learned that finding the perfect camera could be a hobby that I wasn’t interested in participating in, so I tried one of the knock off Polaroid Cube cameras that were plentiful on Amazon. It was a dismal failure with very poor results. Luckily with more searching I stumbled into an online retailer with new old stock Polaroid Cube cameras, so I bought one.
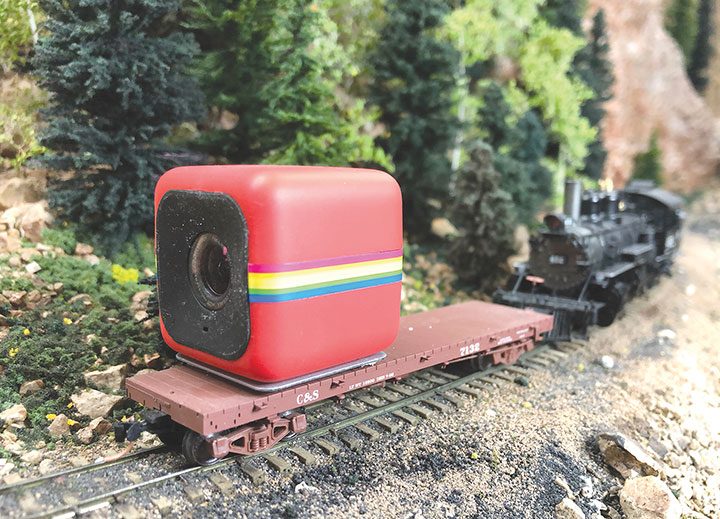
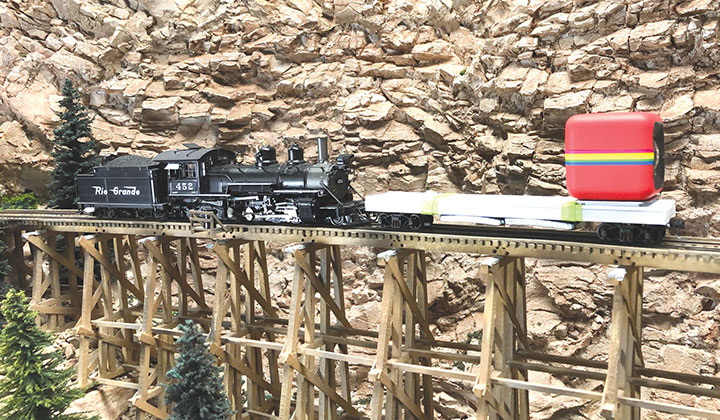
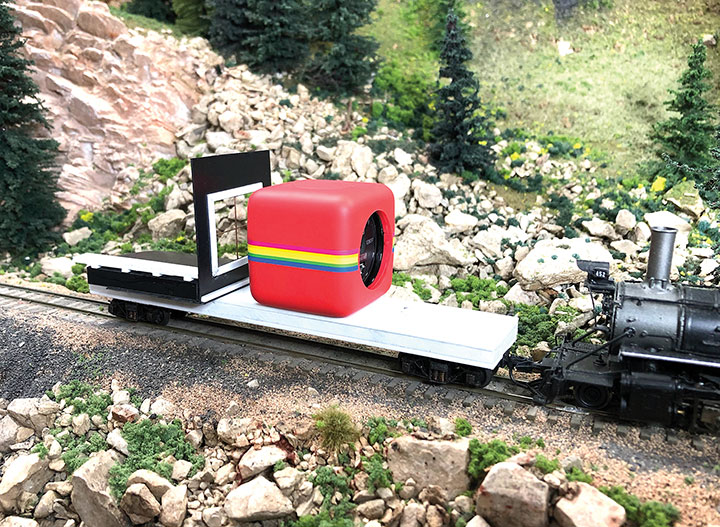
When my new camara arrived, I quickly mounted it on the same Micro Trains C&S flatcar that I had used for the original video. This car is very heavy, so it tracked well when pushed. This new camera also worked well, and I was happy. For anyone wanting to try creating their own video, you can simply look online for a suitably sized and priced option that fits your requirements. There are LOTS of choices!
With the camera situation settled, I started thinking about other ways that I could create videos of my layout. My original test runs showed that the perspective of the camera was from someone standing on the pilot of a moving train. This isn’t very realistic, especially when making long runs down the mainline of my layout. I started thinking about putting the camera in the train to give the perspective of the crew in the caboose. I also wondered how I could create that front end view from the perspective of the engineer. I then remembered that local modeler and friend, Jason Baxter, was using masks to take stunning photos of his HO scale Canadian National, Caramat subdivision themed layout. I wanted to try filming with masks too! If you want to see more of Jason’s photos, check out the Canadian Railway Modelers Facebook group where he regularly posts new photos.
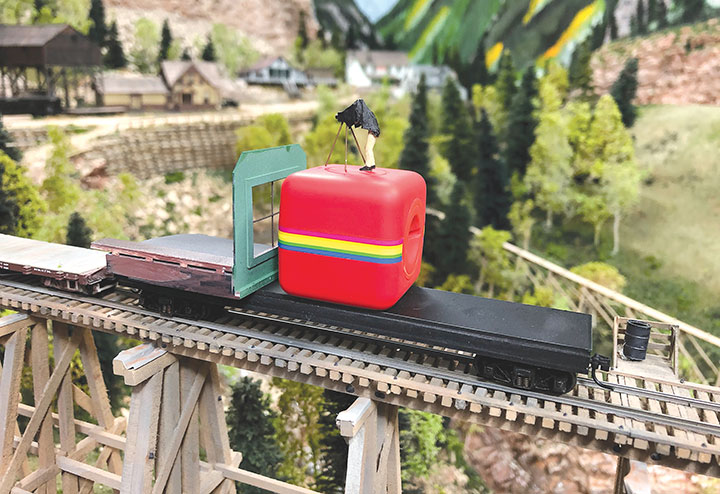
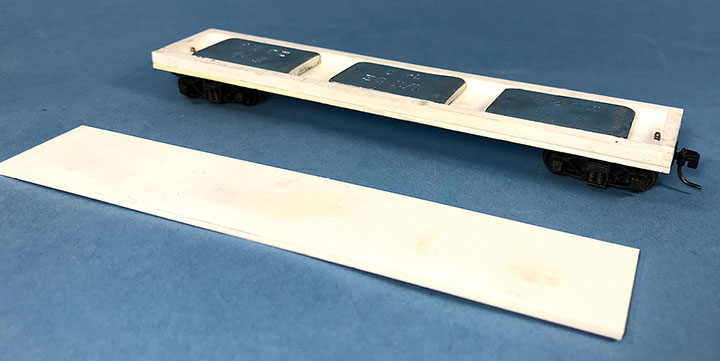
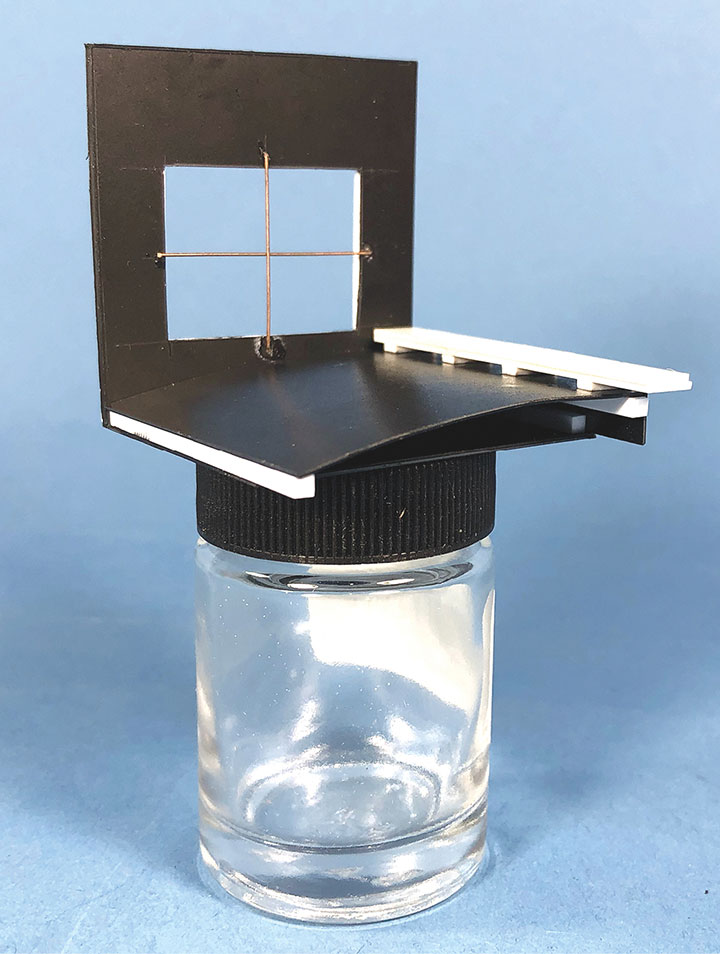
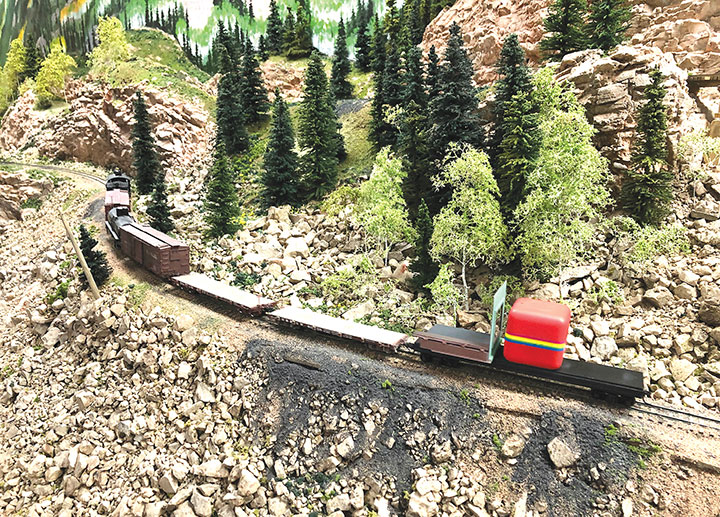
I quickly realized that my original flatcar was going to limit my options for creating a removable mask, so I decided to build a purpose-built flatcar for taking video photography. I made it a scale forty feet long to provide plenty of room for masks and camera mounting options. I made a frame from .125-inch-square styrene with a .040 sheet of styrene for the underside of the frame. I then used various bits of styrene to create a pair of bolsters. I’m fortunate that I have a large selection of HOn3 trucks in my parts bins, and after looking through the options, I decided on a pair of sprung Central Valley trucks. I picked them because it looked like the springs would help smooth out any undulations in the track. With the trucks installed, I set about installing Kadee #714 couplers on each end. I really wanted the car to be stable, so I added three ounces of tire weights inside the frame. A second sheet of .040-inch styrene was added to the top of the frame sealing the weights inside. The result was a stable platform for my camera.
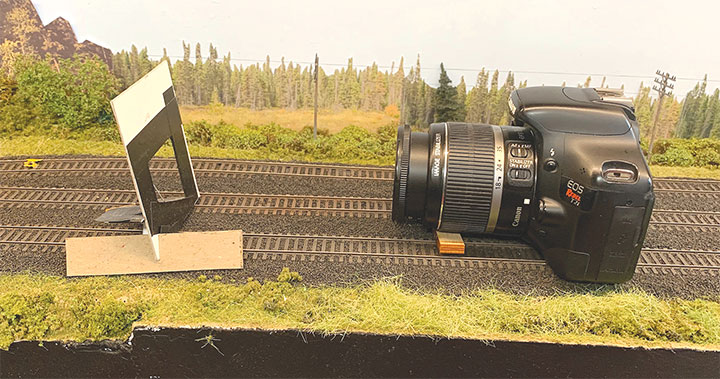
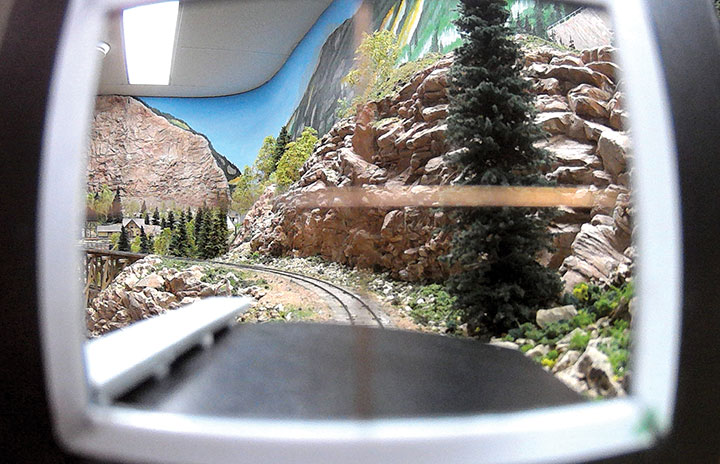
I wasn’t sure how I’d create a mask for the camera, but I decided I would try creating one from the perspective of a crew member sitting in the cupola of a caboose. I used business cards to mockup my options and quickly discovered that a scale sized window was way too small. I tried a series of mocked up masks with ever increasingly larger window openings. The wide-angle lens and camera’s ability to focus close up became a real challenge. The bigger the window, the farther away the camera could be from the mask and the better it was in focus. However, when I finally found what would work reasonably, the mask was so big that it couldn’t be run down the track without hitting all the scenery. So back to the drawing board I went.
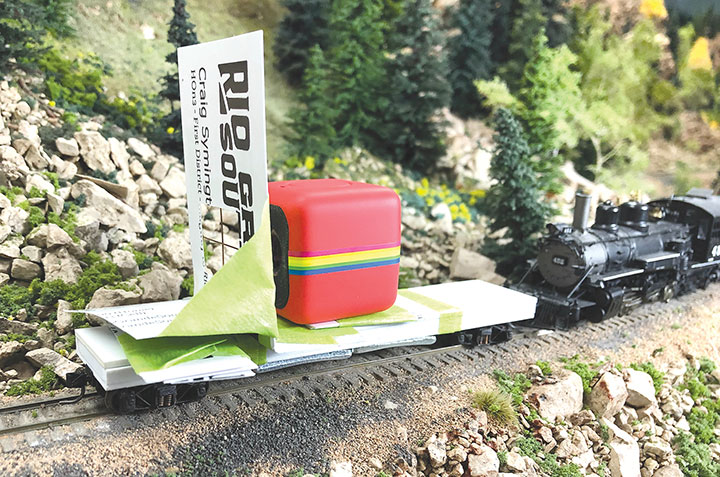
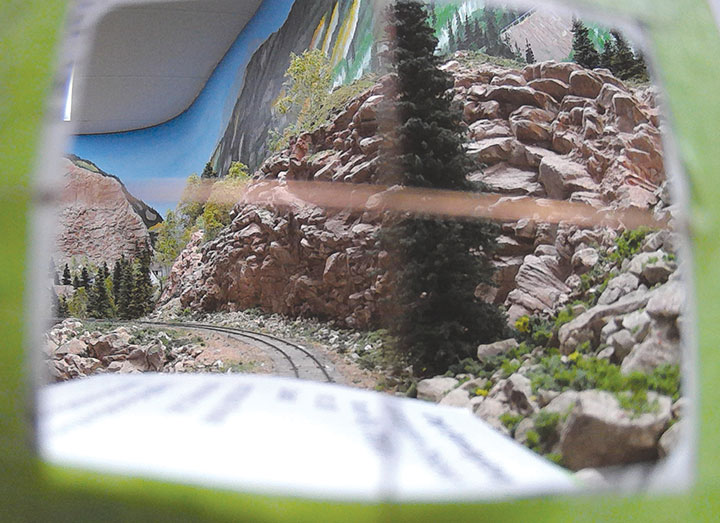
My failed attempts at creating a mask showed that I really needed to start with the maximum dimensions of the NMRA standards gauge and make a window that would fit with enough space around it to block the entire view of the camera. Measuring a model caboose, I found that the opening in a cupola window was about 21 inches wide by 18 inches tall. Using that ratio, I cut out a window that was 7 HO feet wide by 6 HO feet tall in another business card. After some test shots, I found that this seemed to work. To give some perspective, I wanted the window to have divided glass with mullions impairing the view. I experimented with various bits of styrene and found that .015-inch brass wire subtly created the right affect without annoyingly impairing the view. With the windows sorted out, I then used another business card to experiment with trying to get some of the caboose roof into the view through the window. This roof had to be wide enough to fill the camera frame but also not be wider than the NMRA gauge. With the roof sorted out, I then added shims under the camera to experiment with different camera heights to get the right perspective. Once I was satisfied with the overall setup, I used all these bits of business cards and wire as a template to create a permanent mask.
Using the mocked-up mask as a guide, I created a permanent one in styrene. All the sheets are .020-inch material with various other dimensional sizes for structural blocking and details. The wall and roof were straight forward, but all the finer details had to be about three times larger than HO scale to look right. For example, I used HO 2x8s to simulate the 3/4- x 23/4-inch window trim. The partial roof walk was created with suitably large materials too. It was almost like I was building this HO mask in O scale. With the new styrene mask made, I took some more test shots on the layout to make sure it would work. The results were decent, but I was getting a lot of artificial curvature to the image due to limitations with the lens. Unfortunately, I was going to have to live with this shortcoming because the only solution was to go back to a much larger mask that I made in my first attempt.
As I was building this new camera car, I kept thinking about how I was going to create a mount for the camera and the mask. I really wanted both to be highly adjustable so I could change the relationship between the two, and ultimately the view of the camera. I also wanted the ability to use different masks and use the camara car without a mask so I could push the car or add it mid train to create an even different perspective. Finally, I wanted to be able to change the masks and eventually create one that is from an engineer’s perspective looking down the boiler of the locomotive. I may even create another from the perspective of the videographer riding in an open gondola. Luckily for me, I stumbled into the solution. The Polaroid Cube camera has a magnetic mount, and it turns out the wheel weights I buried inside the camera car are steel. Voila! The solution was already there. I just needed to find a thin magnet to bury inside the fake roof of my caboose mask and I would have a complete solution.
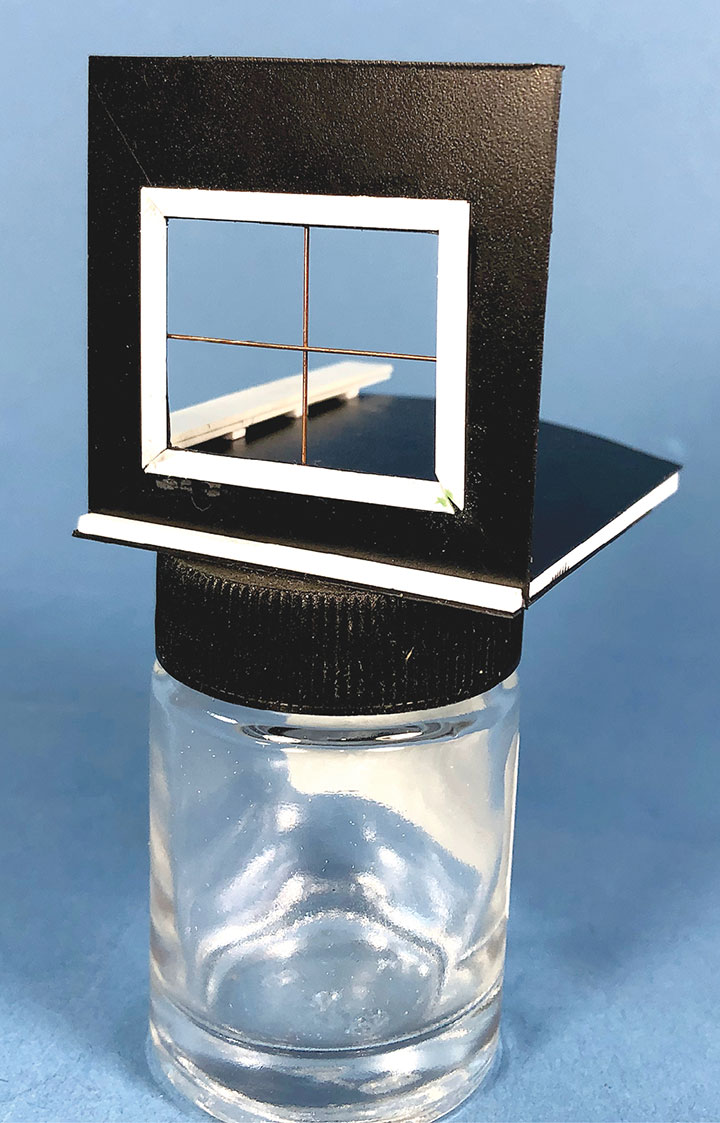
I gave the styrene mask a test and it was working well, so I decided to paint it as if it were a complete model. The inside walls are apple green. The outside is boxcar red with a weathered black roof. I even lightly weathered the mask so it wouldn’t appear too stark in the videos.
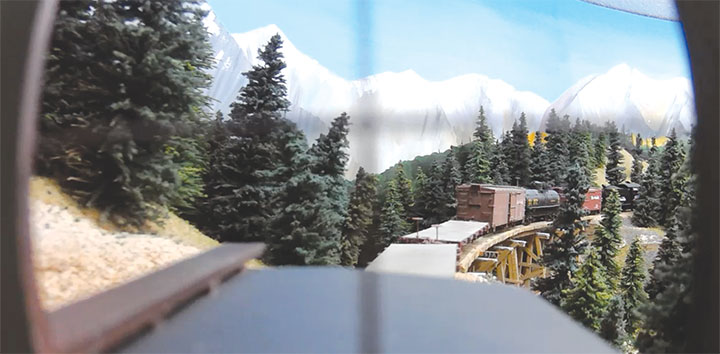

With the mask painted, I ran a train up and down my layout. It took some adjustment and a few attempts to get right. Even though I was careful about keeping the mask inside the NMRA recommended dimensions, it was still catching on scenery, structures, and rock cuts. I ended up trimming it down in size and adjusting some scenery. The distance between the mask and camera lens required some experimenting too. I finally found that a gap of .350 to .400-inches kept the mask inside the camera view and worked as well as it could.
When I was done tinkering, I ended up with what I think is a reasonable solution. The limitations of the size of the mask and the ability of the camera makes for an image with curved edges which isn’t overly realistic. But looking beyond that, the view through the window and outcome is interesting and unique. My home-built camera car is a complete success, and I will no longer be using the Micro Trains flatcar for any videography. The mask wasn’t a total success, but I’m happy with the results and inspired to try making different masks. Through this project I’ve ended up with some decent footage that I intend to edit and share. Mission accomplished!
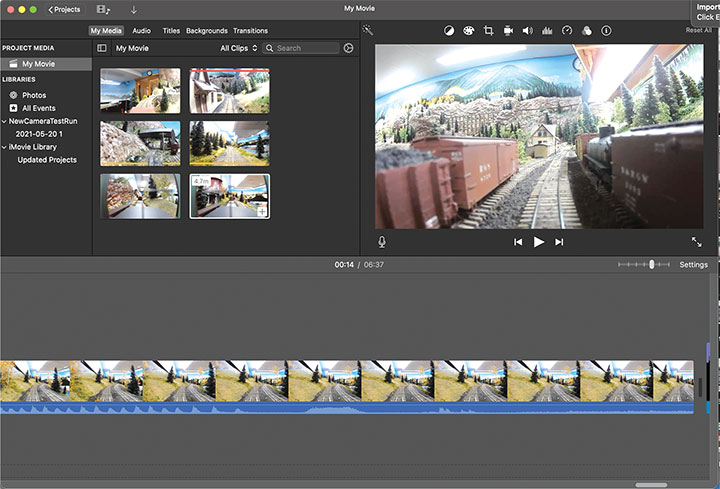
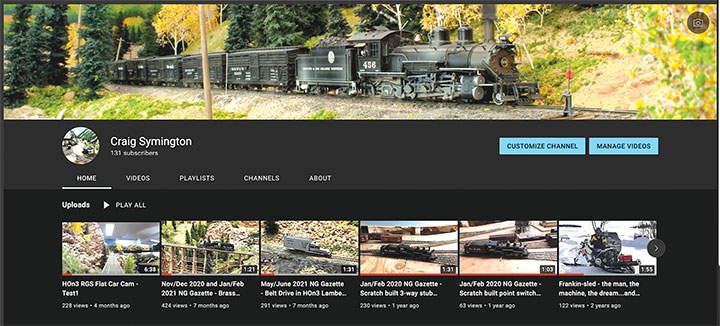
To compile and edit these videos, I use the iMovie software on my Mac computer. It came free with my Mac, and I find it easy to use. To share my videos, I upload them to YouTube since it is free and readily available to anyone. If you decide to use this service and are concerned about privacy, there is the option to make your videos private so you can limit who sees them. If you’d like to see the videos I’ve made, including the ones from this article, please go to https://www.youtube.com/c/CraigSymington. If you’d like to be notified when I post new videos, please subscribe to my channel.
The journey through these 50 articles has encouraged me to keep working on my layout and achieving my goals. I keep wondering how long the ride will last. Luckily, my layout still offers up many more projects for me to write about. Adding more scenery is high on my project list, and would create more opportunities to play with this flatcar cam. I hope this flatcar cam project has inspired you to take a whole new look at your layout too. I’ll see you next time, for article 51.