If you were to compile a short list of iconic man-made surface features of mountain mining regions, you’d likely very quickly think of pack trails, water flumes, timber cribbing, and rock retaining walls. Here is how I add rock retaining walls to my layout.
The title photo shows a freight train working hard on the three percent grade of the High Line up to Lizard Head on my HOn3 Rio Grande Southern layout. The train obscures much of the rock cut it is in, but does show the excavated slope is loose material. This isn’t terrible modeling; the prototype RGS had features much like this. Photos of Burns Canyon amaze me that such tall and steep slopes could be comprised of loose material.
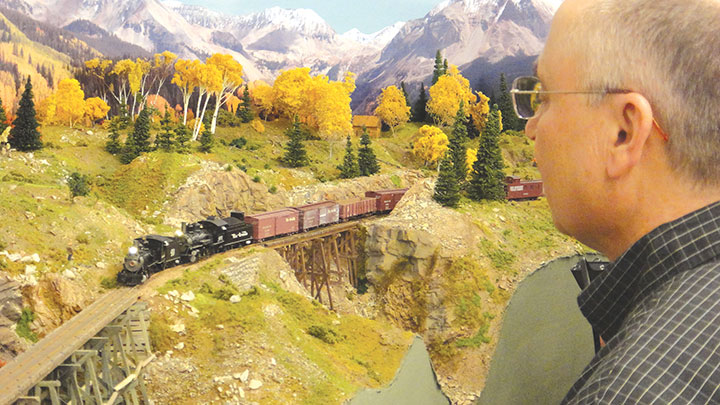
But consider viewer expectations. While a railroad cut through loose dirt and rock may be based on prototype fact, it lacks realism if the visitor thinks it’s illogical. The more one models the rare and unusual, the less realistic the modeling seems. Viewer expectations are fulfilled when we model what’s normal, usual, and typical.

Retaining Walls are Cool
Rock retaining walls are to be found all over Colorado’s narrow gauge country. Drive I-70 today and you will see miles of rock retaining walls along the former C&S grade beside Clear Creek. Ride the Georgetown Loop Railroad and you will see more of it, most spectacularly in the deep mountainside cut near the boulder field. So, rock retaining walls are typical in the region I’m portraying. I have found the sheets of rock retaining walls by Chooch Enterprises are first-rate. However, note that the Chooch Enterprises line has been sold to Walthers. Chooch’s first flexible rock retaining wall material from a decade or so ago represented smaller fitted rocks. I have used much of this material for retaining walls, structure foundations, and entire walls of stone buildings (I had an article on building stone structures for Placerville in the September 2012 Railroad Model Craftsman).
Chooch also has a flexible Sea Wall product. It portrays walls of larger stones using non-mortar construction. I loved this stuff at first sight! I will continue to use the original Chooch retaining wall material for structures, but will employ the Sea Wall for retaining walls from now on.
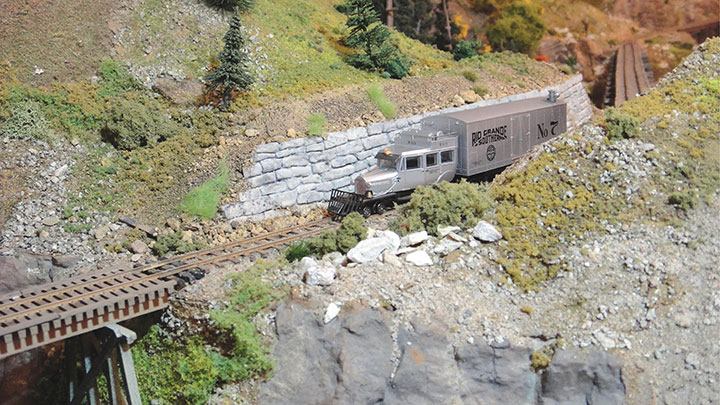
Retaining Wall in the Railroad Cut
This project was sheer simplicity. The improvement in layout scenery was a big bang for the buck.
First, I placed a strip of the Sea Wall in the railroad cut and marked it with a pencil to indicate its final shape. Then I cut it to shape with scissors and placed it in the cut again to confirm its shape. Naturally, I cut along the joint lines between rocks and didn’t cut through any rocks. A hobby knife was used in executing some of the finer zigs and zags.
Next, I used a putty knife to apply some construction adhesive to the surface where the rock wall would go. I keep a bucket of such adhesive on hand because I use a lot of it; adhesive from a caulk-gun tube would have worked equally well. The glue was laid on rather thick as I wanted it to bridge any gaps in the irregular base surface. Then I pressed the Sea Wall material in place. I thought maybe excess glue would squeeze out and I would need to wipe it away with paper towel, but I had guessed right on the amount.
The Sea Wall material would probably have adhered satisfactorily without further effort, but I wanted to make sure it had a snug fit with the base surface, so I held it in place with about a dozen T-pins. I inserted the pins in the crevices between the rocks so the holes wouldn’t show later. After the glue had dried for a day, I removed the pins and filled the gaps around the edges of the Sea Wall with dirt and small stones. In this case I used real mine tailing material from along the prototype RGS, but any kind of dirt or crushed rock will do. This loose material was sprayed with wet water from a hair-spray bottle, and then soaked with diluted white glue in a 50/50 mix with a drop of liquid soap. After that, I cleaned the track and was back in the railroad business.
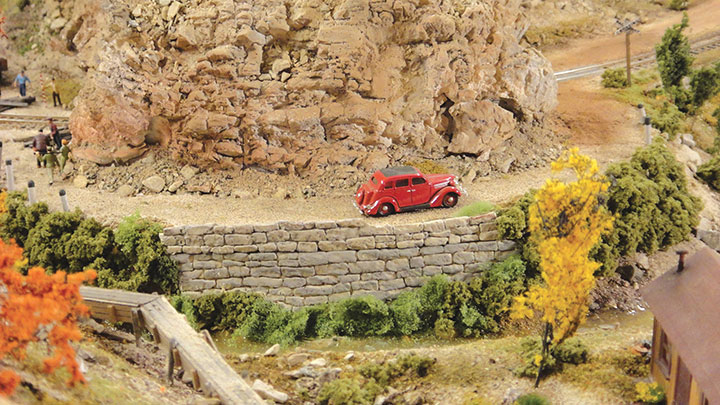
Retaining Wall for the Highway
Similarly, I improved the rock retaining wall in a section of cliff-hanging Highway 145. My first retaining wall here was the original Chooch material. I thought the new Sea Wall would look even better. The height of this wall was taller than the Chooch material, so with scissors I easily cut material and pieced it together.
I repeated the process I used with the railroad cut—applying construction adhesive and pinning the flexible rock material to it. I applied the adhesive to a broader area than the rock wall would cover and applied Woodland Scenics large clump ground foam around the rock wall. To make the clumps adhere better and to make them cover the base scenery more evenly, I cut each clump in half with scissors and pressed the flat side of the clump into the adhesive. This is an excellent way to apply large clump foliage to any steep slope.
Conclusion
Making rock retaining walls with the Chooch Sea Wall material was sheer simplicity. The process was relaxing and enjoyable—and even modestly creative. The results were far greater than the effort, and I count this project as a significant improvement to a layout that was already at photo-finish.