The shelter-in-place was good for something. Lots of work got done in my train room, and I am getting caught up on many overdue items, such as my Hobo Haven. My model was built and taken to the Narrow Gauge Convention in Minneapolis, Minnesota in 2018. There, I promised Bob Brown that I would write something up and here it finally is!
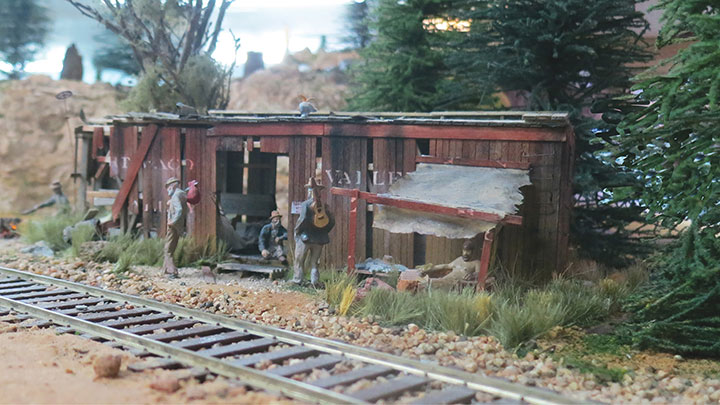
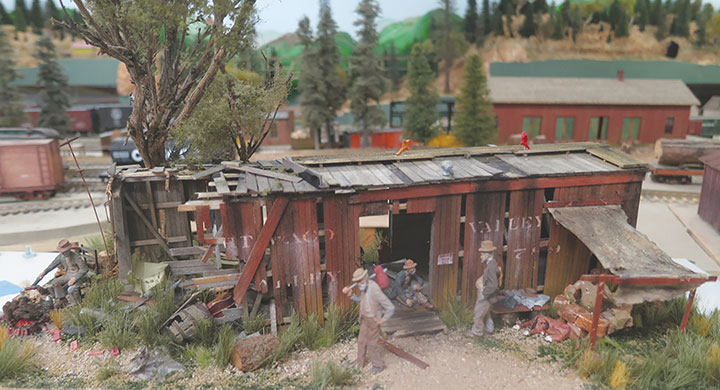
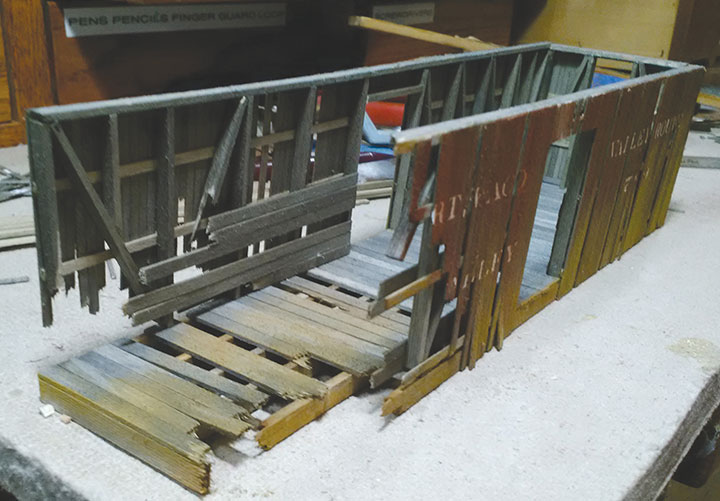
I am a fan of run down, barely standing, structures, although I can only have a few unless I decide to model a ghost town. I had a place along my main line that just needed something to get a visitor to stop and take in the details. My decision was to build an old, wrecked box-car that had the trucks and other metal salvaged and then left to decay along the track. I searched The American Railroad Freight Car book by John H. White, for a plan of an early wood boxcar and chose an 1889 34-foot Burlington boxcar. The good thing about the drawings in this book is that they show all the interior bracing and building details needed to build the car. First thing I had to decide was how the car was wrecked. I wanted a boxcar damaged enough that they wouldn’t have rebuilt it, so I decided that it would have one end badly damaged by breaking some of the main beams in the underframe, but mostly destroying the boxcar end above the frame. After making copies of the drawings in O scale, I started by distressing and staining the various sizes of wood I would be needing. The easy part was assembling the undamaged end of the car. However, it was not just a matter of building the car and taking a hammer to it. All the broken parts had to be planned based on support beams and framing that was still in place and not destroyed in the wreck (at this stage the hammer idea was looking good).
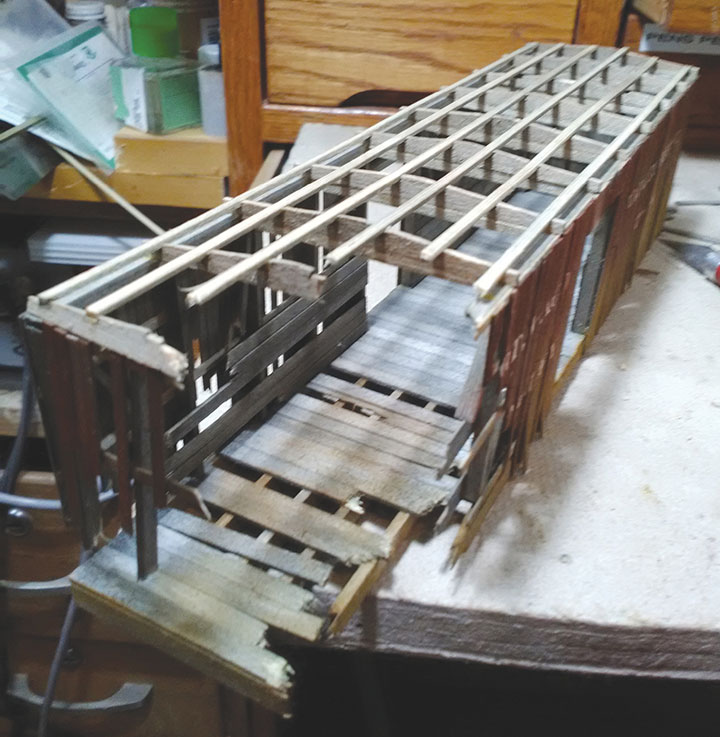
I started by building the car under-frame. Since it was an early car, it was built with a wood center sill. Two of the side beams were broken and flooring was cut, weathered, and installed care-fully breaking boards that would have been affected by the wreck. With the underframe complete, the sides were laid out and built, making sure the parts followed the wreckage to the floor. I cut and stained the wood to be used for the side sheathing with Hunterline Driftwood. As I glued the boards to the sides, I randomly left boards off and broke the boards where needed. I went back over the model applying Golden Oak stain to the boards where they broke.
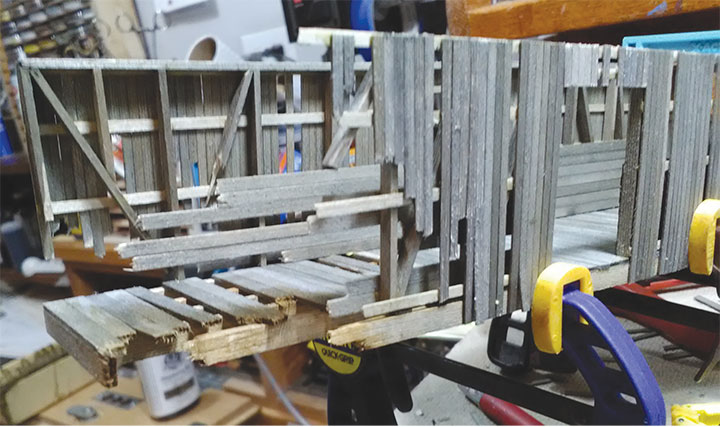
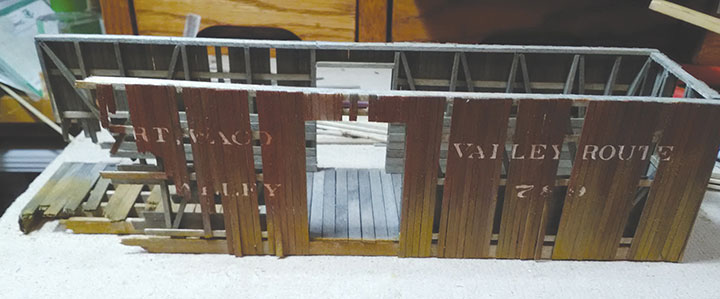
Before I colored the outside of the car, I temporarily replaced the missing boards so they would be consistantly colored and lettered. I used Pan Pastels to color the sides using Red Iron Oxide for the top portions and Ochre for the heavily weathered lower portion. I found some dry transfers from Clover House for the Calvert, Waco & Brazos Valley that once ran where I live in Texas. The dry transfers were applied then colored with Pan Pastels to take the new look off the lettering, and were brushed with a wire brush to distress the lettering even more. At this point I pulled off the boards that I had temporarily placed in the sides saving them to be used elsewhere.
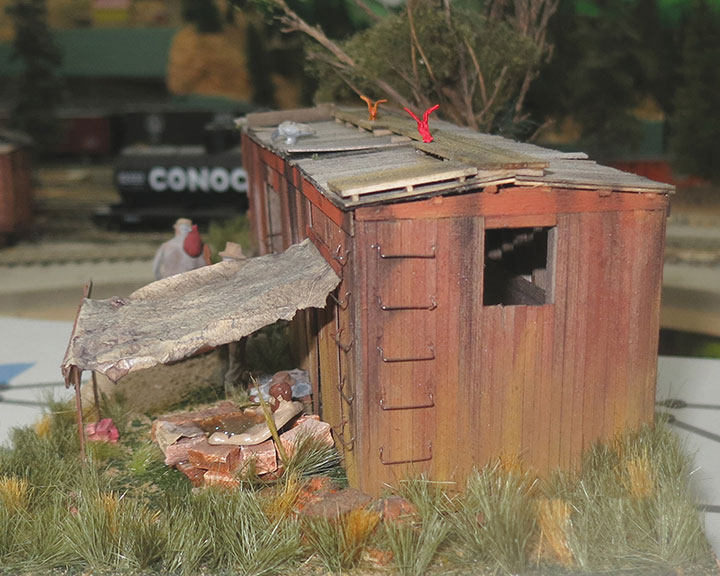
As I was building, I came up with the idea of a hobo camp. I figured that the hobos would make use of any kind of structure they could find along the tracks while they waited to catch that next train. So now that the car had a purpose, things changed a little as I built the car. Some boxes were left inside the car, and a hammock was strung to try and give the wrecked car a new life as a haven for the hobos traveling through the country.
The roof was next. I had decided to build a C. B. Hutchins style wood double-sheathed roof which is basically one layer of wood covered with painted canvas, and another layer of wood over it with seams offset so it didn’t leak. First step was to lay out the carlines and cut the notches for the stringers that ran the length of the car. The first layer of wood was applied. My canvas was made by cutting some 24# bond into strips and then spraying it flat black with a spray can. The second layer was applied over this. As I neared the end the wreck, boards were broken and adjusted to fit.
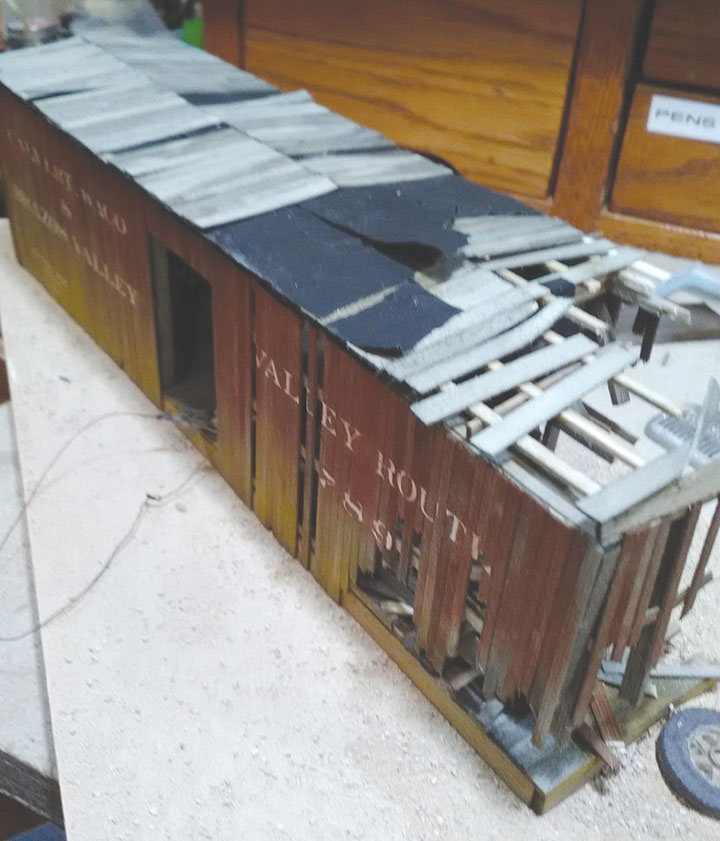
At this point, I mounted the boxcar to a piece of Gatorboard so I could add additional details. A base coat of scenery was added, planting the car into the landscape. From here, the fun began. I added a tarp over a rock bath area the hobos had constructed. For this I used some of the siding pieces to construct the framework for the tarp. Rocks were laid out for the campfire area with a flickering LED used to make the fire a little more realistic. Most of the left-over siding and all the wood I broke, was placed in the wreck area along with some damaged items the boxcar was carrying. A tree was planted, and a few evenings were spent adding weeds around and up through the broken framing. Hobos were added to complete the scene, along with a couple of birds on the roof.
I was very pleased with the comments I received on the model, and it took First Place in its category at the 2018 Narrow Gauge Convention in Minneapolis, Minnesota.