Our Florida club has a large traveling G-scale layout for displays and demonstrations with a time frame in the very early 1900s. It’s difficult to find correct era vehicles, so I scratchbuild vintage trucks and cars for the layout. These are not exact models, but “sort of” copies. Most of our visitors can’t tell a Model T from a Sears Runabout, and yes, Sears really did sell their own cars. All my models are made with bits and pieces from my scrap junk box. After checking photos and articles on the internet, I typically pour out some bits on my workbench and just study them. Invariably I find all kinds of useful shapes and set them aside.
Most of my vehicles are high wheelers. To keep them above ruts, rocks, and obstructions, they ran on wagon wheels with thin rubber tires. I get my wheels from the toy wagons in cowboy and Indian sets from dollar stores or toy shops. Wheels are usually around 1.5 inches in diameter. O scalers can find all kinds of wheels from the usual suppliers. Sometimes I clamp the wheels in the Dremel and file down the rims. Tires are thin electrical wire (earbud wire works well with the metal inside pulled out). Vintage tires were either black or white.
First, I spray paint the wheels a reddish brown or wood color. I dab a bit of superglue on the rim and start working the tire around and cut off excess wire at the end. If there’s a bit of a gap, a little putty takes care of it. Since my vehicles don’t move, I often just make sure the gaps are on the bottom in the dirt or grass.
Building the Trucks - The Curved Dash Olds
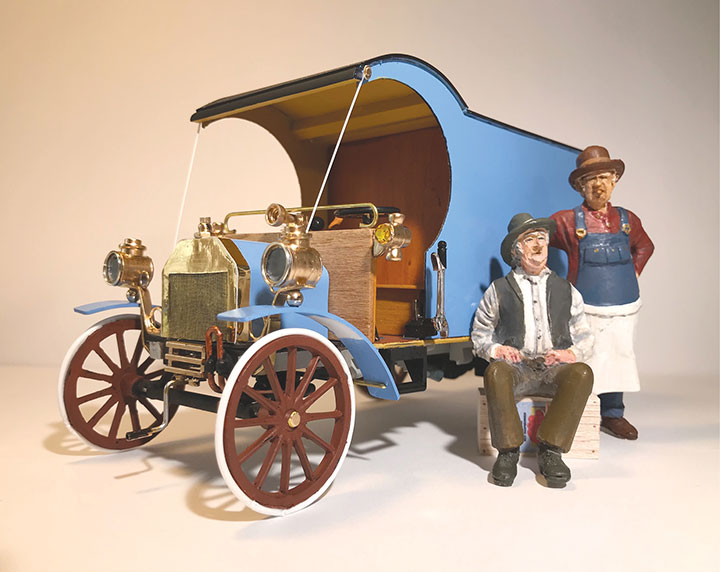
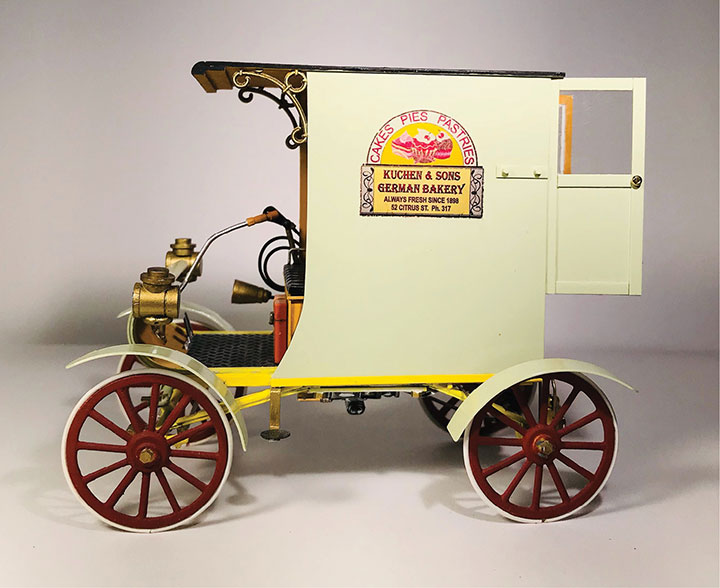
First I’ll describe a sort of curved dash Oldsmobile, one of my favorites. The chassis is simply a piece of thin plastic, long enough to allow for the curve. I rolled the dash area around a bottle to get the rough curve. Then I made two “J” shapes out of thin brass strip, These were superglued to the outside top edges of the chassis. The dash curve was wrapped and glued to the strips and clamped down for a bit.
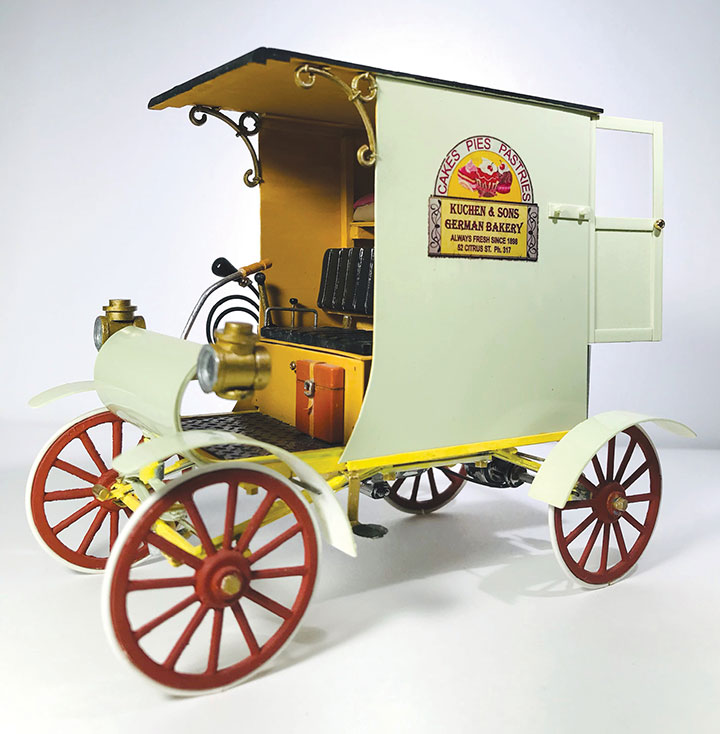
The seat box is thin balsa scrap. The leather upholstery is baking clay, shaped, scored and finished in my wife’s toaster oven.
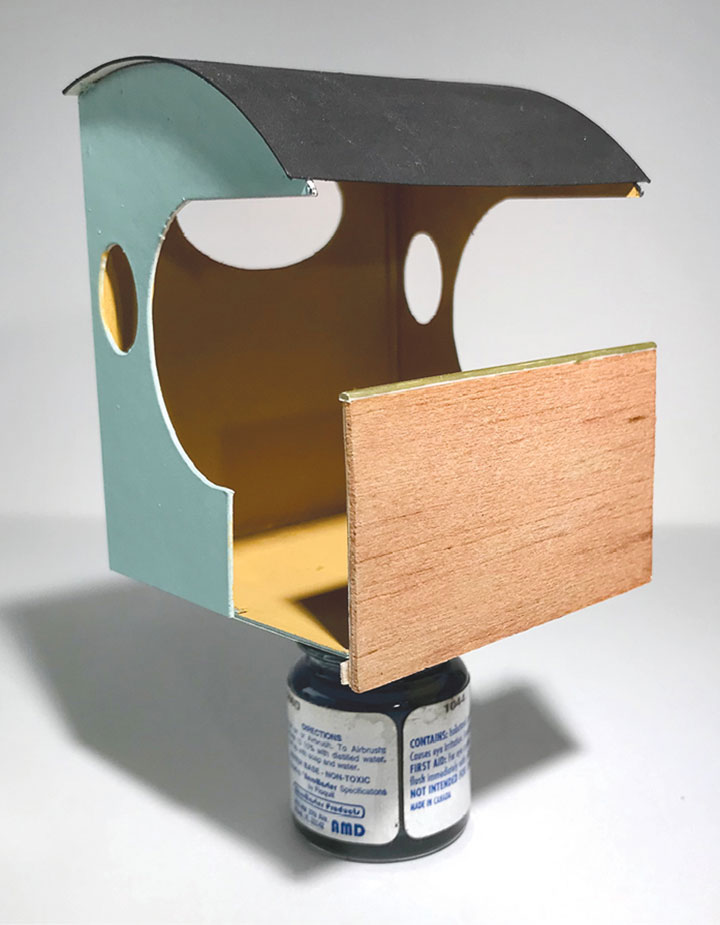
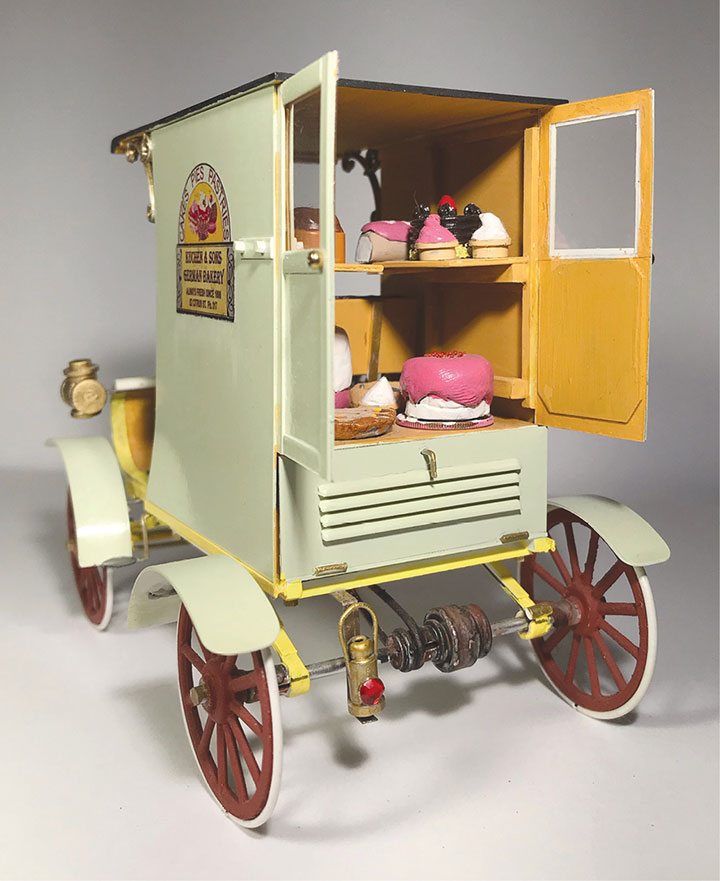
The cab sides were cut from thin pieces of cardstock. The roof is a thicker piece of plastic for strength, with a quarter-round strip at the front of the roof. There were no windshields on these runabouts. The insides of the cab were braced with strip wood. Cab sides sit in two plastic “C” channels scrounged from the scrap box, but you could glue the cab to the floor of the chassis. I wanted mine to be removable so I could add the baked clay upolstery. Back doors are cardstock with some reinforcing inside shapes, and the windows are clear plastic. The back panel vents are quarter-round strips with smoothed ends.
The real Olds suspension was very simple, really just a buggy. I attached two strips of brass under the outside edges of the chassis, with ends bent down and joined to the plastic rod axles. Lots of simulated bolts cut from plastic rod give the impression of construction.
The real steering tiller passed through the dash floor and joins two small opposing curved plastic strip springs glued to the front axle. Plastic rods suggest steering mechanisms.
Thin plastic fenders were rolled and epoxied to piano wires which were glued to the underside of the chassis.
Practically everything else on this little delivery truck is what I call “do-dads,” or found objects. The steering tiller is bent wire with a toothpick end. The controls are wire with small beads for knobs. An old piece of plastic flooring seemed right. The horn bulb is a large bead. Bent wire and a conical jewelry finding passes for the horn bell. The rest of the controls are simple. Plastic bent into “L” shapes are for pedals. Small rings painted brass with white inside for instruments. Hinges on doors and panels are bits of plastic rod. Headlights are various tubes, punched-out circles, and small rings. The rear lantern is also made from tubes and beads with a small red jewel.
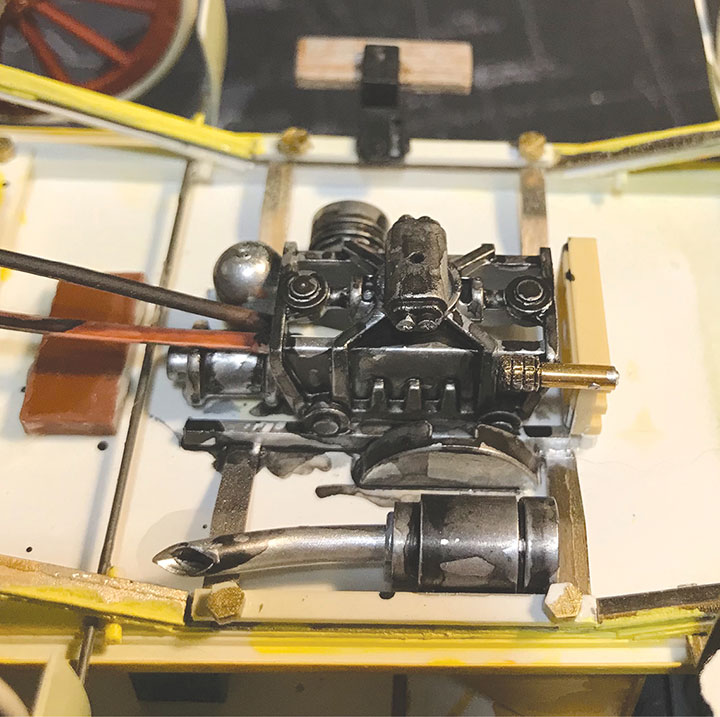
In the real vehicle, the engine was under the driver’s seat box, and partly hung below the chassis. I cobbled together some parts to suggest an engine and added the paper drive belt running to the housing on the rear axle.
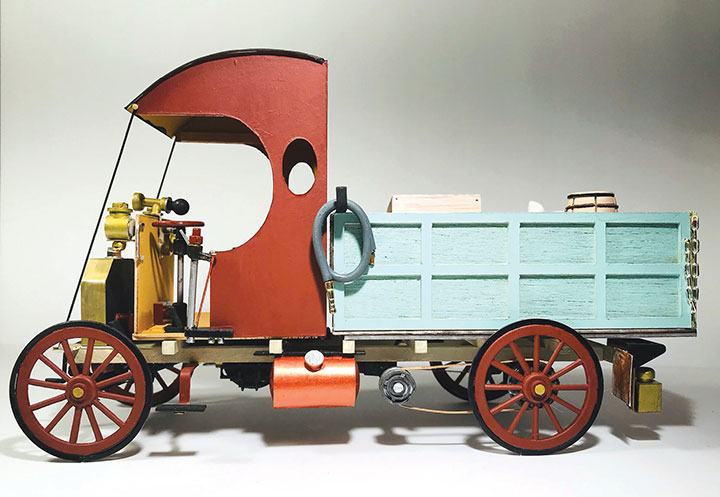
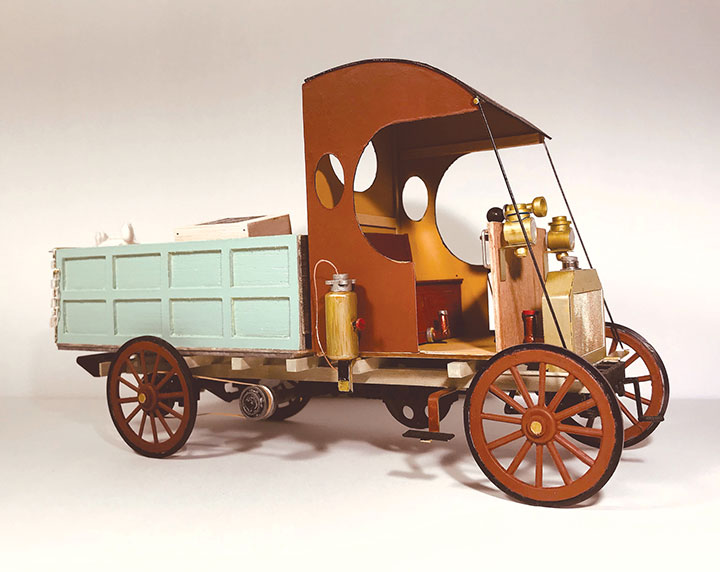
The “Large Hauler
This truck is freelance. International Harvester, REO, White and others made similar types-—all simple and rugged. The classic “D” cab is basic. On mine, the whole chassis/frame is two lengths of ¼-inch-square strip wood with six smaller 1/8-inch-square strips glued across for strength. Plastic blocks with holes for the axles to pass through are glued underneath. Everything else is imagination.
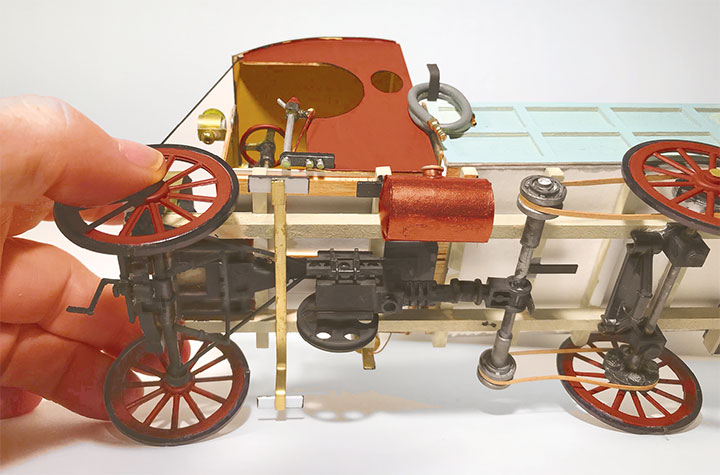
These big trucks had large engines extending under the chassis, often with a big flywheel, mine is a large coat button. The rest of the motor is found and “likely” pieces from the junk box. A required bent wire crank is at the front of the truck. I have no idea how the steering worked, but some wires and plastic rod suggest it.
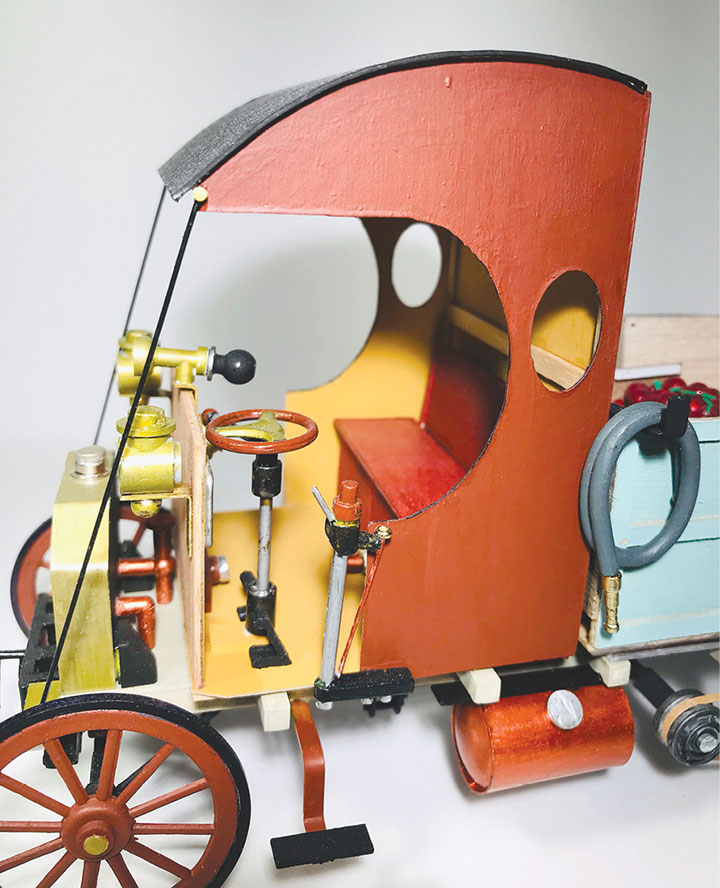
The cab is a separate unit with a thin plastic floor. Sides and back are cardstock, braced with strip wood and a thicker plastic top was rolled and glued on. Classic wires connect the cab roof to the front of the frame. The firewall is a piece of basswood, sanded and clear coated. There is a simple balsa seat box with a back rest. The steering wheel is an O ring with simulated column and shift handle, and the controls are the same as on the Olds.
The big radiator sits forward on its own base with some simulated piping down to the engine. It’s a shape of foam board, covered in very thin cardstock. Organza from a gift bag painted copper represents the radiator.
The headlights are tubes and circles, and the horn is some unknown piece that appealed to me, with a bead for the squeeze bulb.
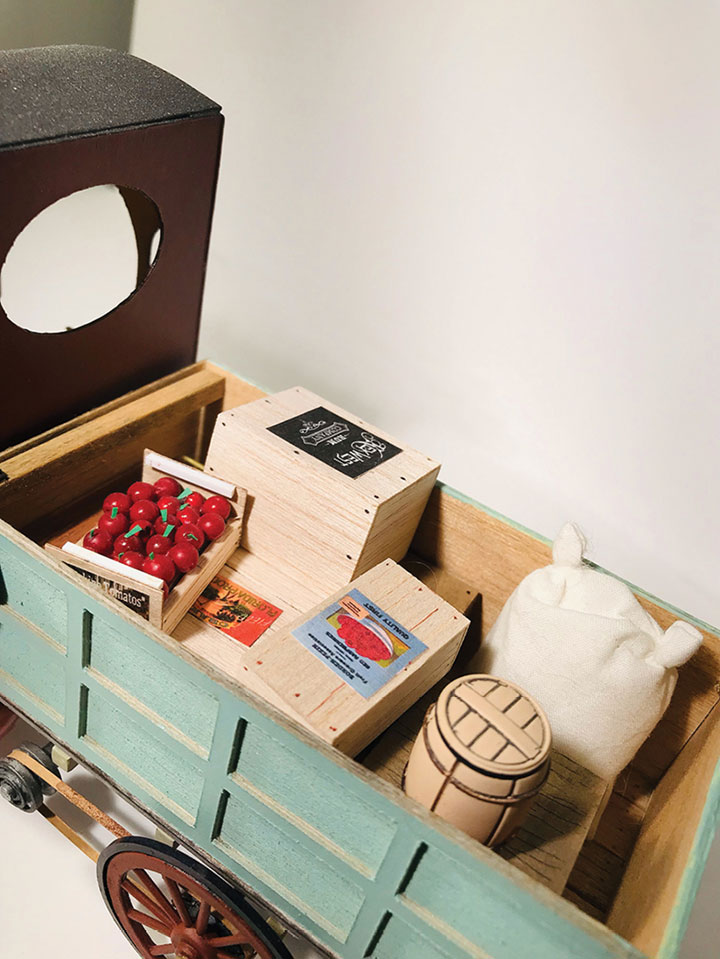
The cargo compartment is a simple balsa box with outside card framing and the floor is scored for boards. I attached some chains for the tail gate that I should have rusted.
Everything else on this truck is imagined or inspired by old photos. Cobbled parts are everywhere, including the hanging gas tank and dual chain drives made from slices of plastic rod to suggest bolts.
What about colors? Vintage vehicles came in all sorts of colors, so you’re not limited. I use spray cans and cheap acrylics where needed, especially for wood tones inside cabs, and lots of brass paint for radiators, lights, and steps. I don’t age or distress except where necessary, like on undercarriage or axles. Trucks in those days weren’t cheap and were kept clean as a matter of pride.
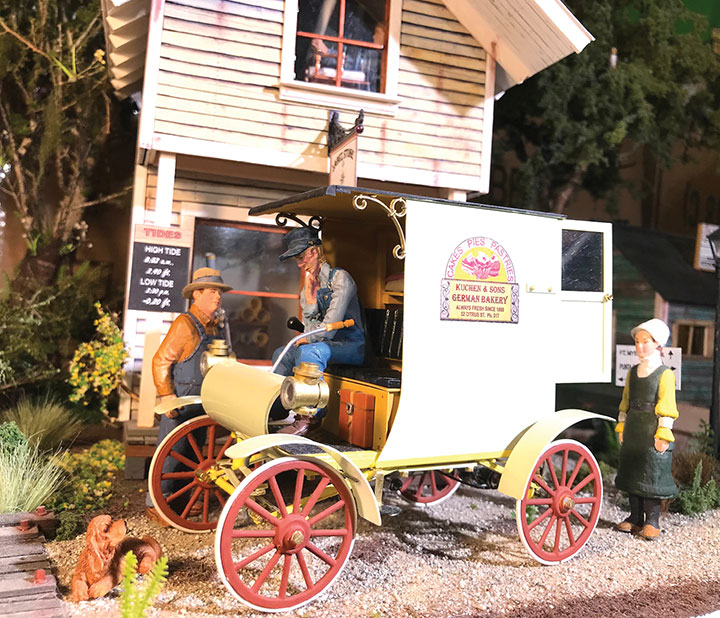
I’ve included a gallery of two of my vintage trucks that have been placed with several similar vehicles around our layout. Because they’re so vintage looking, they help to establish the time setting and present interesting vignettes. These runabouts are easy to build and rewarding. Free your imagination and try your hand.
Richard Compton’s CURVED DASH OLDS GALLERY

Richard Compton’s “LARGE” HAULER GALLERY