I find waterfront scenes fascinating. It started with John Armstrong’s seaside module in the GAZETTE and the Thatcher’s Inlet series in the Railroad Model Craftsman. So, when my Sn3 layout was on the drawing board, a waterfront town was the first consideration. On my layout that town is Rock Harbor. Here, the railroad earns the title “Navigation Co.” with two track spurs running onto the pier and a company-owned tug working the harbor.
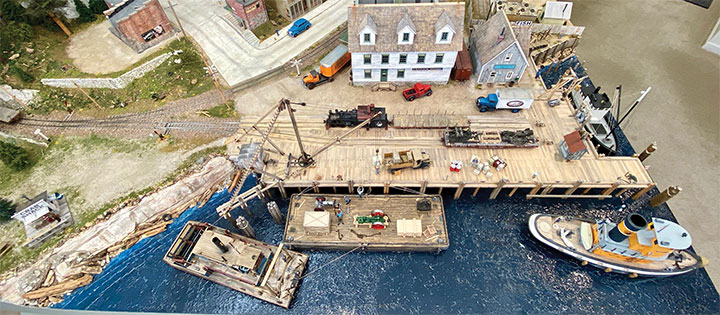
My waterfront scene occupies a relatively small space, 30 x 50 inches, but there’s a lot of activity packed into that area. The waterfront is the signature scene on the layout and is usually the first thing a guest sees upon entering the train room.
I will describe construction of the harbor in two articles. The first part will cover how I created the water effects, dock, and the cargo transfer system for the dock complex. In the second part, I’ll discuss construction of the watercraft and the industries along the wharf.
Water Effects
What to use for water? Poured EnviroTex was my first choice, but I never liked the way it tended to creep up whatever it contacted. I experimented with various coatings to stop the creep, but nothing seemed to work. A friend suggested Golden’s Soft Gel (gloss) artist medium for the water. After a little experimentation I decided to go with it. The difference between EnviroTex and a gel is the resulting water surface. Instead of a smooth glass-like surface, the gel produces a surface like water agitated by a light offshore breeze. A side benefit is that it doesn’t show every speck of dust that falls as is the case with a smooth surface, thus a little less maintenance. Finally, the gel has a slow cure rate, so you have a couple of hours to work it, creating waves near the shore or the bow wave from a boat.
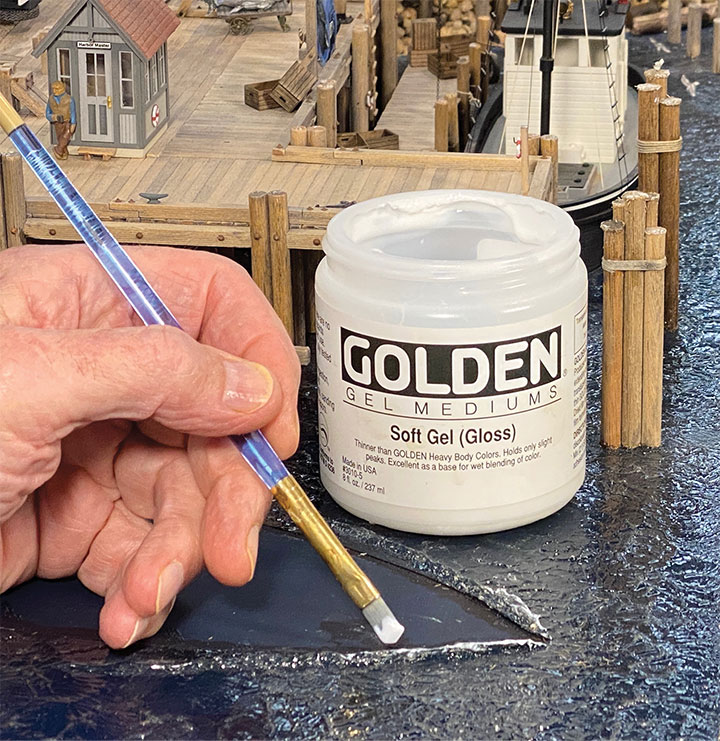
The application is simple. My harbor has a plywood base which I painted a dark blue to represent a deep body of water. I gradually lightened the color about an inch from the shore simulating a steep drop off. I then added debris (driftwood, rusted drums, tires) along the shoreline and fixed it in place with a solution of diluted white glue. I cut out a cardboard footprint of the two boats that I had at the time and temporarily bonded the templates to the painted surface where the boats would repose. The purpose being to avoid placing gel in those areas. I then applied the Golden’s Soft Gel to the entire surface of the harbor using a 1-inch-wide brush to a thickness of about 1/8-inch. It goes on white and dries clear and hard. I stippled the gel, using a 1/2-inch brush with an up and down motion to achieve the effect I was after. Near the shore I formed parallel, raised lines of soft gel to simulate small waves. Once satisfied with the appearance, I dropped the pier into place—no creep!
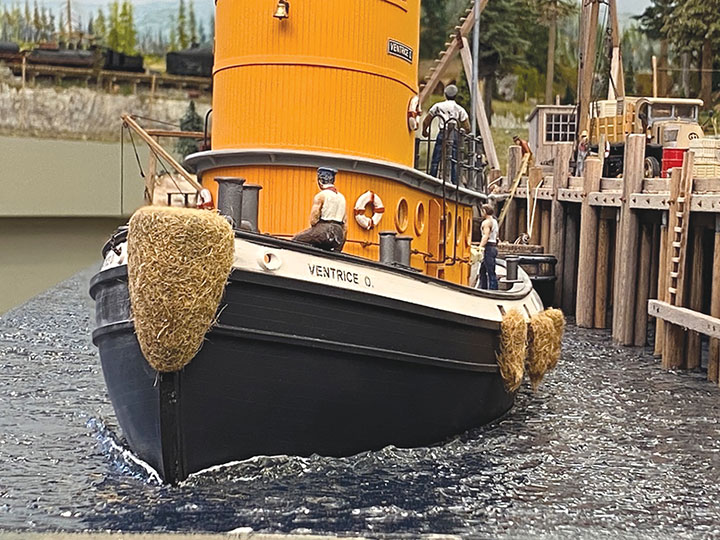
Once the soft gel had dried, I came back and added more detail to the water. The cardboard templates were removed and in most cases the boats fit snuggly into the depressions. The boats appear to be “in” the water. Where there was a gap, I placed a single sheet of plastic kitchen wrap around the hull, placed the boat back in the depression and filled the gap with more gel and let it dry. One of my boats, the steam tug, is underway pulling away from the pier. I used a small chisel-shaped brush to create a small bow wave leading back from the prow. I later dry brushed a little white paint on that bow wave to give it a frothy look. I did the same thing on waves near the shore. The beauty of the gel is that you can come back at any time and add more gel for a different effect or to correct an error. Once it dries, the addition is undetectable.
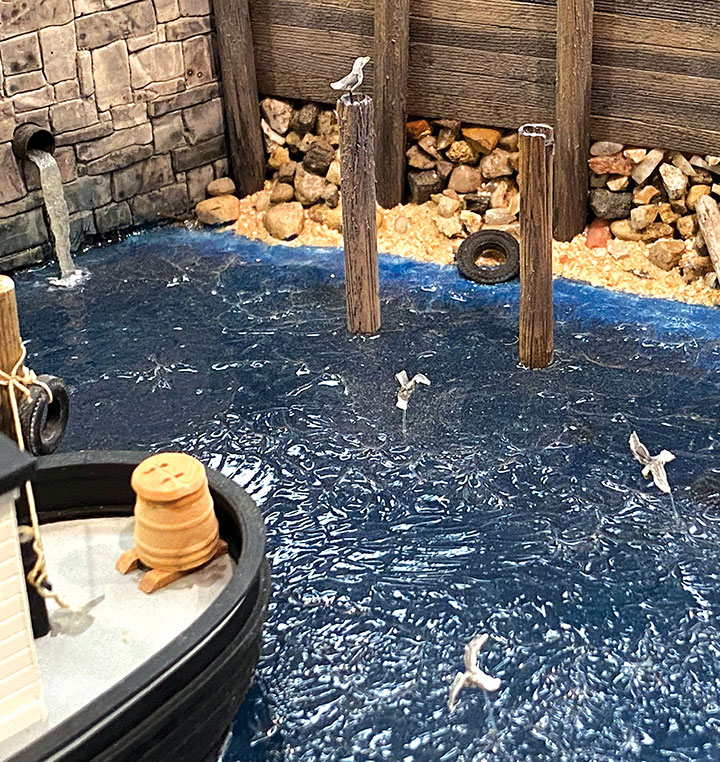
I finished off the water scene with a dozen or so sea gulls. Some are perched and others are swooping low over the water. The swooping gulls are supported by a very thin, clear, monofilament line; one end in the belly of the bird and the other into a hole drilled in the water. It takes a discerning eye to detect the supporting line.
Two large pipes protrude through the stone retaining wall discharging water into the harbor. The water stream is simulated using aquarium filter fiber and soft gel. I formed the water stream on the workbench, let it dry and then placed it in the discharge pipe.
The Dock
The dock design is based on a Howard Fogg painting that appeared on a Christmas card that Jim Vail sent out many years ago. It depicted a railroad pier and ferry terminal called the “Alameda Mole” that stretched over a mile into San Francisco Bay on the South Pacific Coast Railroad. Fogg’s depiction probably has no basis in reality, but the design looked right, so I used it as the basis for my pier.
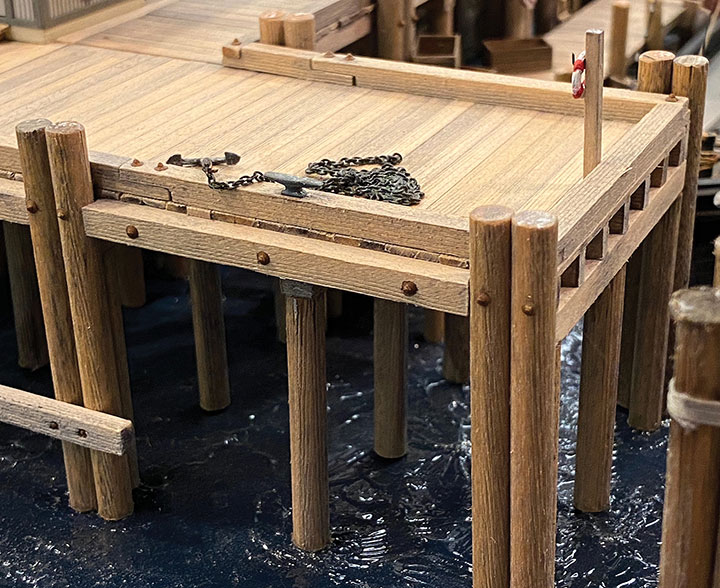
The dock rises 12 feet above the water line and the 3-inch-thick decking is supported on 14-inch-diameter pilings. I pre-stained all the wood components with alcohol dye and assembled the entire structure on the workbench. I debated adding barnacles to the first few inches of the pilings by dipping them in diluted white glue and then in an appropriately colored grit. I opted not to because my scene was located on a long, river-fed estuary and the water would be fresh to brackish. Plus, it was one less thing to do and I felt hurried. It was a decision I regret, as these little crustaceans are a great detail to model, people expect to see them, and they do grow in brackish water. So, my explanation to the critics of this absent detail is that the scene represents a high tide.
Two rail spurs extend out to the end of the pier. I depressed the track so that the top of the rail is flush with the surface of the pier decking. That way vehicles can move unimpeded around the pier area.
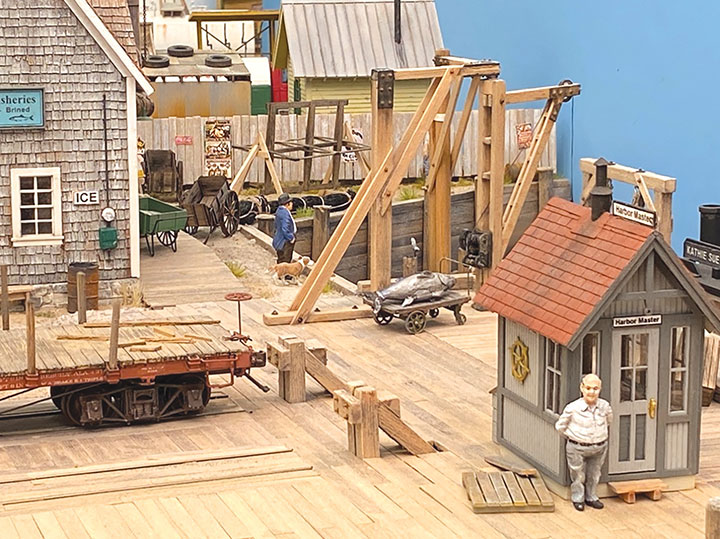
Finally, I added some sturdy bumpers at the end of each track spur, plus a shack for the harbor master. The shack is a Building & Structure Co. kit of a crossing shanty. They produced that useful little structure in HO, S, and O scale.
The Cargo Transfer System
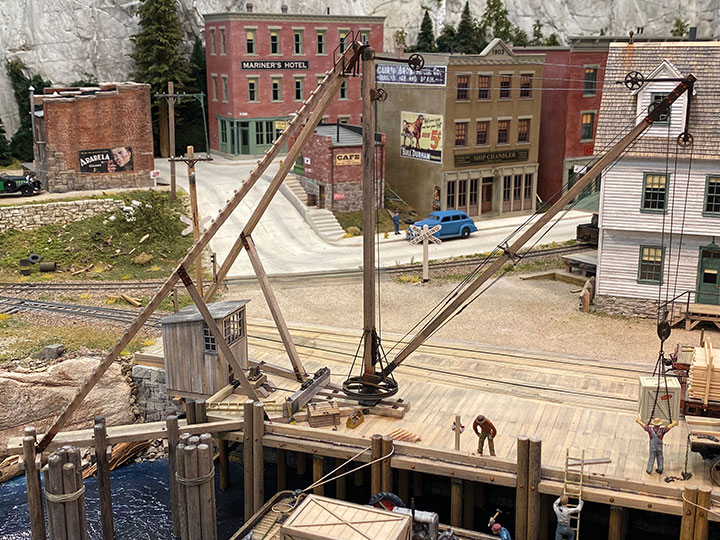
My next project was the design of a system to transfer cargo on and off the ships, trucks and rail cars on the dock. I figured the intra-coastal freighters would be self-sustaining, i.e., have their own lifting gear. But the port would have to service barge traffic. I toyed with various styles of gantry cranes, but they all seem a little too elaborate for my small operation. I finally settled on a stiff leg derrick which could reach both rail sidings, trucks and a barge along-side the wharf.
Unfortunately, stiff leg derricks take up lots of space because their two legs extend about 40 feet from the base of the mast. I didn’t have the space nor did I want to clutter the pier with the derrick supports. The solution was to run one of the legs out over the water on a series of pilings and run the other leg off the pier along-side the inbound track. That configuration allows the derrick mast to be placed at the leading edge of the pier and leaves most of the dock free for cargo and vehicles.
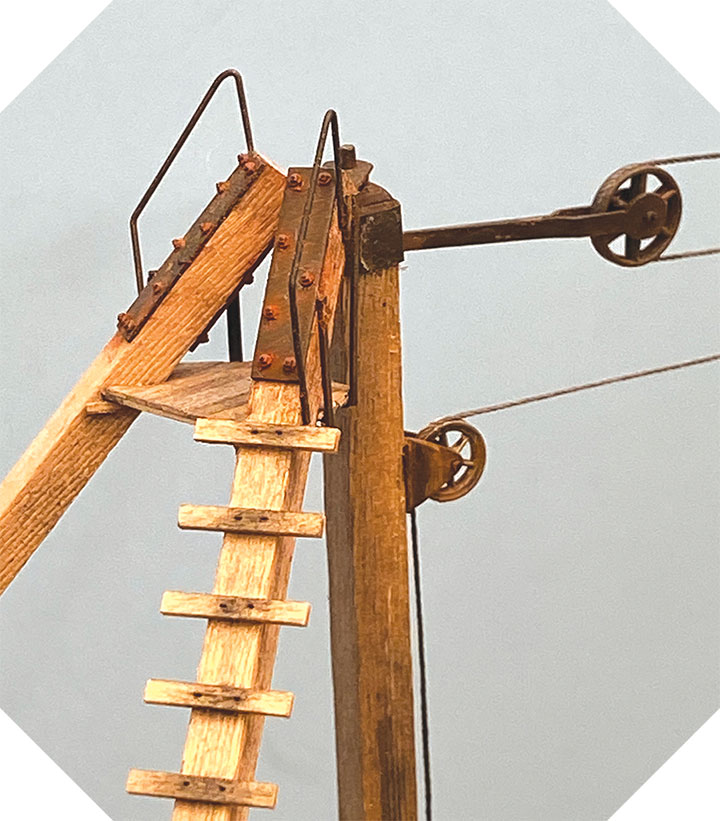
Crow River Products sells a lovely stiff leg derrick, but only in HO and O scales. I borrowed the O scale plans from a friend, reduced them to S and used them as the basis for my scratchbuilt derrick. My derrick sports a 42-foot mast and a 46-foot boom, with an effective reach that extends about 30 feet from the base of the mast. The mast is a 12- x 12-inch beam, and the boom, legs and mast supports are 10 x 10s.
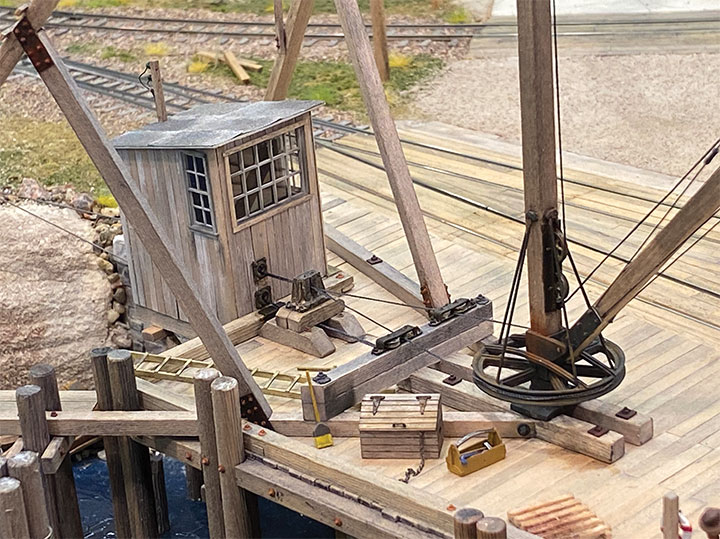
The pulleys were sourced from a variety of manufacturers, and some were found in my parts drawers. Some of the leads and fairing are logging hardware. The bull wheel that rotates the mast was made from two Grandt Line, O scale 34-inch-diameter sheaves. The stiffeners on the boom were constructed using 12-inch passenger car queen posts and monofilament line. The remaining fixtures and hardware were fashioned from styrene and brass stock.
As I was assembling the ladder that runs up one of the mast support beams, I tried to visualize some poor bloke at the very top trying to execute a repair with one hand, hanging on for dear life with the other. That prompted the construction of a platform “crow’s nest” with hand grabs at the top of the mast.
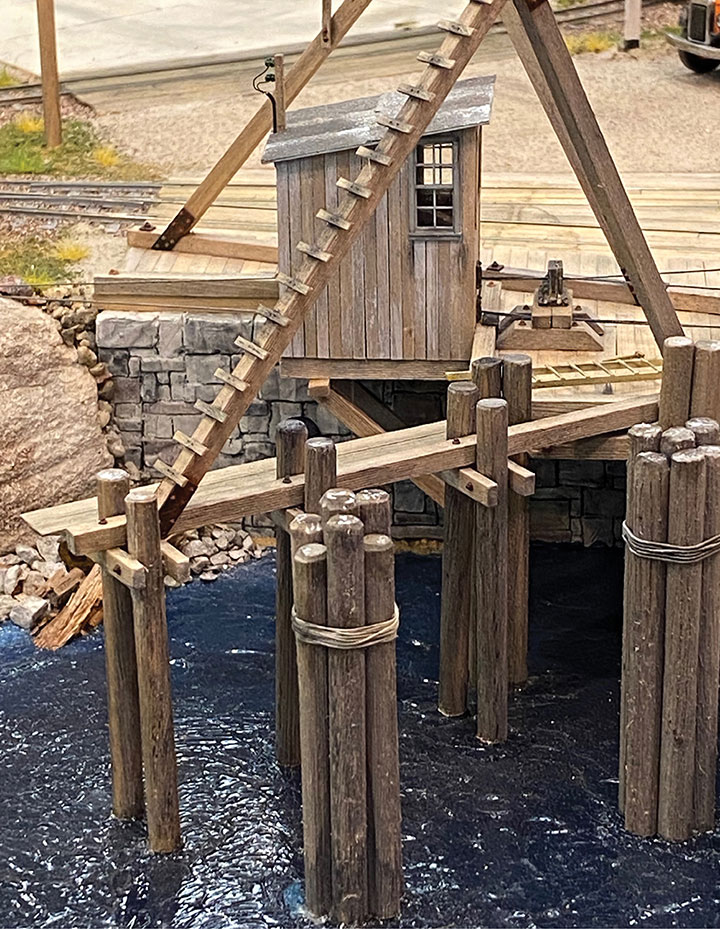
Due to the space issue, I mounted the operator’s shack on a pair of wooden beams cantilevered out from the pier. I envision a metal frame inside the shack on which the winches and electric motors would be mounted. Out of respect for Newton’s 3rd Law of Motion, two cables are attached to that frame and extend out the back of the shack to the shore where they are anchored to a concrete deadman.
To avoid sagging lines, I staged a scene on the dock where some stevedores are loading a truck and a large crate is suspended in the air and being guided by one of the men. I filled the crate with lead shot causing the lift line and the boom line to be under tension and thus taut. There is a third line which rotates the boom. This line enters the shack where it is attached to a clear monofilament line which loops over a dowel, drops through the floor of the shack, through a hole in the water and below the bench work where it is attached to a fishing weight. The line is partially obscured by two strategically placed pilings as it runs down to the water.
The derrick added a sense of activity and purpose to the wharf and compliments the overall waterfront scene.
In the next, and final article on the waterfront, I’ll discuss the watercraft and the wharf side industries.