The recent release by San Juan Models of their spectacular HOn3 Conoco tank cars was the inspiration for this project. I had been waiting years for these cars to become available in kit or ready-to-run form. With their delivery and integration into the operating scheme on my HOn3 Rio Grande Southern layout, it became apparent that I hadn’t built a single Conoco distributor for my layout. All I had was empty spurs with no structures. With that, I decided it was time to build some structures and I decided to start at Old Placerville.
Usually, it isn’t too hard to find prototype photos of facilities along the Rio Grande Southern Railroad, but when it comes to the petroleum industries along the spur at Old Placerville, I found none for when the RGS was in service. The best I could find were the later photos by Dell McCoy that are published in the RGS Story Vol. 1 (Sundance Publications). The next best source of information were plans drawn by Mike Blazek that are available from him directly (https://blazeksplan.com/) and also found in the RGS Story Vol. 1. These sources of information helped, but left me with a lot of questions about how the structures were oriented and there was no clear delineation of what structures were for the Conoco distributor and those for the Texaco distributor. In fact, the information makes it appear they were combined into a single facility. Knowing that some of these structures still exist, I looked to Google Earth to try to work out dimensions and locations. Unfortunately, the tree canopies and new houses in the area made it hard to determine which buildings were the remains of the petroleum distributors.
Being confused by the information I had, I reached out to my friend Tom Casper. He has travelled extensively through Colorado and recently shared some photos of the remaining structures. Tom provided me with some street view photos of the buildings that helped me match them up with the Google Earth satellite images. I had finally figured out how the buildings all related to each other.
The last question I had was whether the Continental Oil Company (Conoco) and Texaco Oil Company (Texaco) shared a distribution center at Old Placerville. It seemed odd that two competitors would combine forces. The way Mike Blazek’s plans appear, there is only one customer facing distributor building with loading docks and a large warehouse behind it. After studying the Dell McCoy pictures you can see what looks like a pump house and footings for two more tanks that are beside what Blazek refers to as a warehouse. I don’t know for sure, but I believe this building is probably a pumphouse and the tanks are actually for the Conoco distributor. The other building and tanks are the Texaco distributor. To me, this makes a lot more sense than a combined distributor.
With the research complete, I set about scratchbuilding both the Conoco distributor as well as the Texaco distributor. It was a big project and will take several issues of the GAZETTE to tell the story. I’ll start with the Conoco buildings, then move on to the Texaco buildings, and will finish with the tanks for both distributors and finishing the scene on my layout. I’d like to thank Tom Casper for helping me research this project.
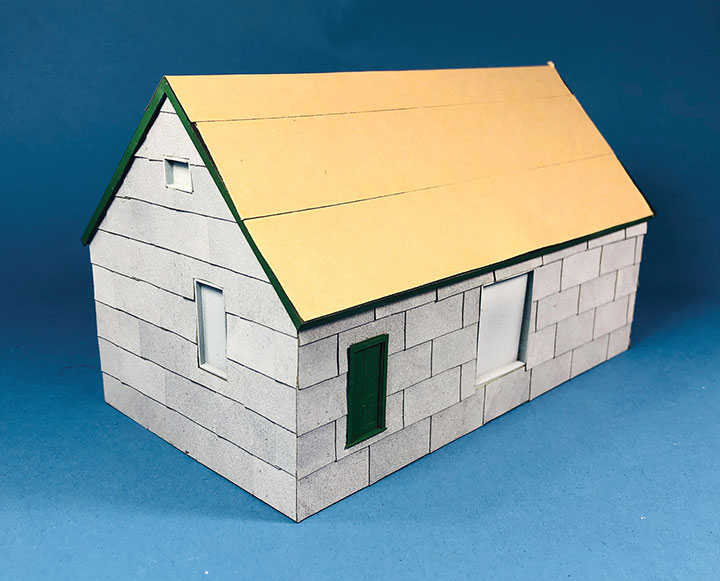
I scratchbuilt the Conoco buildings using styrene, 600 grit sandpaper, some plastic detail parts and Building and Structure Company corrugated panels. Follow along with me as I walk you step by step through their construction.
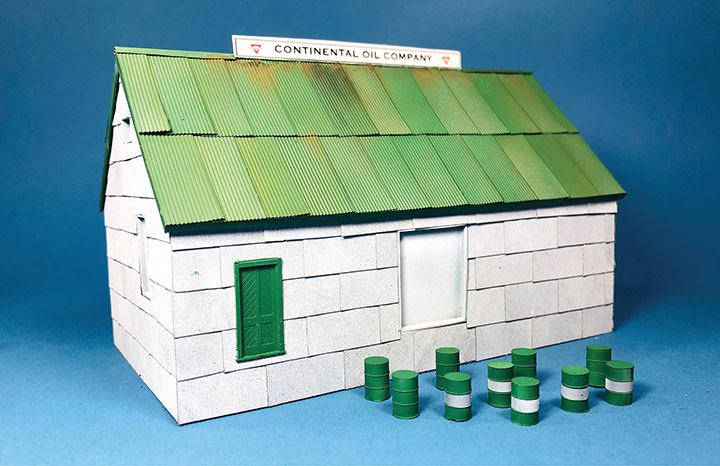
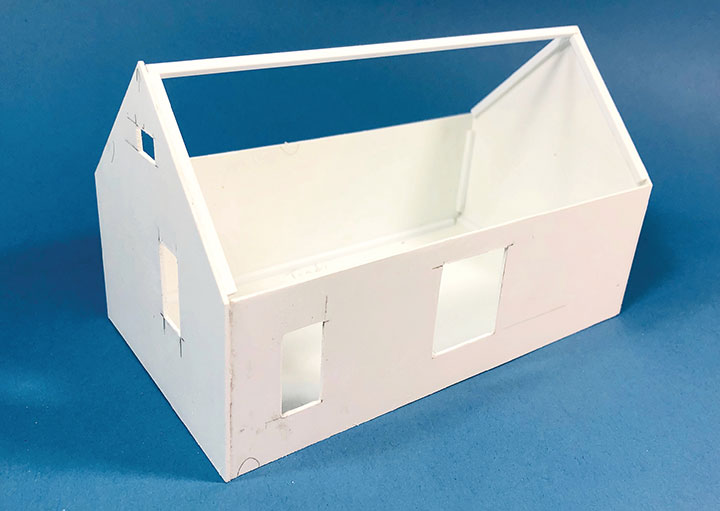
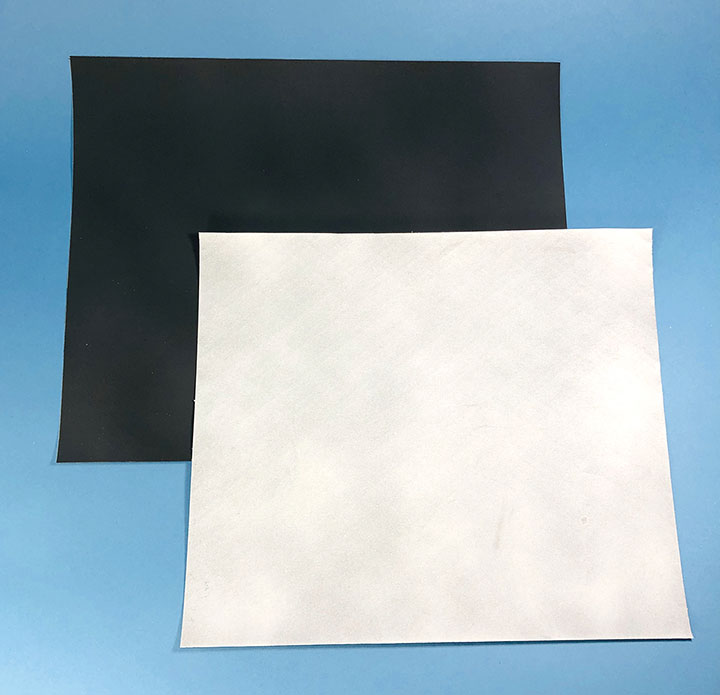
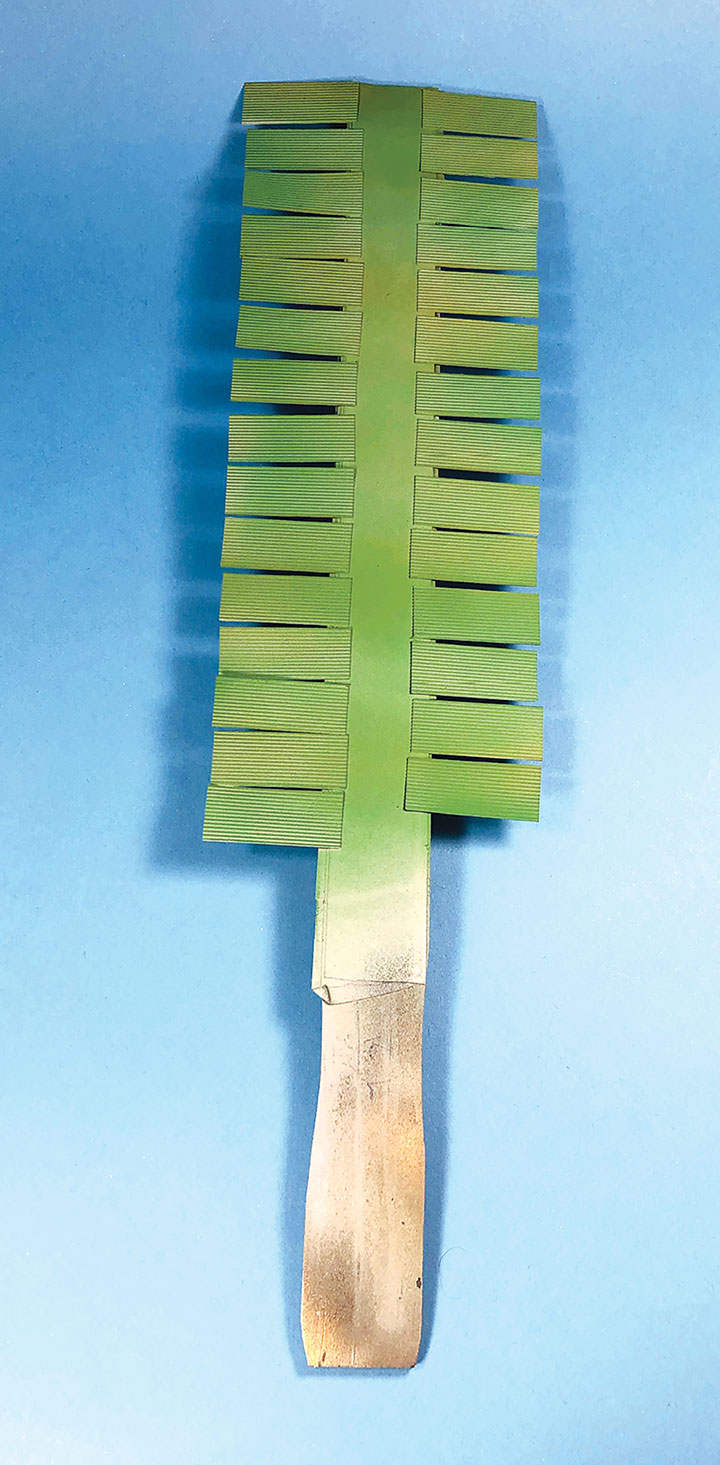
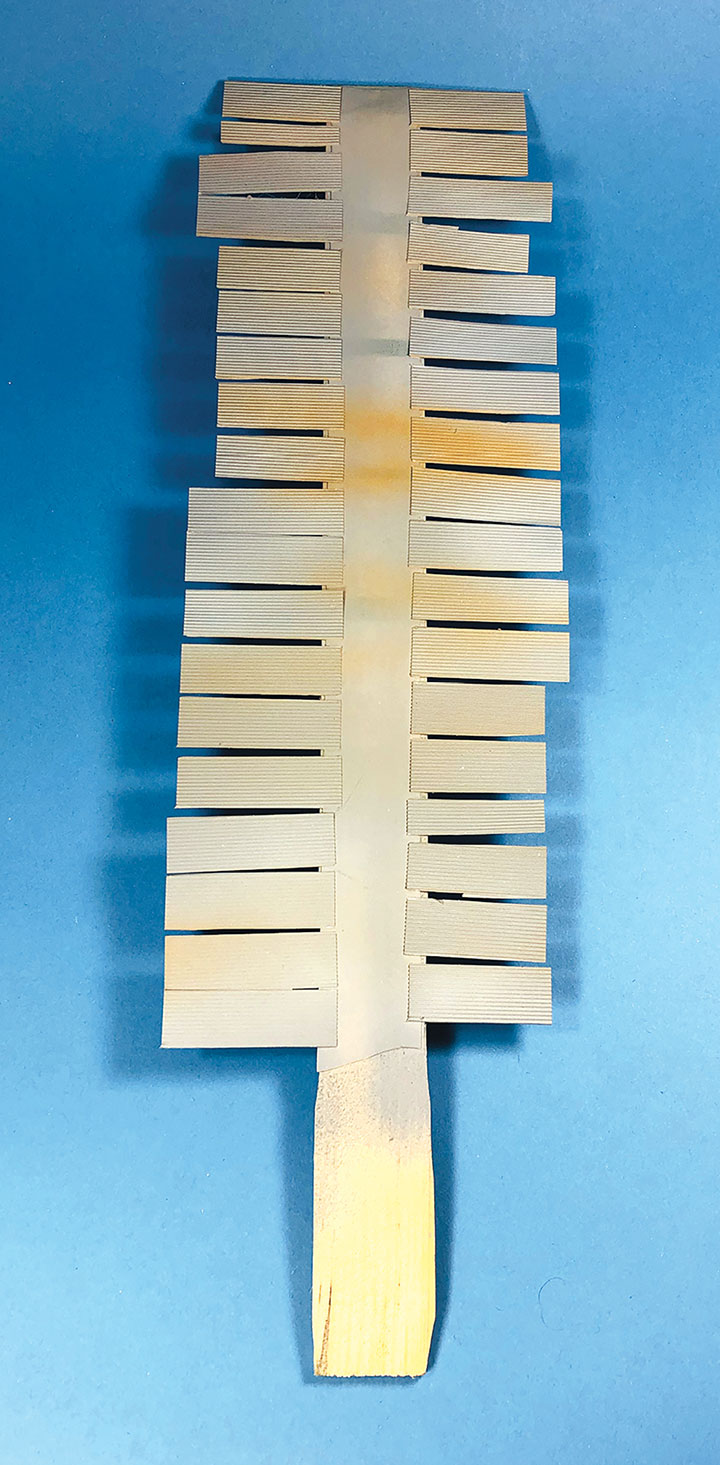
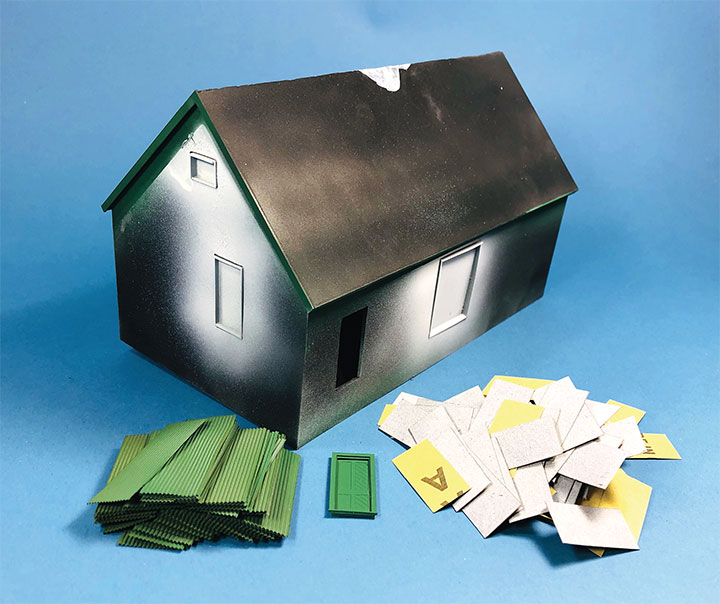
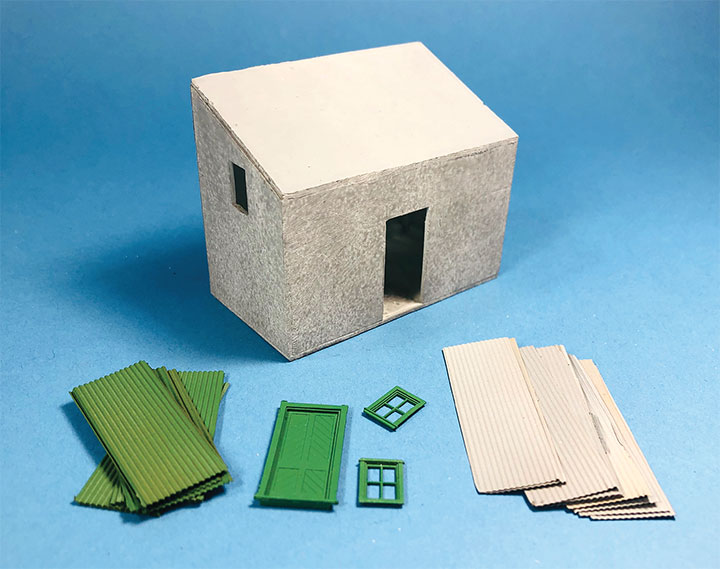
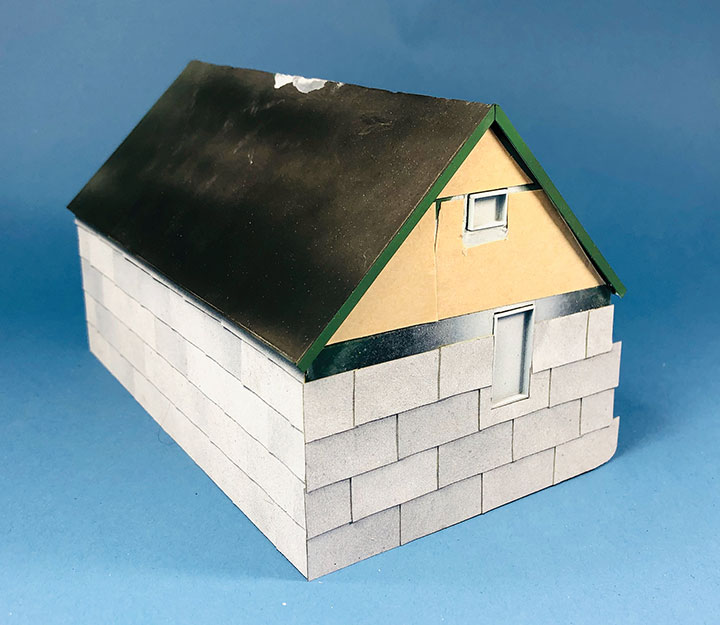
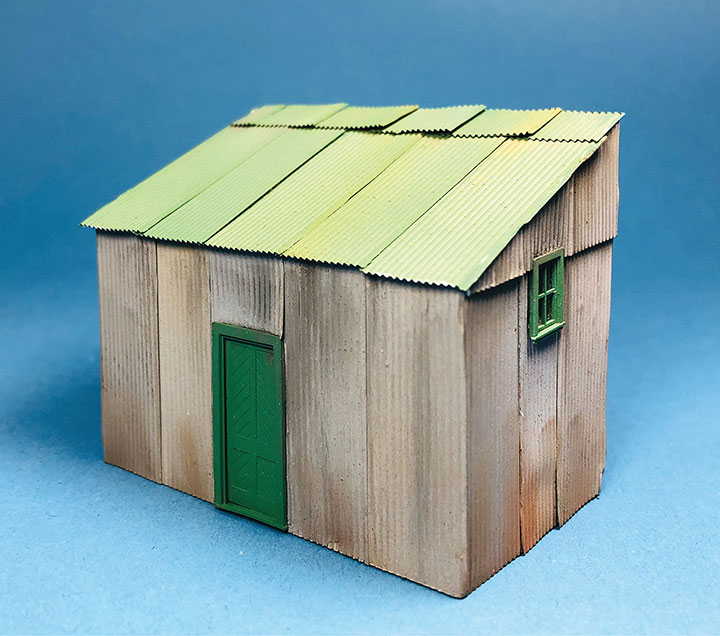
The completed distributor building along with some Conoco 55-gallon barrels. The sign was made on my computer and the barrels are Grandt Line #5041. Barrels in the era I model, approximately 1941, were color coded by the company. I couldn’t find any information on Conoco barrels but did find photos of old barrels matching the green that they used, so mine are painted based on an educated guess.Since this Conoco warehouse didn’t contain any windows, I only had to make a basic box. Using Mike Blazek’s drawings as a guide, I marked out the doors and boarded up openings on .040-inch styrene and cut these openings out before assembly. The man door is a Grandt Line #5058 Station Door with the transom removed. I made the boarded-up openings by framing square pieces of styrene with 2x8 styrene strips. I set the door and boarded-up openings aside to be installed later. To turn the flat walls into a 3-dimensional structure I glued the pieces together and reinforced the corners with .100- x .100-inch-square styrene.I didn’t have any plans for the pumphouse, so I used the other structures and some construction knowledge to come up with my own dimensions. I decided that a building 10 feet by 18 feet with a height of 10 and 14 feet scaled right so I created a styrene core for this building too. I can only see the backside and end wall of the building in the Dell McCoy photo. Grandt Line #5059 Outfit Car Windows matched the photo, so I added them to both ends. I assumed there would be a man door on the trackside, so I used a Grandt Line #5058 Station Door.Asphalt roofing is really easy to make using 600 grit sandpaper. The sandpaper I started with was a dark gray, almost black color. Using my airbrush, I misted random patterns of grimy black and flat black onto the sandpaper. This created a subtle, mottled color pattern. This photo doesn’t show it well, but it’s there. The warehouse building appears to be covered in sheets of an off-white asphalt material too. I took one of the sheets and randomly misted it with gray primer and white paint. The dark sandpaper in this photo became the roofing material for the Texaco buildings described in the next issue of the GAZETTE. The white was used on the outside of the Conoco warehouse.The McCoy photos are black and white and show a badly deteriorated warehouse building. I’d imagine that any paint that was on the roof was long gone. Doing some research on the Internet showed that early Conoco distributors sometimes had a green roof. I decided that a green roof was a reasonable assumption for the time frame I model and would also look good. I cut Buildings and Structure Company corrugated aluminum into four-foot-wide pieces and stuck the pieces to a paint stir stick using double stick tape. These pieces were sprayed with an automotive self-etching gray primer. I then lightly sprayed them with Humbrol #78 Green. This was followed with a dusting of rust colored paint. When I’m airbrushing structure parts I don’t try for a solid coat because that looks too fake in model form. Dusting on coats and getting a subtle mottled appearance looks slightly weathered and more realistic. You can see the airbrush strokes in the photo, but when the panels are then randomly applied, I find that I get a very pleasing weathered look that brings out the details in the panels.I sprayed all the wall material for the pumphouse and upcoming Texaco building the same as I did with the roofing material. After the gray self-etching primer dried, I dusted it with Floquil Gray Primer and rust colored paint.When I’m building a structure, I like to prepare all the components and assemble them like they are a kit. The core of the building has had all the roof trim and soffits painted in the green paint. The boarded-up openings have been painted white. Once again, I don’t put the paint on solid, but instead I dusted it on randomly to give the illusion of some weathering. The man door has been painted green. I cut the white sandpaper into 3½-foot wide strips. These strips were then cut into 7-foot-long pieces. I don’t know for sure what the covering on the building is in the photos, but to me it looks like pieces of rolled roofing applied so it appears as a series of panels. All the bits and pieces in this photo were used to finish the warehouse. It’s amazing how this ugly mess can look fantastic when put together.All of the pieces needed to create a pumphouse “kit” were assembled together. The door and windows were painted green. The corrugated panels were already painted and prepped.I discovered that the double stick tape that I use to attach small parts to a paint stick for airbrushing works great for applying siding. I covered the walls of the structure with this tape and incrementally removed the wax paper to reveal the adhesive as I clad each wall. The siding panels were applied in a running bond pattern. I used a sharp knife to cut the ends flush with the corners.All of the siding has been applied and the door installed. The roof is prepped for the corrugated metal by applying a covering of double stick tape.I used Pan Pastels to further weather the corrugated metal on the pumphouse to complete it. This view shows the trackside of the structure. The other side will get partly buried into the hillside on my layout.The backside of the warehouse lacks details. There were none seen in the photos or mentioned on Blazek’s plans. I’d guess that there were probably at least some windows, but that information is lost in time. These walls wouldn’t be seen on my layout, so I left them plain. To finish the structure, I created the sign on the roof following a photo of the Conoco distributor in Telluride. The Telluride building had a sign along the roof ridge advertising the business with small Conoco logos on each end. I created this sign on my computer using Microsoft Word and a Conoco logo that I downloaded off the internet. The sign was printed on photo paper. A layer of .010-inch styrene was sandwiched between two signs and glued to the roof peak, finishing this structure.