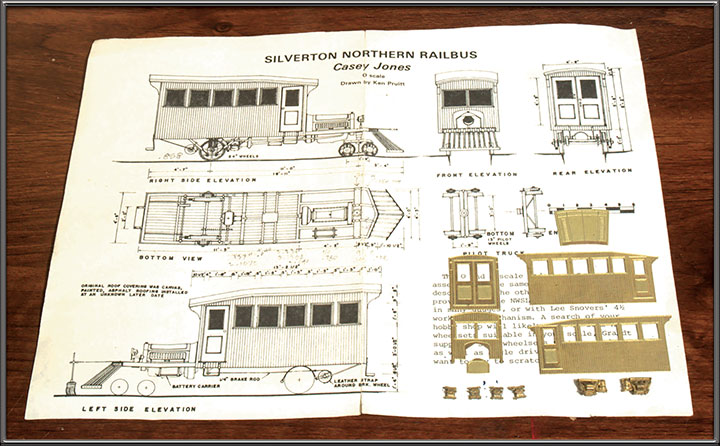
To the delight of railbus fans, Bob Sloan made scale HO, S and O brass etchings of the Silverton Northern’s Casey Jones railbus way back in the mid-seventies. You might find a set at the Narrow Gauge Convention this September in the Tacoma Seattle area. Dan Pyzel had two sets of Bob’s etchings in S scale, and Dan started asking me to help him create a model of Casey Jones. He assumed that since I had nine RGS Galloping Geese, that I might be amenable to the challenge. While I had done extensive re-motoring to make the geese run as well as our best S scale locomotives, I did not have the brass scratchbuilding skills of my friend and professional model builder, Kelley Morris, so I sent the etchings straight to him. I asked Kelley to build a Casey Jones starting with the Robert Sloan etchings.
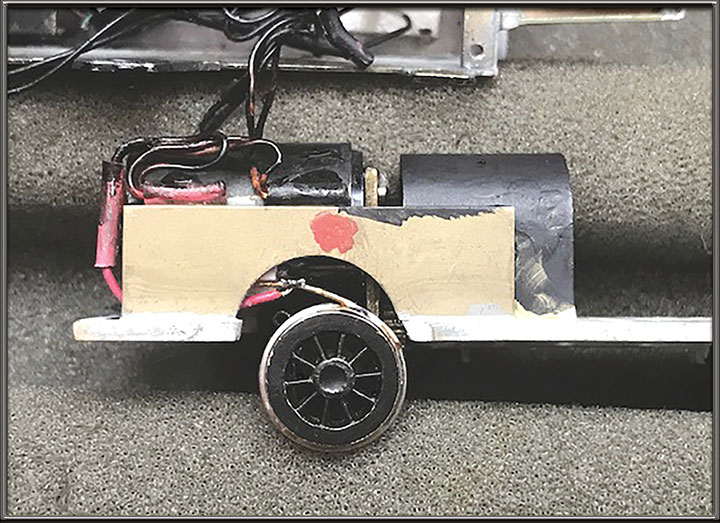
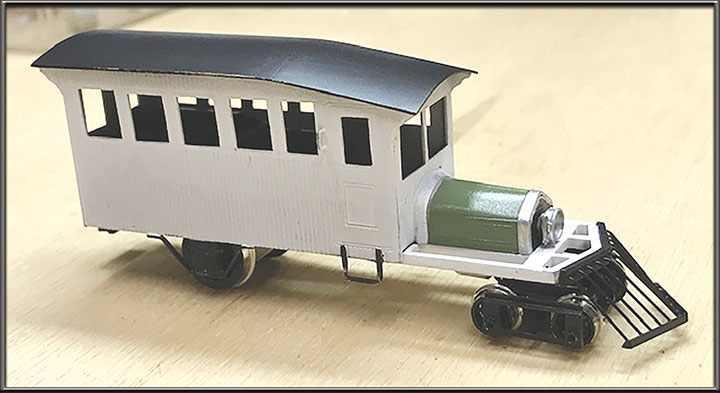
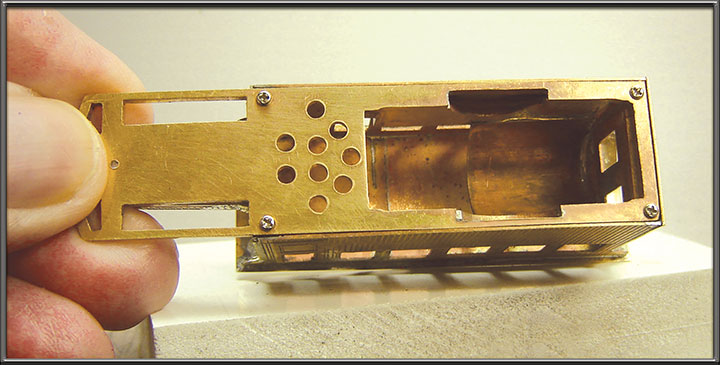
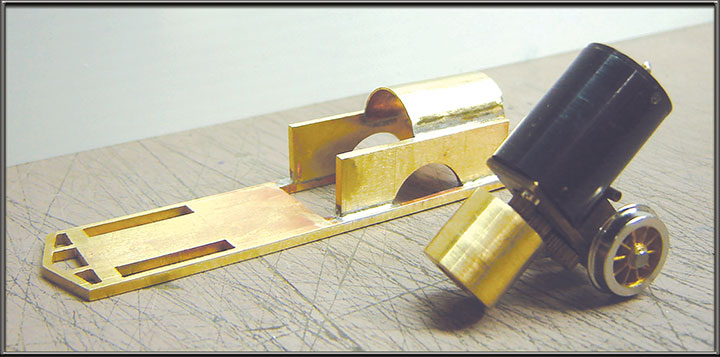
As Kelley describes it, the etchings come as one sheet which required cutting out the parts. The rest of the railbus needed to be scratchbuilt part by part. I deviated from the instructions in two areas—I made the cowl from a solid piece of 1/8-inch-thick brass, and the roof from one piece of pre-rolled .020-inch sheet brass, cut laterally at the proper spots in two parallel cuts and then soldered. This created a more prototypical bend than a single joint would have. The frame is all scratchbuilt from one piece of brass plate, with appropriate cut-outs for the engine compartment, speaker, and motor mount areas. Holes were drilled in the window areas and a 2/0 jewelers saw was fed through the hole to do the cut-outs. The saw cuts were then filed to exact shapes and dimensions with needle files. A sheet hoop was added to the motor mount strengtheners to create the motor cradle. Upon completion, a NWSL HO flea (regauged to Sn3) with flywheel was siliconed lightly into this cradle and became the entire rear suspension. The rear journals and braces were added to the outside frame strap.
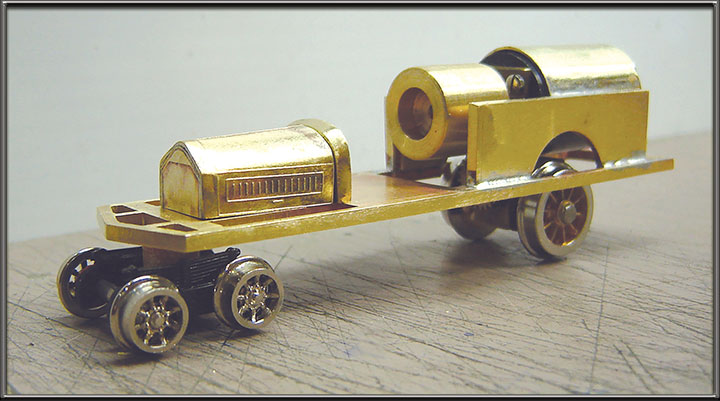
The front truck started as a P-B-L piece, heavily modified with the proper outside journals and frame as seen on Casey. A cored phenolic pedestal elevates the body to the correct height, and provides insulation from the frame. Incidentally, both front and rear wheels are goose wheels as close as could be found. The hand grabs, pilot and stirrups are made from wire, angle, and strip.
At this point, I gave the model to Bill for adding electrical parts and paint and weathering.
As Bill describes it, he painted and weathered the model and added the electrical parts. After the body was fully masked and painted, Bill wrapped the body with foam (taped on) to save the paint job from being marred by the wiring process.
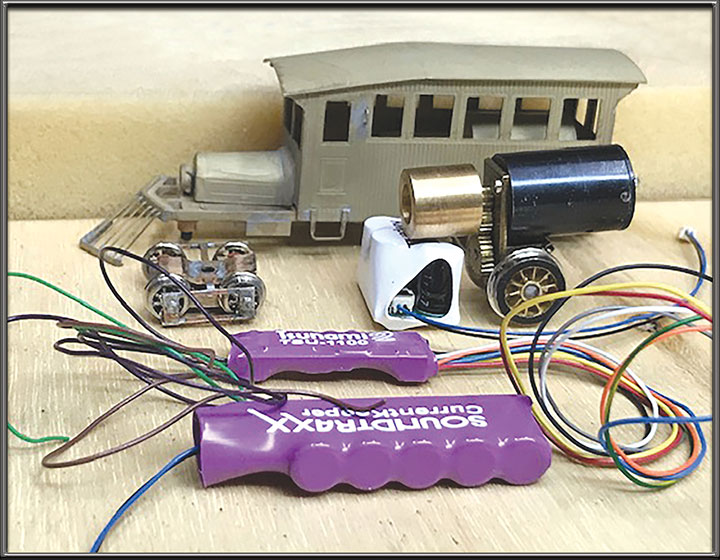
Filling the inside of Casey was like stuffing 21 clowns into a Pinto. A sugar cube speaker from Larry Close helped a lot, along with the Tsunami Baldwin decoder. But the real challenge was getting enough capacitor storage in a small enough size to fit in the body. I tried custom Keep-Alives with multiple capacitors, but working around the flywheel was an additional problem. (Flywheels were used in my three truck geese as a mechanical version of a Keep-Alive). The final Keep-Alive choice, seen in the photo of the component choices was a TCS KA1. It is thin and long so it will fit next to the decoder on the inside of Casey’s roof. The last hurdle was to make wipers for electrical pickup.
All my geese have some form of phosphor-bronze wipers. But that didn’t end the problem, because Casey has outside frames instead of inside frames on the front truck, relegating Casey to only two pick-ups on the drive wheels. (Having front truck electrical wipers truly saved my scratchbuilt #1 goose as I described in the July/August 2015 GAZETTE.) As the operational abilities of Casey were being tested, a serious case of cough and buck on starting was encountered. I finally realized that Casey had to sit and idle for 30 to 45 seconds to fill up the capacitor, and then it would run well. It turns out, that all capacitors need to be filled up like gas tanks. The take-away about Keep-Alives, is that the initial stall problem is most evident in small railbuses and two truck geared locomotives. Locomotives with at least three drive axles and a tender have enough pick-ups to usually avoid this problem.
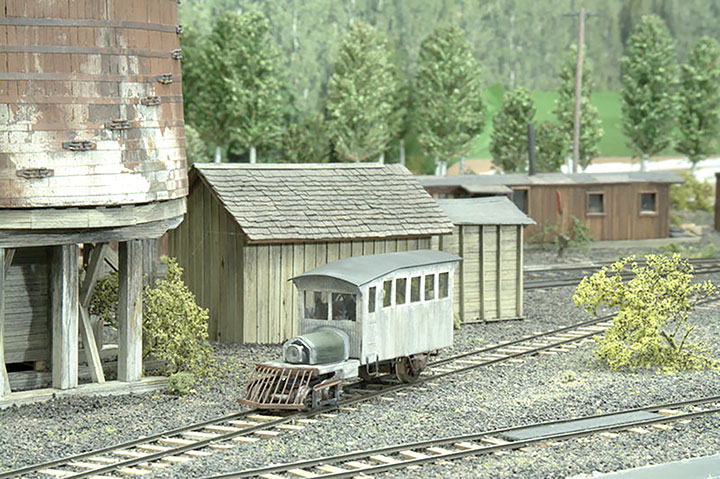
I’m not a seasoned paint master, but Green Frog masking tape saved me. And Pan Pastel weathering chalks took away the toy look for Casey.
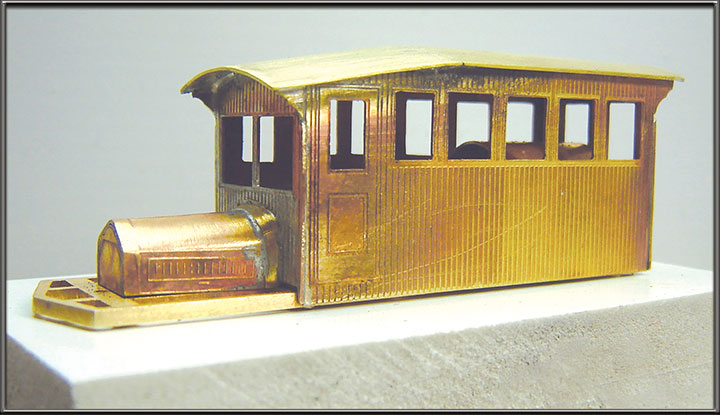
The result is a Tsunami decoder-controlled Casey Jones with sound and a working headlight. Right now, Dan has a one-off version, but he has another set of etchings, and, we know how modelers tend to be packrats, there must be more Bob Sloan etchings out there on modelers’ shelves. Now that you’ve seen how, somebody needs to make the second model of Casey Jones. This was a long, but satisfying project, and now Dan has his Casey Jones!