The depot is probably one of the most interesting and recognizable of any railroad structure. Even the smallest town was proud to have a depot, showing it was important enough to be a stop on the railroad. They were variously known as depots, stations, or telegraph offices, but from the smallest to the largest they were the center of activity during the Golden Era of railroads.
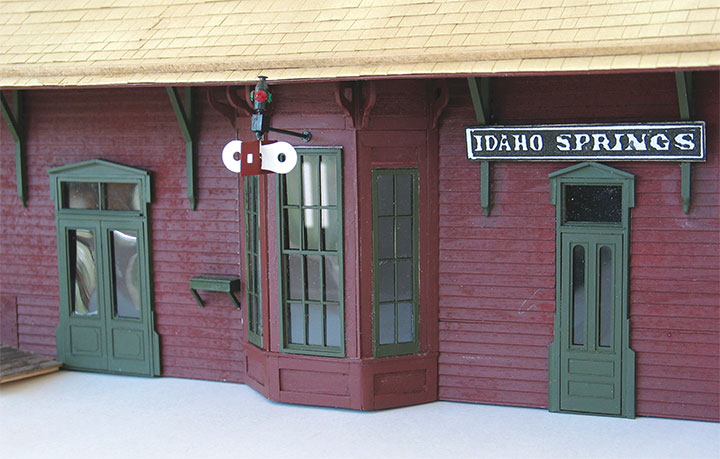
Those of us who model the Colorado and Southern owe a debt of gratitude to Harry Brunk for his GAZETTE series, Up Clear Creek on the Narrow Gauge. One of the articles in his series which appeared in the May/June 1983 issue featured the Idaho Springs depot. It isn’t fancy or ornate, but its classic style appealed to me, and I wanted to model it.
I enlarged his drawings of the depot to ¼-inch scale, and it quickly became apparent this was a large building, especially for narrow gauge. More importantly, there were no commercial castings available to duplicate the unique style of the doors, windows, and eave braces. I reluctantly shelved the plans and went on to other projects. I looked at them occasionally through the years but didn’t see an easy way to get what I needed to duplicate those details.
I recently decided I needed that particular depot for my growing town, and it was time to figure out how to get those missing details. Grandt Line now had beautiful castings for the basic style doors I needed, although I would have to add trim to match the prototype. The windows were the major problem, as no castings came close to what I needed. I noticed that the masonry double-hung window had the right number of panes and was the right width, but was much too long. My solution was to cut a row of panes out of the top and bottom of the window, as shown in the photos.
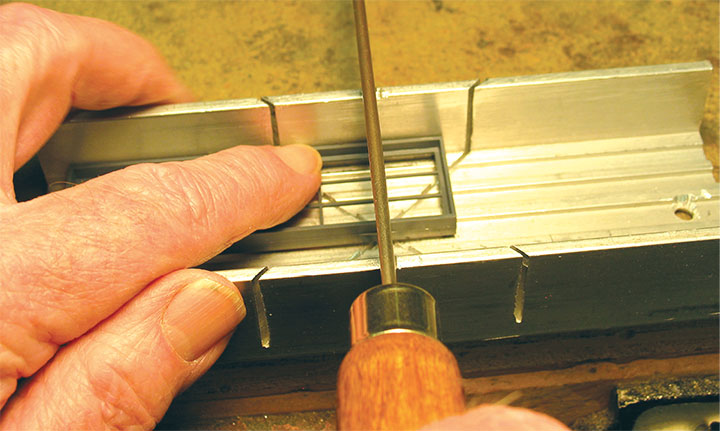
I put a new sharp blade in my Zona saw and carefully cut out sections, then glued the castings back together. It was tedious, but I managed to do it without breaking any of the fragile pieces. I used Bondene plastic cement from Plastistruct to glue everything together and the resulting windows are very solid. Because the castings are meant for a masonry building, the window frames are a little too deep for a wood structure. I didn’t intend to detail the interior, so this didn’t bother me.
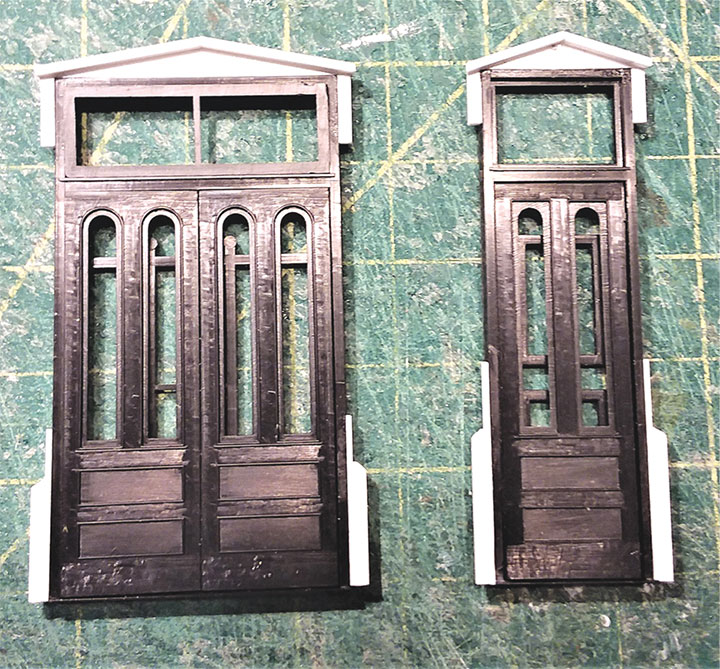
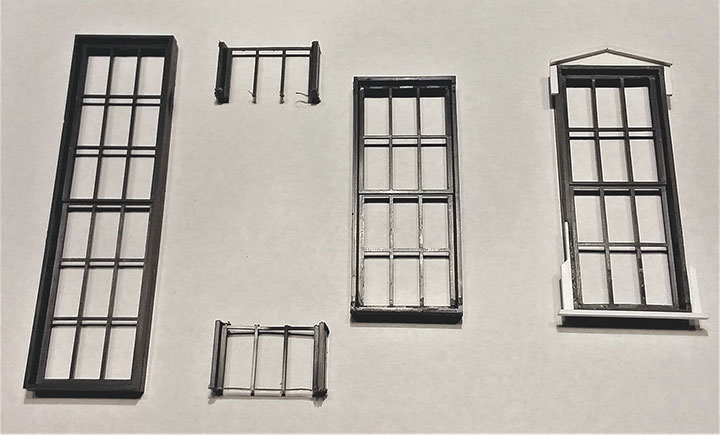
Now that I had everything I needed, I had to add the trim to the windows and doors. I used Evergreen styrene for this, as shown in the photos. I also used styrene strips to fabricate the eave braces. I thought about making a pattern and casting copies, but I didn’t want to buy mold rubber and resin for such a small project. I made a simple fixture out of basswood and straight pins, which worked very well.

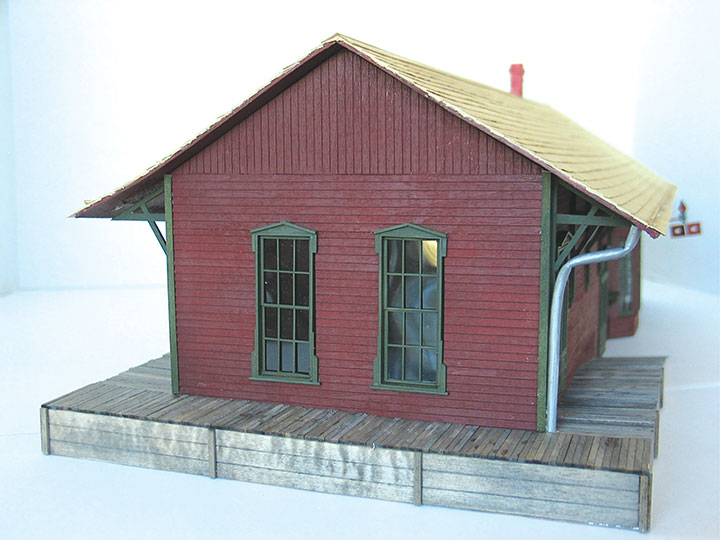
The building is NorthEastern clapboard siding with interior bracing, and the roof is artists’ illustration board with Grandt Line shingles. The bay was the most difficult part of the building, consisting of wood, styrene, and Grandt Line castings. I debated about spending so much time building the bay because it won’t be seen when the depot is in position on the layout, but I enjoyed the challenge.
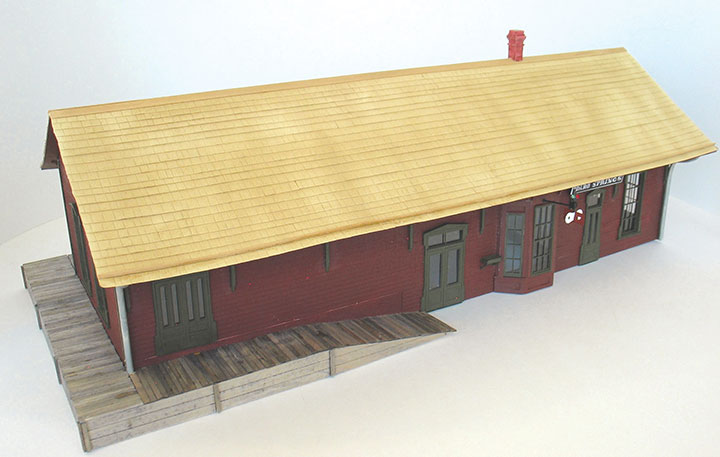

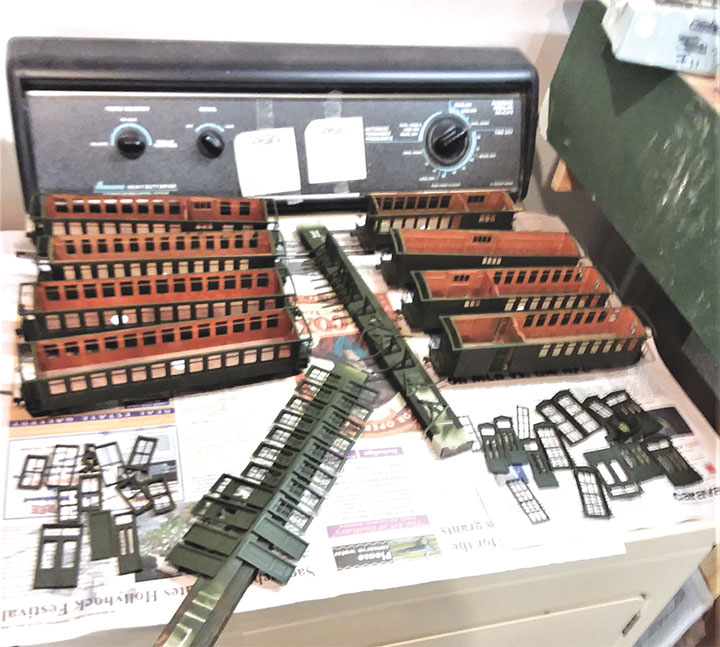
The depot was too long to assemble on my workbench, so I used the largest flat surfaces that were available— the tops of the washer and dryer, now known as auxiliary workbenches. Once assembled, it was too long to fit into my spray booth, so painting it took a little juggling.
While writing this article, I realized just how much I like depots. The Idaho Springs depot will make the 9th depot on my CC&S. The layout occupies most of the basement, so the various depots are well spread out, but I think this will be the last one. Probably.
Depots on the Colorado Central and Southern: