In the previous issue of the GAZETTE, I described how I built an HO model of the Conoco distributor buildings at Old Placerville, Colorado. I’ll continue this story of the petroleum distributors at Old Placerville by describing how I built a model of the Texaco distributor. I’ll conclude this series in the next issue by describing how I built the tanks and put the scene together.
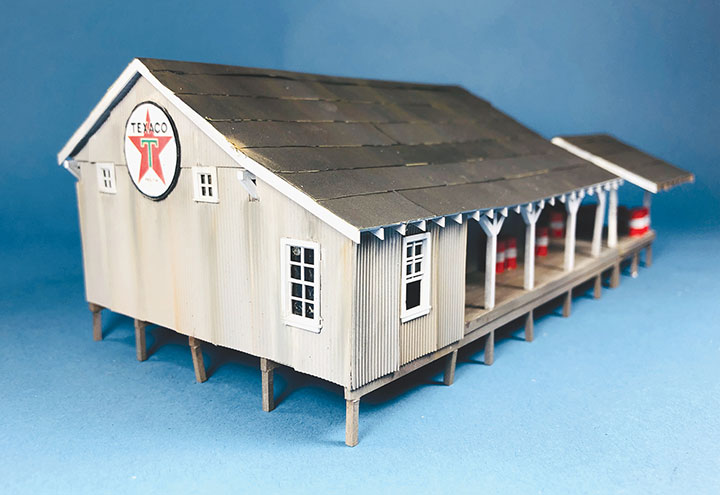
I used photos that Tom Casper supplied of the remaining buildings of the Texaco dealership, Mike Blazek’s plans and the photos in the RGS Story (Sundance Publications) as reference material for this project. I have not found a single photo of this building while the Rio Grande Southern was in service, so I had to make some educated guesses based on the later reference material. Follow along with me as I describe how I built this structure.
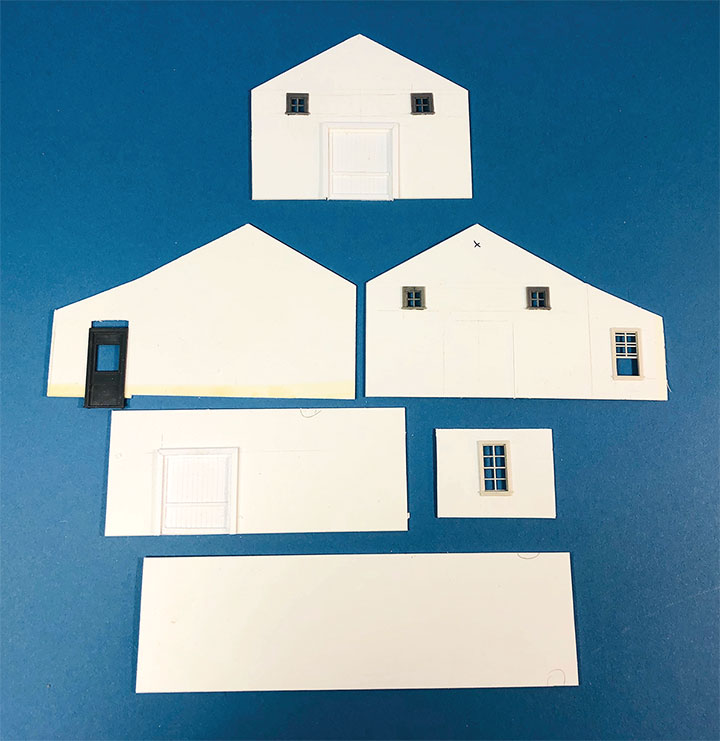
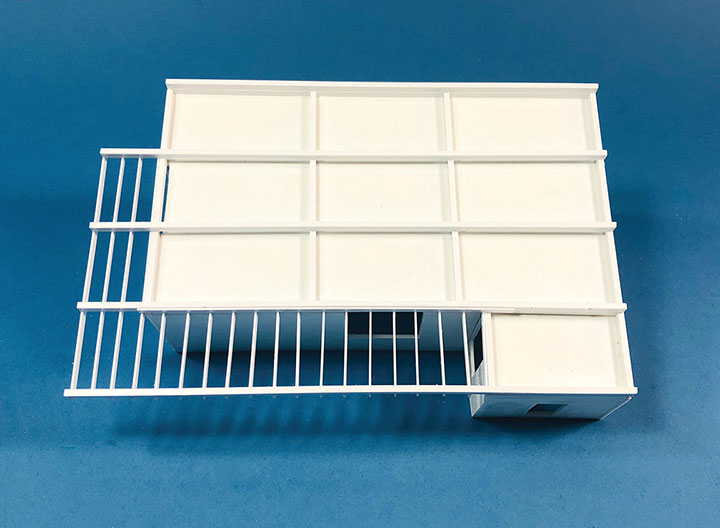
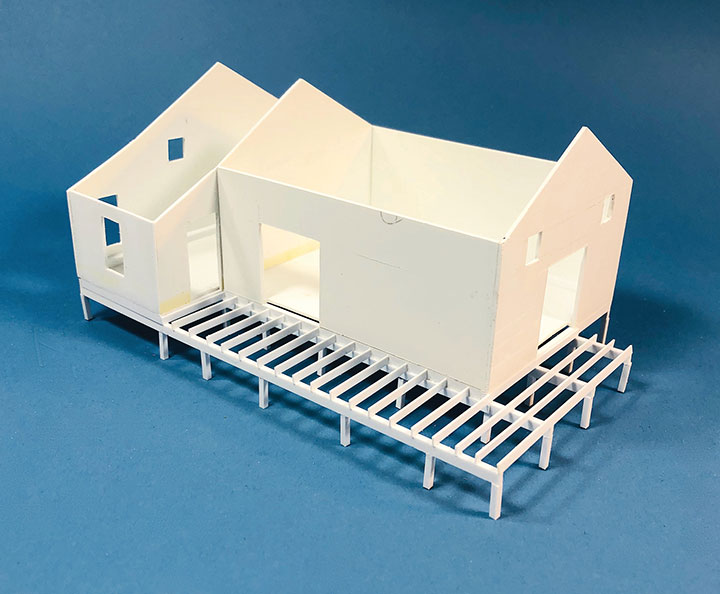
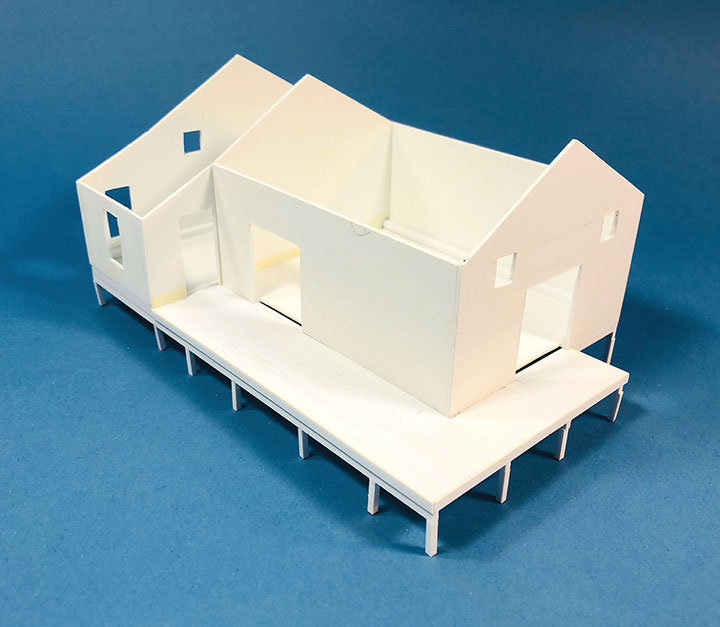
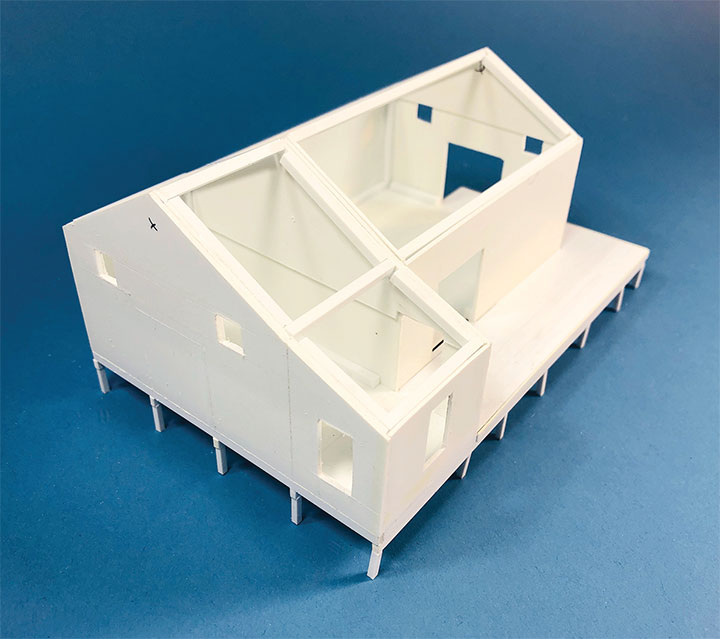
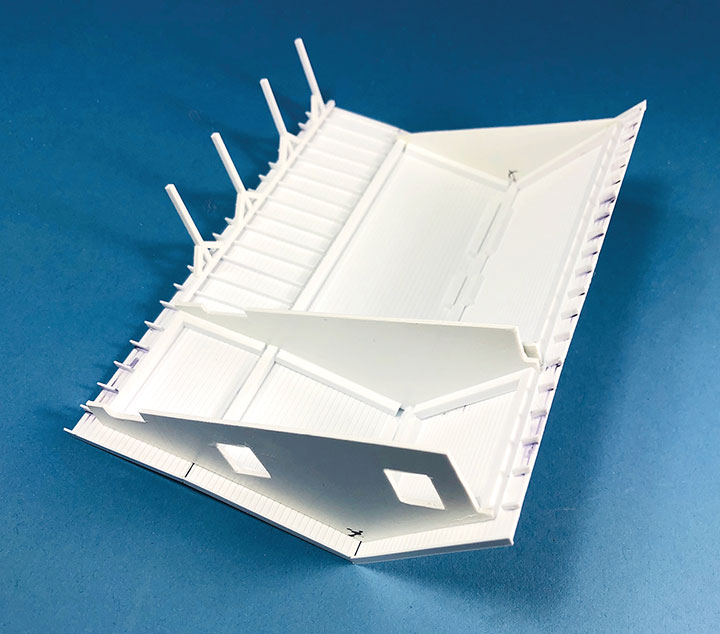
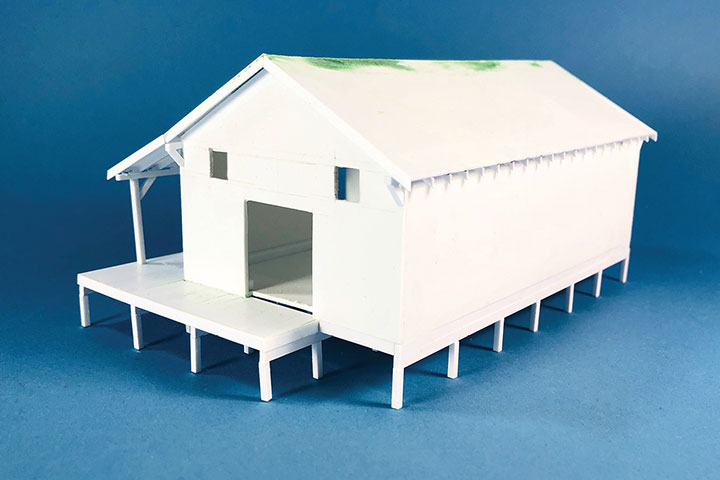
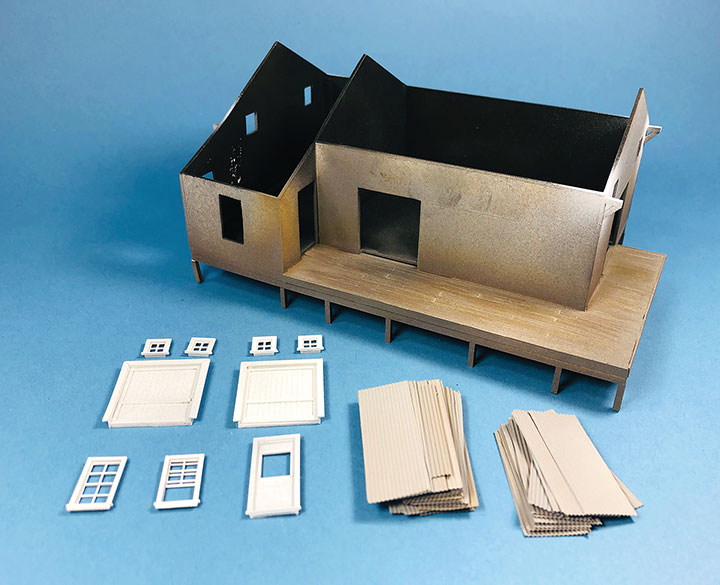
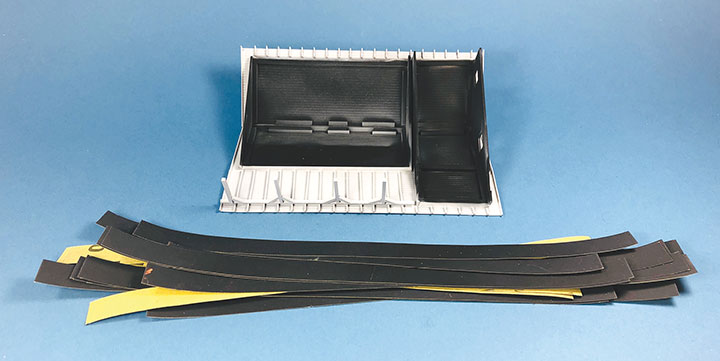
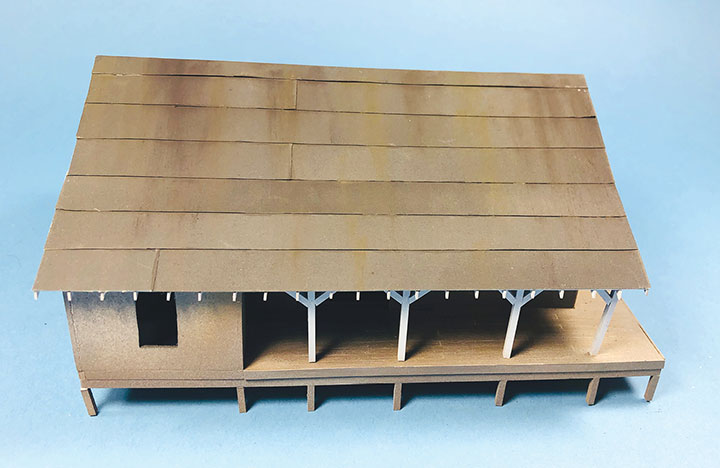
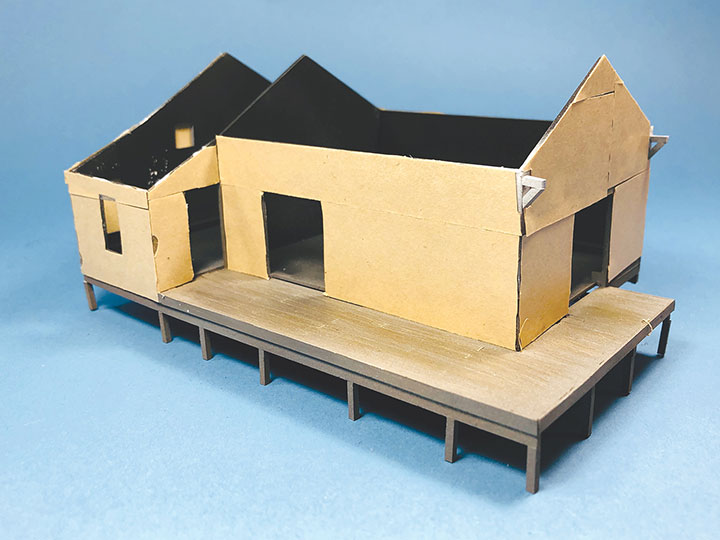
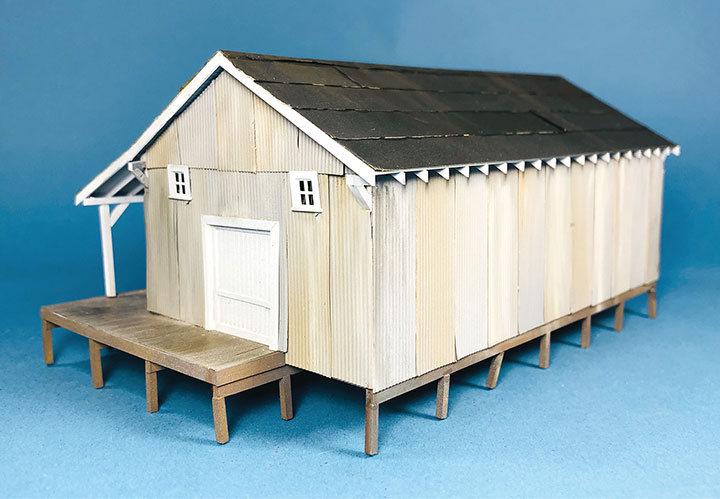
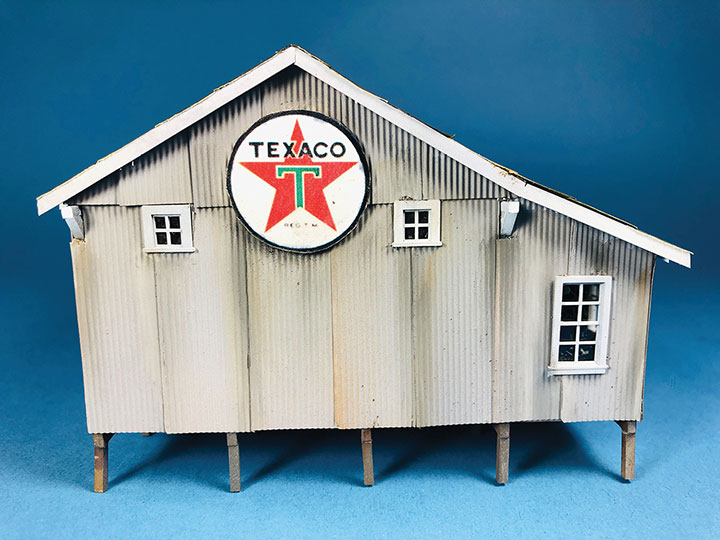
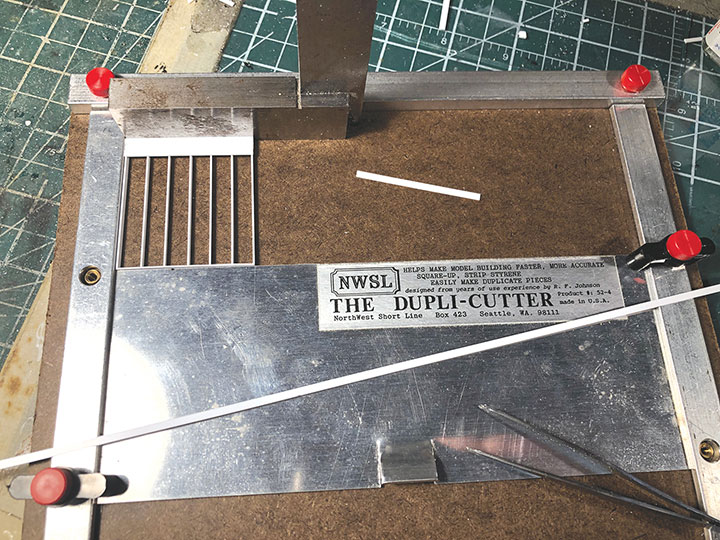
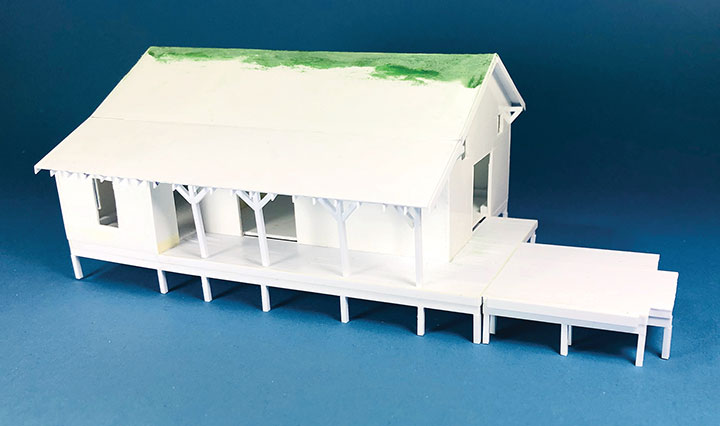
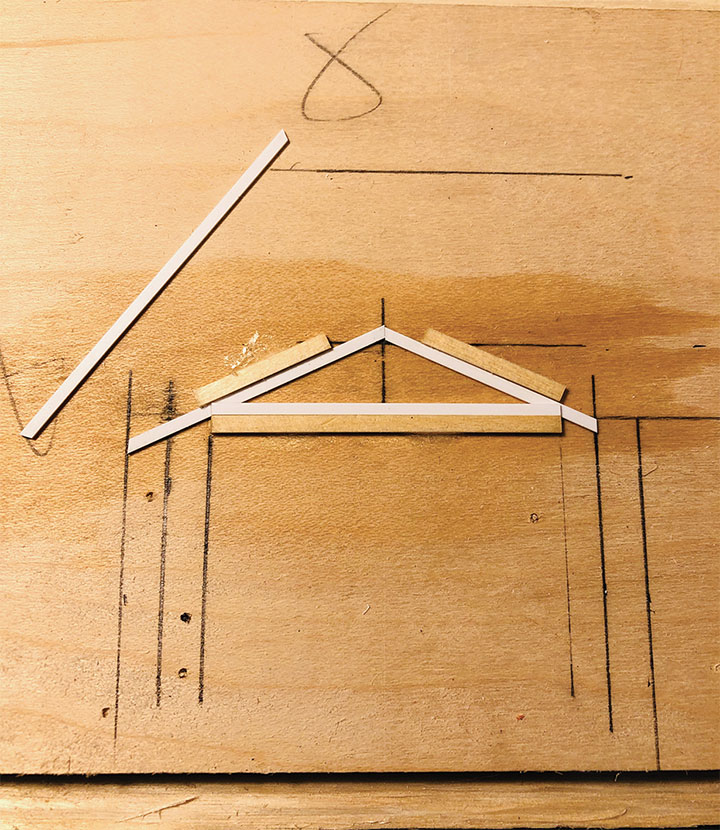
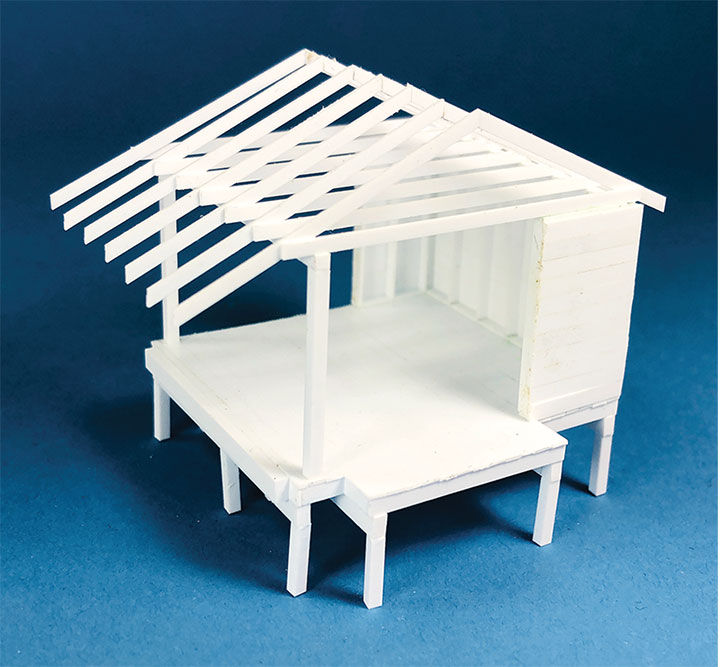
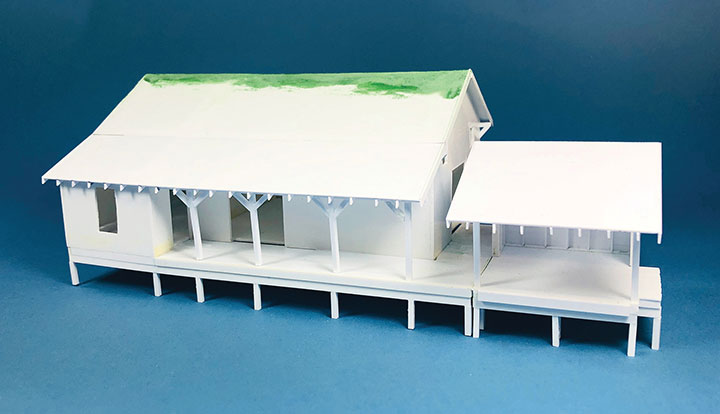
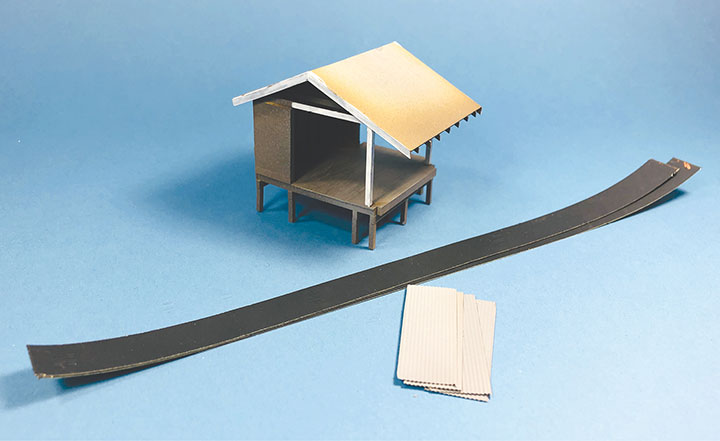
With a complicated structure like this one, I like to build all the walls on the flat. This makes it a lot easier for marking and cutting the openings from .040-inch styrene. I scratchbuilt the two loading doors from Evergreen #4060 V-groove material with 2x6 and 2x4 framing. The loading door frames were made from 2x8 material with 2x6 trim. The small windows on both ends of the building are Grandt Line #5241 and the two larger windows are Micro Engineering #80-067. The man door is a Grandt Line #5292. The walls were assembled with .100-inch-square styrene corner braces.To stiffen the floor and add timbers that would be seen from the sides, I added 6x10 floor beams. I then added 2x8 joists for the loading dock framing. This probably will never be seen, but I know it’s there, so I added them anyway. The individual boards also create some slight irregularities to the soon to be installed decking that creates a more realistic look after painting.6x6 posts have been added to the underside of the floor beams and the structure is starting to take shape.I’ve added 2x8 decking to the loading dock. The lengths are no longer than 16 feet and the joints are staggered over the joists following common construction practices. The loading dock edge is trimmed in 2x10 material. I know that it would have been a lot easier to use grooved sheet styrene, but I find that the texture of the individual boards looks so much better than the perfect look of sheet material.The underside of the roof shows the gable end panels and .125-inch framing that was wedged inside the walls. The roof panels are made from Evergreen #2060 V-groove with the groves on the underside to make the soffits look like there is individual boards for the roof decking. I framed the end fascia with 2x6 material and added 2x6 rafter tails to the roof edges. I also added a 6x10 beam and 6x6 posts to the overhang above the loading dock.I find that scratchbuilding roofs is tricky. I like to make them removable so that I can paint the building in sub-assemblies. This makes painting much easier and eliminates a lot of masking. For this roof I cut .040-inch styrene triangles to a press fit within the gable ends. I then used .125-inch-square styrene to frame in the roof and create a substructure for the roof sheeting to glue to. I was very careful not to allow glue to seep onto the wall sections and accidentally glue these roof substructure assemblies in place. With this structure I ended up with a removable roof framing section for the warehouse end and another on the office end. Once this was done, I carefully glued the roof sheeting to this framing. If done right, lifting the roof panels off brings all this framing with the sheets and creates a roof that “plugs” inside the walls of the structure. This is my usual technique for making roofs.I puttied the peak of the roof to give it a crisper edge, 6x6 braces were added to the end walls and the model was ready for paint.I painted all the bits and pieces for the warehouse and prepped them for assembly. The corrugated wall panels were painted and weathered in preparation for installation (described in the previous GAZETTE). The windows and doors were painted white and window glazing added. The end roof braces were also painted white. The loading dock and floor framing were painted in various mists of brown and gray paints. Between each coat, the paint was scratched with a P-B-L scratch tool. The result is a weathered wood look. Since I didn’t intend to detail the interior, I painted it black to hide it from being viewed through the windows.The roof pieces are painted separately and ready for assembly in this photo. I painted the underside of the roof edges and posts with white paint. I misted it using my airbrush to give it a weathered look. The interior of the roof was painted black. 600 grit sandpaper was painted (described in the previous GAZETTE), then was cut into 3½-foot-wide strips to represent rolled roofing.In my college years I worked as a roofer to pay for school (and trains) and have installed a couple real rolled roofs, unfortunately I’m well-schooled in how this is done. I installed the roof core on the building walls to make the roofing installation easier. Starting at the roof’s bottom edge, I applied the sandpaper following the prototype techniques and let the joints fall where they naturally occurred. Each row was overlapped slightly until I reached the peak. Once the simulated asphalt material was applied, I used a fine brush to paint black along the joints. This didn’t need to be neat because the real roofing isn’t. The black is the tar oozing from out of the joint. When I was done, I weathered the roof with some Bragdon chalks to make it look less uniform.The walls were covered in double stick tape. I removed the protective wax paper as I installed the corrugated metal on each wall.This is the backside of the Texaco Distributor and the side that faces the RGS tracks. After the corrugated metal was applied, I weathered it with Pan Pastels. The windows and doors were also installed at this time.Another view of the structure showing the street and customer facing side of the building.I downloaded a period correct sign from the internet and printed it on photo paper in various sizes. I then picked the size that I thought looked best, and cut out the disk for the logo. The real signs were often porcelain signs in that era and would have a shiny surface, so the photo paper was ideal. I used a black sharpie to turn the edge of the paper black and glued it to the building using Pliobond.There was a loading dock attached to the main warehouse building. It was a simple stick frame construction building that I simulated using dimensional styrene pieces. To keep the subassemblies square, I setup a jig in my NWSL Dupli-Cutter.The loading dock floor was made with 2x8 framing and decking that was built over 6x10 beams and 6x6 posts. In this photo, I was checking to make sure it meshed properly with the warehouse deck. The photos of the prototype suggest that this loading dock was a later addition.Photos of the loading dock show that the interior framing is wide open to view. I decided that it would be best to make a jig so that all the trusses would be identical. I made these trusses from 2x6 material.I made the loading dock walls from 2x6 material covered in 2x8 sheathing. The posts and beams are 6x6 material. Once the walls and beam were installed, I glued my trusses in place.With the structure of the loading dock complete, I test fit it one more time. The prototype photos show that the roof lines are nearly identical, so I wanted to make sure this looked right.I painted the loading dock using various brown and gray paints to make the white styrene look like weathered wood. I then painted the fascia, posts and select beams in white paint. This matched what I could see in the prototype photos. Corrugated metal siding and rolled roofing were selected for cladding the structure.The siding and roofing were applied using double stick tape. Once done, it looked really bare, so I painted some Grandt Line #5041 55-gallon barrels in Texaco colors to fill the loading dock. This structure will get permanently glued to the warehouse when they are both installed on my layout.