Modeling plywood sheathing has intrigued me since reading Bob Hayden’s article in the January/February 2010 GAZETTE about his boxcar scratch-bashing projects. Following Bob’s article, I tried modeling a boxcar in On30 (see sidebar), as it seemed an appropriate upgrade approach for my frugal Appalachian short line.
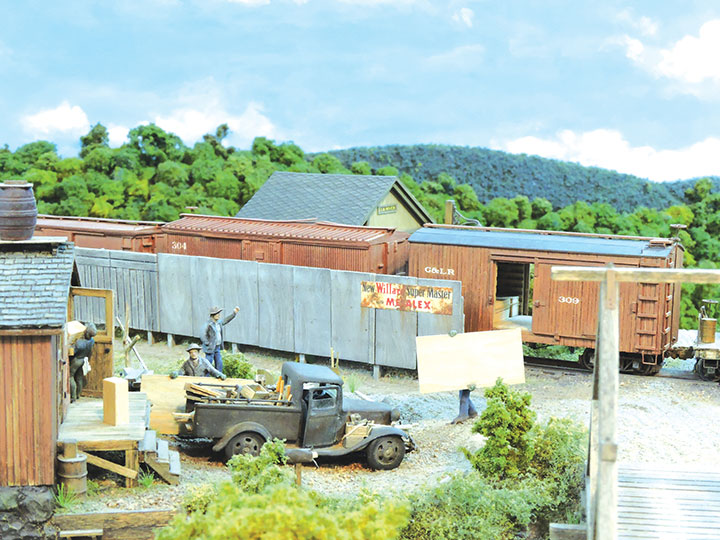
As with the weathered fence extension along the G&LR right-of-way near the Elk River station, sheets of plywood will be used to upgrade a portion of Ridley’s Mill interior.
And because I also model Maine in HOn30, I wanted to try a few variations in producing and coloring styrene to see if panels with texture and coloring could be replicated for a variety of structure projects as well. I had previously tried simulating plywood with cardboard, as described in Fine Scale Miniatures kit fashion, but didn’t obtain results that replicated it realistically enough.
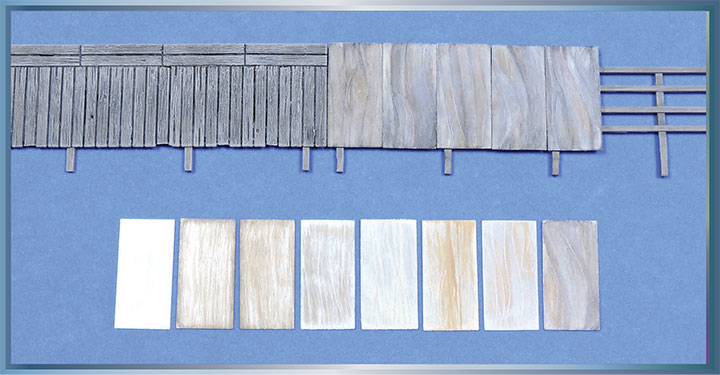
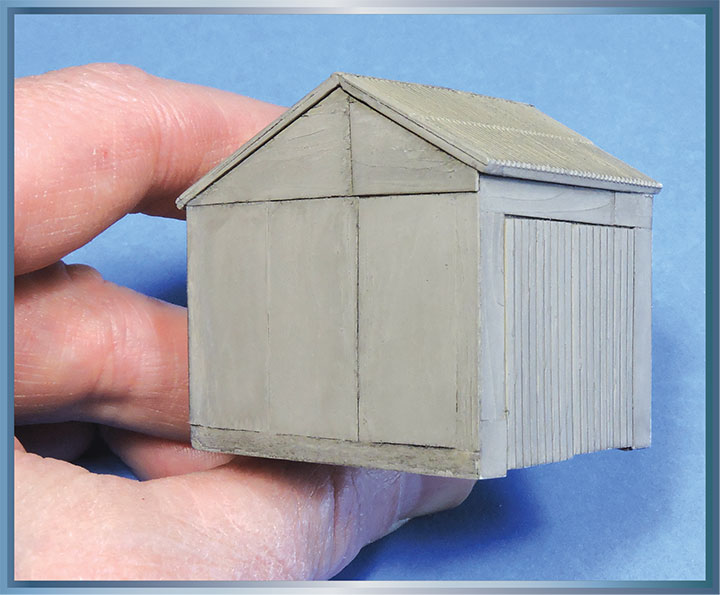
For HO, Evergreen 0.015-inch sheet styrene (9015) works well to simulate nominally scale 1-inch-thick plywood. After cutting the panels to scale 4- by 8-foot dimensions, I sand, scribe, paint, drybrush, and stain them to look like new or weathered panels. Construction and finishing steps for a couple of structure projects are illustrated in the following step-by-step photos and captions (and could be used for rolling stock sheathing as well).
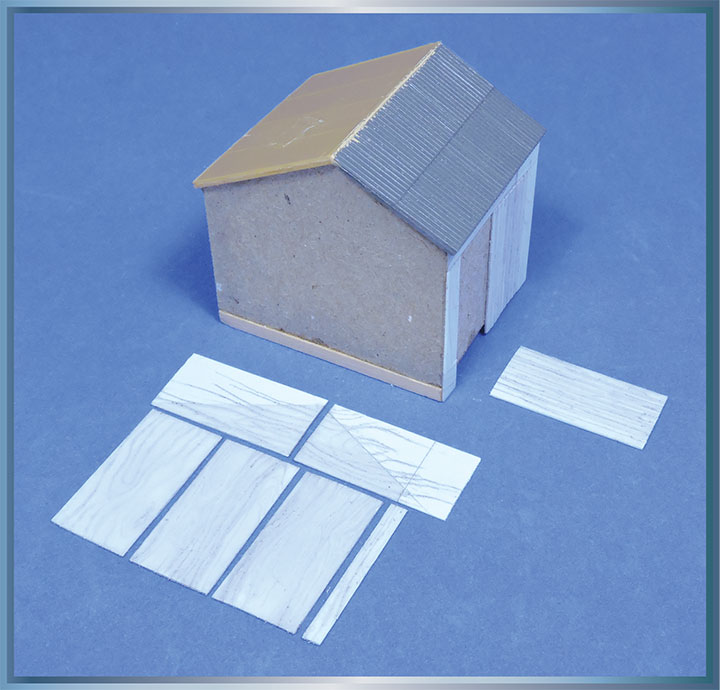
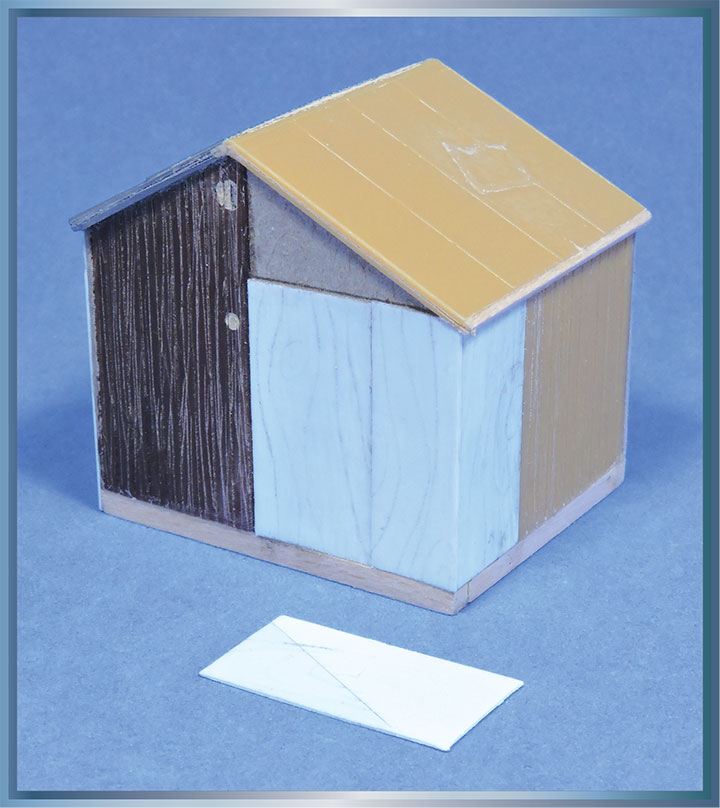
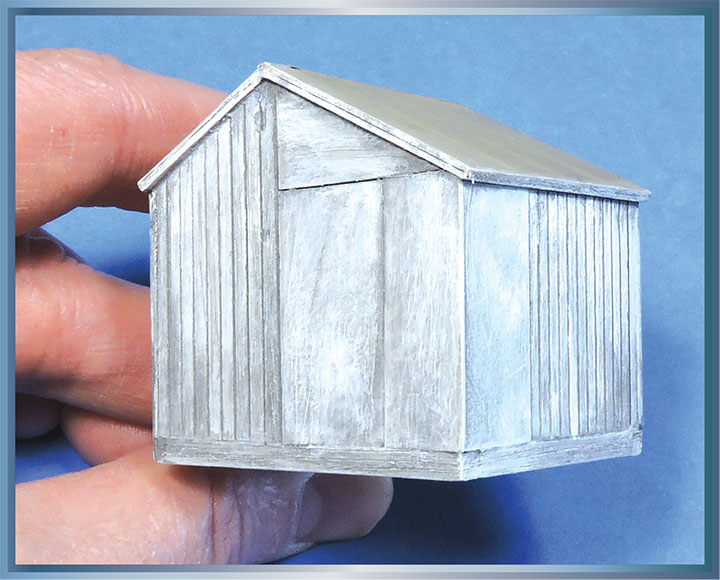
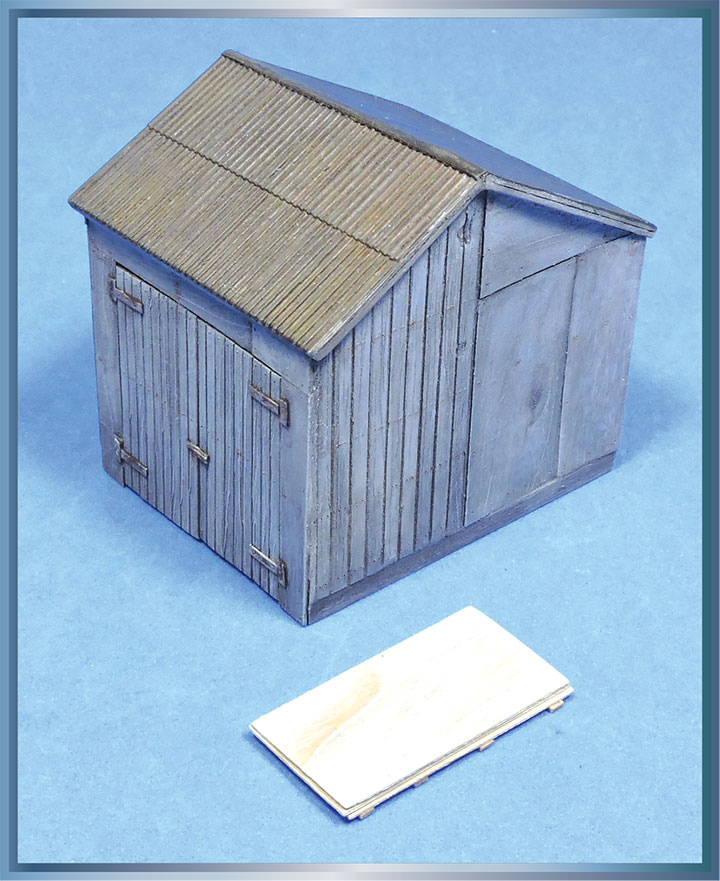
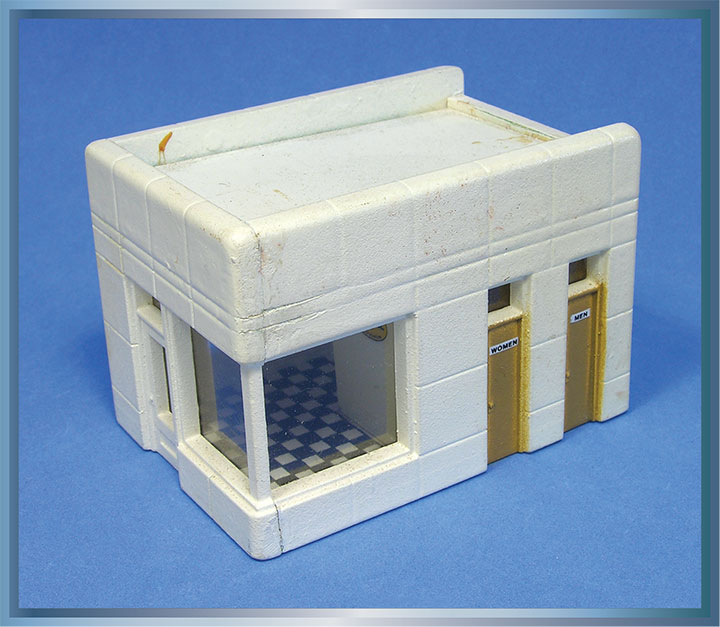
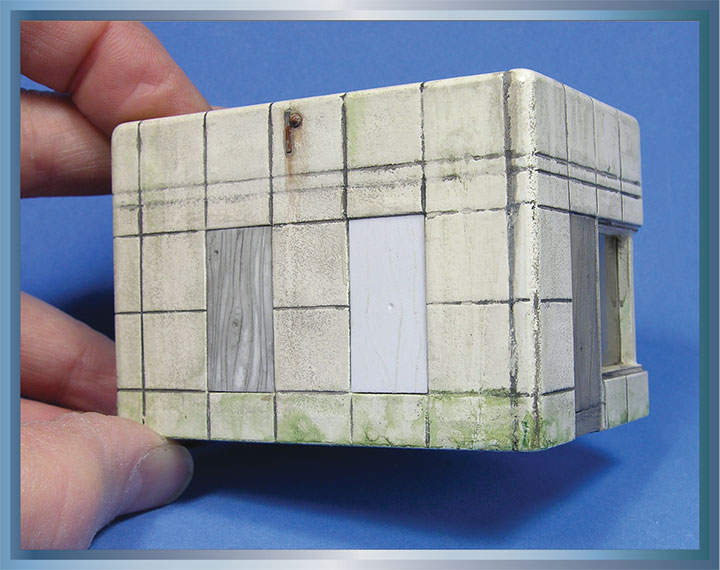
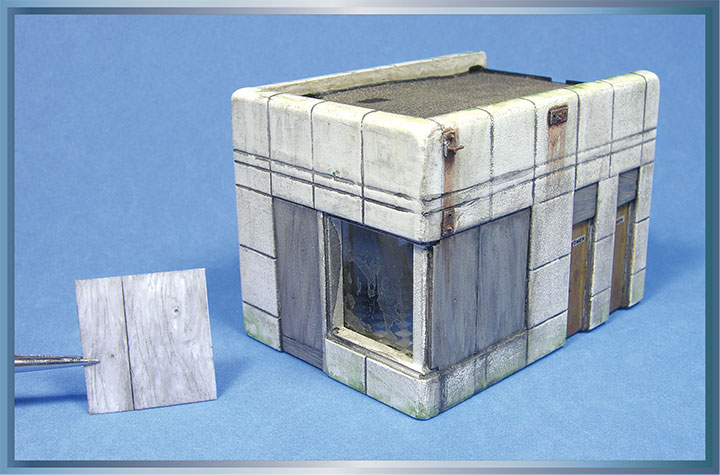
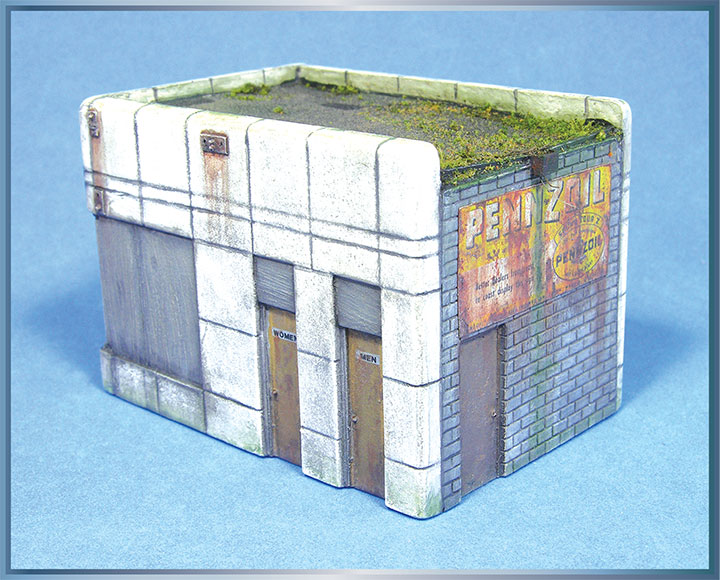
Following sanding of the raw styrene sheet with 220 grit paper, I primed panels with various combinations of Vallejo Sand Yellow (71.028) and some dark streaks with Concrete (71.131) and scribed in grain lines with a needle in a pin vise. Then panels were brush-painted along the grain with a light coat of FolkArt Buttercrunch (737) acrylic and while still wet, streaked with FolkArt Coffee Latte (2559) to simulate dark grain portions. Drybrush with a warm or off-white to accent grain and edges as desired. To weather, stain with diluted flat black to indicate greying (applying several coats for very weathered panels).Determine the plywood panel arrangement by measuring the wall to be sheathed and cutting the panels to size. For triangular or narrow pieces, starting with a standard size scale 4- by 8-foot panel, adding the woodgrain, and then cutting down to size may be the easier approach. To inspect the woodgrain prior to cutting panels to size, brush on a very thin coat of black acrylic.After scribing an X-pattern into the back of each panel, I used Elmer’s Carpenter’s Wood Glue to affix them to the cardboard backing. Outer edges of panels were then spot glued with Loctite CA, to insure sound adherence between the dissimilar materials.I brushed on a light grey solvent-based matte enamel by following the woodgrain of the plywood and sheathing planks (front wall of shed in the photo). Then as shown on the shed’s side, brush-painted a tan-grey color over the face and seams. Once that was done, I applied another thin black wash to accent the grain and define the seams.Using mostly a dry brushing type action (where most of the paint is removed from the 1/4-inch-wide flat brush by brushing on a paper towel), white paint was spottily applied along the grain of each exterior element. Then overall and selective thin acrylic black washes were applied to imply wear and accent woodgrain. The photo shows weathering after two black wash applications.A couple more rounds of selective washes were used to finish the model, indicating grain, imperfections, and seams. I added nail holes in both boards and plywood panels using a needle in a pin vise, and then rusted some with spotty dabs of burnt umber acrylic. To contrast the weathered panels, a stack of new plywood sheets is stacked and ready to be installed as part of the Ridley’s Mill scene.This gas station was part of a box of castoffs I bought at a flea market. Because it doesn’t fit with my modeling era, it would be a good exercise for practicing plywood used to board up window and door openings.Following weathering the gas station with some black, green, and brown washes, I cut plywood panels from 0.015-inch sheet styrene that matched the openings’ dimensions. Following wood grain scribing and adding knots with a drill bit, I stained the panel on the left with a black acrylic wash to check the plywood details.For the front door (installed) and front window panels, I used one piece of 0.015-inch styrene and just scribed the panel line (rather than trying to connect two separate pieces). Each of the panels was secured with Loctite CA.Following plywood panel installation, thin grey acyclic paint was used to color them, and then thin black washes were selectively added to accent the knot holes and areas between and along prominent grain lines. Additional black washes were then used to darken the building’s openings framing, along with indicating rotting and stained areas along the bottom edge of several plywood panels.Painting the concrete block wall (maybe a grey shade somewhat a bit too close to the weathered plywood color), adding a paper sign, and some Woodland Scenics fine ground foam atop a roof made with a rectangle of 150-grit sandpaper completed the abandoned look of the gas station.