Leadville Designs
5 Stapledon Cr.
Ottawa ON, K2H 9L1
Canada
www.leadvilledesigns.com
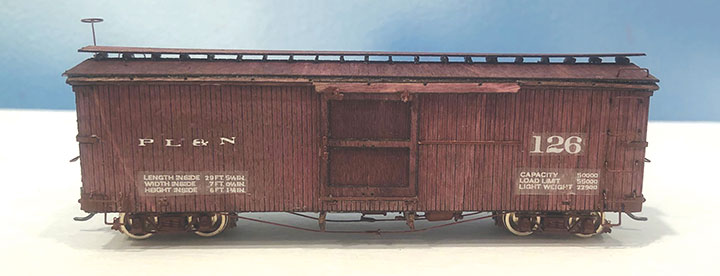
Leadville Designs sells kits for the 3000 series boxcar as originally built for the Denver & Rio Grande Railroad in 1903. To my knowledge, this version has not been offered before. Featuring a simpler air brake system, end truss rods and wood roof, the car also had less safety equipment than when rebuilt in the early 1920s when a metal roof, modern air brake system and added grabs were applied. I built the HOn3 version priced at $44.95 and it is also offered in Sn3 at $64.95 and On3 at $84.95. All three less trucks and couplers. If you are not modeling the D&RG or modeling a later time frame, these cars also found their way into MOW service or could be lettered for another road. Since I model the 1949 era, I elected to letter the car for my own road but generally built it as designed. The kit consists of laser-cut wooden parts; 3D printed, etched brass and styrene parts, wire, nylon, and decals. There are two levels of detail possible with this kit. Every detail can be added or some details, later hidden, can be omitted. For the first time, the instructions even note this possibility and provide guidance on when to do so. As with earlier LD kits, the fit of the parts is superb and the assembly is precise. There are a few points of confusion. One example is the styrene custom cast corner angles, the middle ones of which are to support the end truss rods. The instructions refer to a diagram and a process of double-bending them to form the bracket for the truss rod. I could find no specific diagram other than the car plan, nor could I figure out the process. I elected just to apply them as an angle iron, omitting the end truss rods. I was very impressed by the delicate 3D cast piping attached to the air brake reservoir and the brake system can be added quite easily thanks to this.
No timing is suggested for adding couplers or decals but it is easy to figure out the best stage to do so. I added Kadee #714 couplers, requiring a slight enlargement of the end sheathing and Grandt Line D&RGW 3-foot 7-inch trucks. Note that using the stock kit end buffer blocks and brass overlay plates will not allow proper operation of the Kadee couplers. If you wish, modification of the kit parts is easy to allow full coupler operation by removing the bottom half of each. I applied Hunterline Boxcar Brown stain (which is not brown) to the body and Floquil Red Oxide for the metal parts. This replicates the prototype’s slight difference in color between wood and iron parts when painted and weathered. The underframe is detailed, adding those darned turnbuckles to the nylon truss rods is the most challenging step for me (at least in HOn3). The body is then added and the interior framing, present in other LD kits, is a nice feature. I stained mine a light brown wood color and will permanently park the car adjacent to a loading dock with an open door to show it being loaded. If made operable, be sure to add weight to bring it up to the NMRA recommended practice. A jig is provided to form grabs irons, but I elected to use commercial grabs. I also added four, not two, stirrup steps, and a few extra grabs. Note both the ends and roof have grab irons. All the door hardware is present and adds a lot to the final appearance. The roof and brake staff and wheel are added last. I used a combination of the kit decals and my own custom road name decals to letter the car. The provided decals are very fine quality and apply easily. They accept decal softening solutions well.
I was pleased with the result. This car joins other kits available for modelers to model the earlier period more easily in Colorado and California narrow gauge. I look forward to more releases from Leadville Designs.
-Charlie Getz.
Brunel Models
20 Station Rd.
Cheltenham, Victoria, 3192
Australia
brunelmodels.net
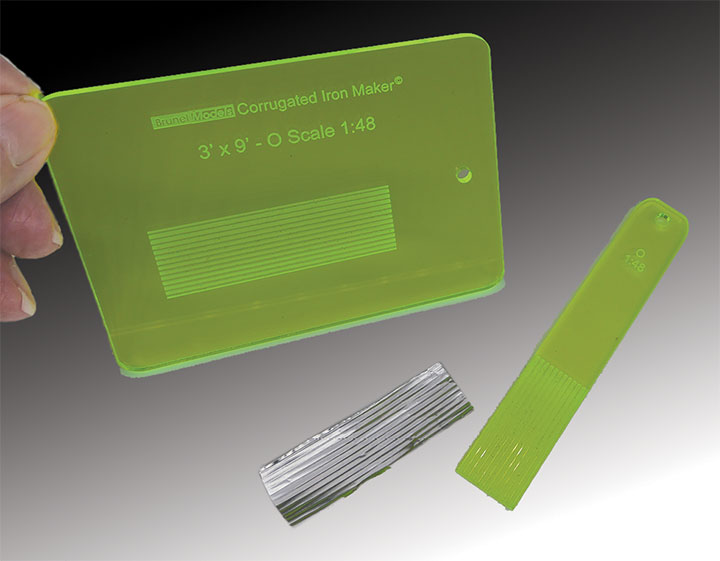
Brunel Models sells a few interesting tools. It would be worth your time to check out their web site. I became aware of Brunel Models after reading Walker Embry’s excellent article “Corrugated Steel from Tinfoil” in the July 2022 Railroad Model Craftsman. Walker used a tool called a Corrugated Iron Maker sold by Brunel Models and I just had to try one, so I placed an order with Brunel and soon had my Corrugated Iron Maker. This tool consists of a plastic plate with a scale 3- x 9-foot corrugated section in the middle. You place a piece of slightly over-size tinfoil over the corrugations and run across it with a spatula-like tool making perfect corrugated ridges. Then you trim your corrugated piece to size. I suggest using small scissors.
The Corrugated Iron Makers come in HO scale, 1:35 scale, U.S. O (1:48) scale, European O (1:43) scale, N scale, 1:32 scale and 1:72 scale. My U.S. O scale tool cost $17.50. I also ordered a $3.00 package of tin foil so I would be sure of having the right thickness of foil. That made the bill $20.50. I was surprised to see the postage was a whopping $20.50, but what the heck, my tool and foil came by international air in only 10 days.
-Bob Brown.

Berkshire Valley Models
438 Morgan Woods Dr.
Fenton, MO, 63026
314-401-4005
www.berkshirevalleymodels.com
Berkshire Valley Models latest O scale wagon kit sells for $29.95 and assembles into a hook and ladder fire wagon. Wagons like these once hauled the ladders to fires along with long hooked poles used to pull apart burning material.
The instructions warn that this is a delicate kit and I agree. It takes some care to assemble. The front and rear spring assemblies consist of white metal castings that have to be ACC’d together. The front spring assembly fits on a cast white metal fifth wheel. The wheels are also white metal. The frame and superstructure are laser-cut wood and frail. You do have to bend six bucket hooks and four wires to hold running boards for the fireman to ride on. Templates are provided for bending these parts and holes are laser cut into the frame for these wires so no drilling is necessary. I assembled my spring assemblies and sprayed them, then sprayed the body and the wheels. Once I had the wheels on the axles, I added the spring assemblies to the frame.
I did have trouble with the six water buckets. The instructions say to drill two holes in dimples in the upper edges of each bucket. Then use the template provided to bend wire handles for the bucket handles. This was beyond my skills, so I bent a U-shaped wire for each bucket, filled a bucket with ACC and stuck the wire handle down into the ACC. Crude, but it seemed to work.
The ladders are laser-cut wood including the rungs. A neat jig is provided for either 24- or 21-inch wide ladders and they assembled easily.
White metal hooks are provided to ACC to the ends of wires to make the hooks in the “Hook and Ladder Wagon.” The instructions were clear, and I used them and the photos to assemble my wagon.
I am pleased with my hook and ladder wagon and hope Berkshire brings out kits for more horse-drawn fire equipment. Even if you are more modern, one of these wagons might be in back of your fire house for use in a parade.
-Bob Brown.
Wild West Scale Model Builders
P.O. Box 1971
Englewood, Colorado 80150
303-842-6106
sales@wildwestmodels,com
www.wildwestscalemodels.com
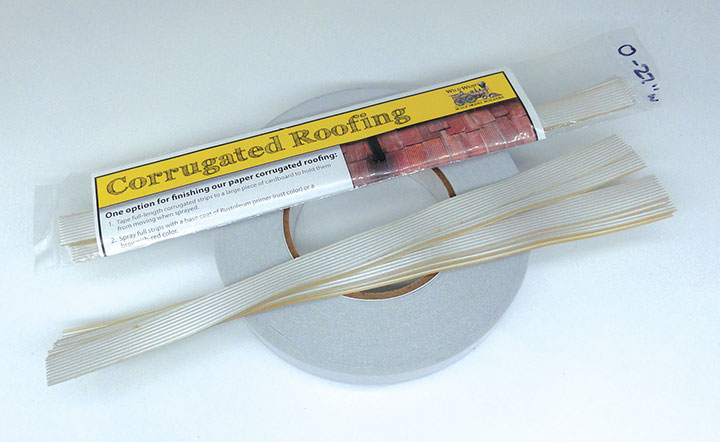
Wild West Scale Model Builders sells corrugated paper roofing. Way back in the late 50s Cliff Grandt used to hold a gathering of narrow gauge modelers every fourth Friday of the month. Cliff had a little corrugator that would make paper corrugated material. One Friday, I came equipped with strips of paper and spent the whole evening corrugating a lifetime supply of material. Well, not really, it soon ran out and I began using the corrugated paper sold by Russ Simpson. So, I love paper corrugated material. It is easy to cut, glue down, and paint will not flake off it. As my supply began to run out, I decided to try some of Wild West’s paper corrugated roofing. It comes in N, HO, S, and O scale. I bought some O scale material. Sixteen 11-inch long, 27-scale-inch wide strips sell for $10.00. The paper is a nice aluminum color, and one package covers some 30 scale feet. The strips come in a plastic sleeve with coloring and weathering instructions. I found the material nice and stiff so glue trails will not show through it. I am looking forward to using this corrugated on my next Bodie model.
I also ordered a roll of double face tape sold by Wild West. It is designed to hold down Wild West’s shakes and corrugated roofing and sells for $12.00 for a ½-inch wide by 180-foot long roll. I find it perfect for holding down plastic windows and doors while spraying them. For years I have used masking tape for this. I would cut a strip of tape, lay it on a piece of cardboard sticky side up and tape each end with small strips of masking tape. It would stick to me and was sort of like corralling monkeys. So, I decided to try the Wild West tape. Now I just cut a piece of tape, lay it down (no monkeys) peel off the backing and have a nice thin, almost invisible, strip of adhesive. I stick my parts down and spray. Of course, you can also use this tape to hold down your shakes and corrugated roofing.
-Bob Brown.
Conowingo Models
440 McCauley Rd.
Conowingo, MD 21918
Conowingomodels@yahoo.com
http://conowingomodels.com
Conowingo Models sells HO scale kits for a 24-foot wood tank water car. The kits sell for $40.00 each less trucks and couplers. They feature wood construction with Tichy details, 3D custom parts, wire truss rods and a set of Conowingo Railroad decals. Trucks and couplers can be purchased from Conowingo Models.
-Bob Brown.
Hangman Creek Diorama Company
315 W. 30th St.
Sioux Falls, SD 57105
650-679-5854
jessd3818@yahoo.com
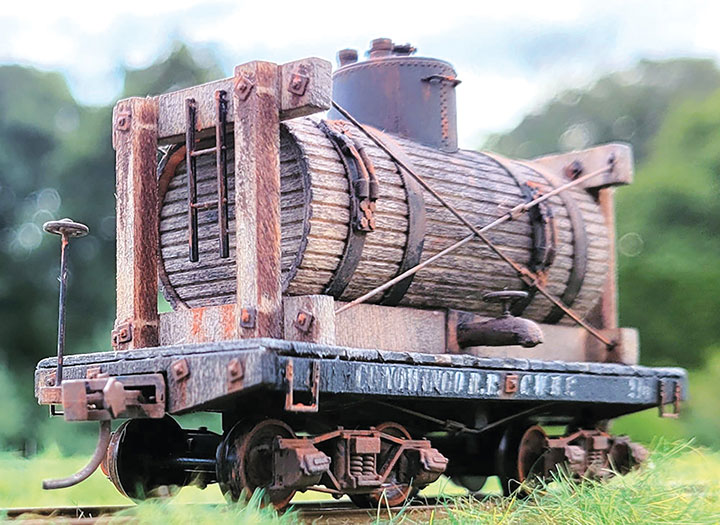
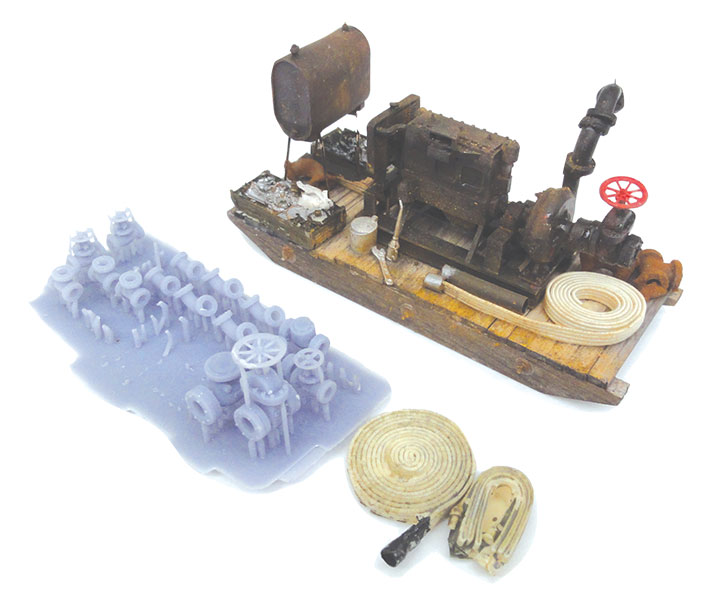
Hangman Creek Diorama Company sells a series of O scale kits designed to assemble into detailed dioramas. Examples include pond boats for pushing logs around log ponds, a pipe rack, small trestle, blacksmith car, bridgetender’s shack/tool shed, twin water tanks based on the Yosemite Valley’s Bagby tank, and the kit I chose to order, a portable Diesel-powered centrifugal pump sled. My sled kit sells for $65.00 plus $20.00 postage.
The Diesel engine, radiator, and pump come mounted on an angle iron frame as a one-piece 3D print. I was astounded by this print, all I had to do is add ignition wires, a pipe and paint and weather the print. The fuel tank is also 3D and I had to bend up two legs from wire. The wood sled must be cut to length and a strip wood deck added along with tie rods and
n-b-w castings. There is a white metal kerosene can, oil can and wrench, along with two epoxy coiled hoses and two toolboxes full of tools and gears. A strip of flat elastic material is also provided. You coil this around a pencil and ACC it. Then you can drape the hose around your model. A nice touch. There is even a little piece of tissue paper for oily rags. The kit also includes some extra strip wood to strew around and some styrene tube for pipes. A sheet of 3D pipe elbows and valves is also provided. I had 14 of these plumbing parts left over after detailing my pump and can use them for future projects. The idea is to assemble the pump and use it in a detailed diorama, so it has lots of details.
The instructions come in a 27-page, color, horizontal format, 8½- x 11-inch, spiral bound booklet. This booklet discusses inspiration, modeling philosophy, what’s in the box, supplies and tools needed, preparing the various parts, and assembling the pump sled and painting and weathering its parts. The instructions are really for the novice, but there are some gems of wisdom to be found. I enjoyed assembling my portable pump and it makes a nice piece of clutter on my already cluttered layout. Bob Brown.
Beware: I reviewed an electrical enhancing material called NO-OX in the July/August issue. After applying it, I noticed my layout began shorting. I thought it might be a closed gap, so I ran a razor blade through all my gaps and my layout stopped shorting. Then I realized that the NO-OX, due to its Vaseline like consistency, may have shorted across one of my gaps. So be careful when rubbing NO-OX on and off your track.
-Bob Brown.