In the July/August 2020 and September/October 2020 GAZETTEs I wrote a two-part series on building an HO scale model of the coal pocket that once existed at Rico, Colorado. This article is the long awaited third and final part to the story. When I originally built the coal pocket, I knew that because of where it would be located on my layout, it would be very difficult to spot cars during an operating session. The grade of the delivery track and the location of the coal pocket being out of reach from my operators meant there was no way to manually stop the coal cars from rolling away. From the beginning, I had planned to install some sort of mechanical mechanism for holding cars on the grade. In this final installment I’ll describe how I accomplished this.
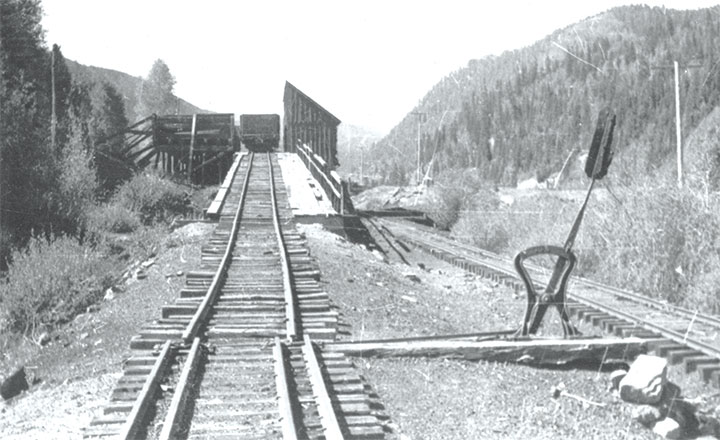
South facing view of the RGS Rico coaling facilities as seen standing behind the derail switch stand between the lead track and the main line. RGS Rico, CO (7/3/1938). -Photo credit Friends of the Cumbres & Toltec Scenic Railroad, Richard L. Dorman Collection, John W. Barringer III, RD140-060.
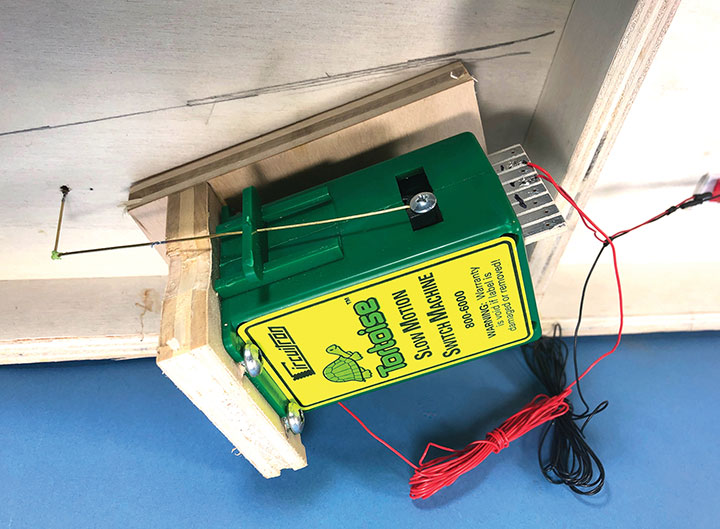
As I was thinking about the problem, it became apparent that I’d have to have some sort of moveable car stop in the track that the coal car could rest against. I felt that a wire sticking up through the ties just enough to catch an axle would be the only practical solution. This wire would have to retract to allow cars to be spotted and removed from the coal pocket too. I decided that a switch machine would work, and better yet, a Tortoise Switch Machine would be ideal since it has auxiliary electrical contacts for controlling accessories. A wire sticking up through the tracks would be very difficult to see, so having some sort of additional lighted indicator could help alert my operators when the wire was raised.
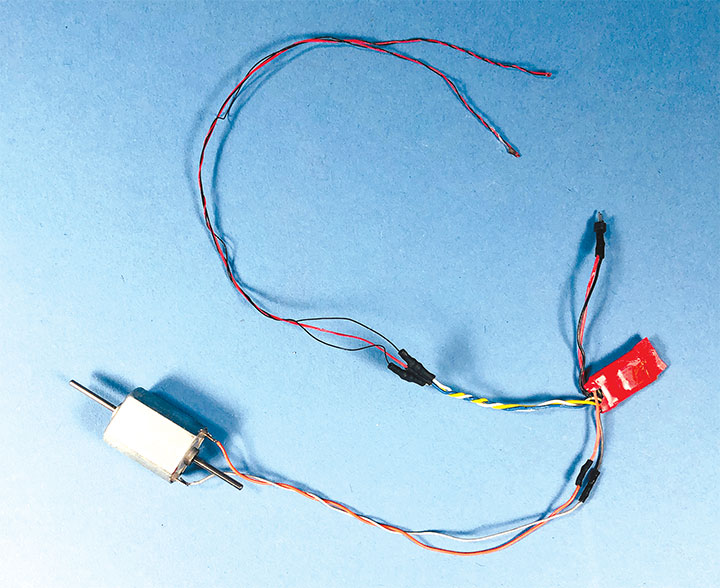
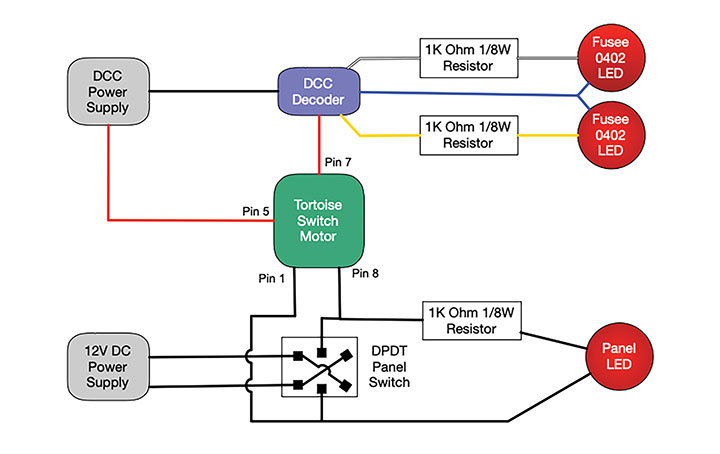
After upgrading many of my early DCC installations to sound, I have a surplus of older motor-only DCC decoders. I used one of these decoders to simulate a fusee on the tracks when the car stop wire is raised. Using the white and yellow headlight wires on the decoder, I lit a pair of 0402 LEDs that were coated in Tamiya clear red paint. Using JMRI and the DCC programming box that I described building in the March/April 2022 GAZETTE, I programmed each of these headlight outputs to always be on with a firebox flicker effect. It was hard to know if the programming was working, so I also wired a motor to the grey and orange decoder outputs. The motor pulses when it accepts a DCC command which helped me know when the decoder accepted its programming.
I have now completed the project and future operating sessions will be the determinator of whether this project is successful or not. For now, it has met all my expectations. Please follow along in the photos and captions as I describe how I completed my coal pocket project.
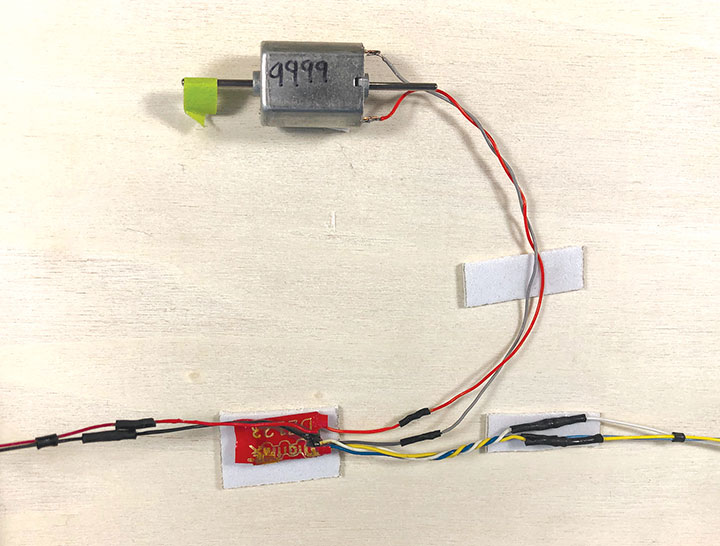
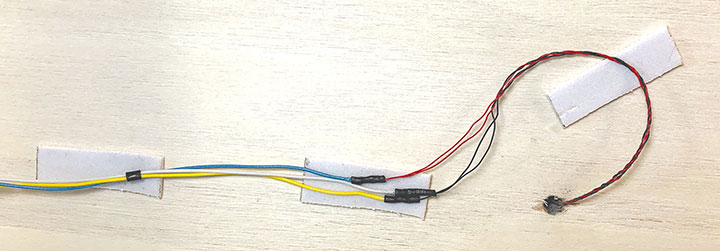
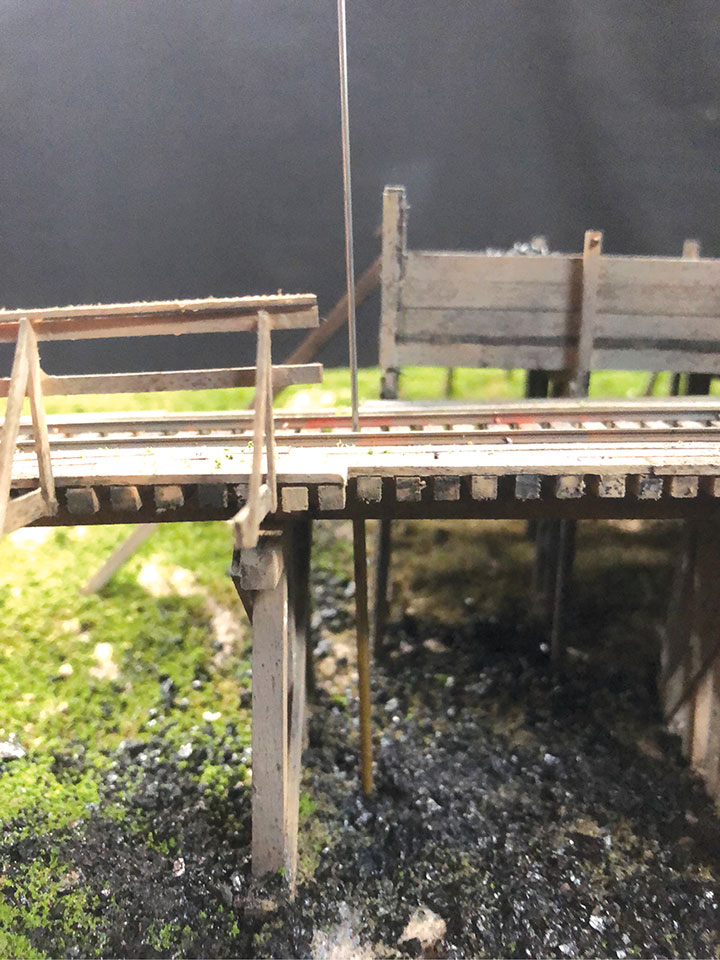
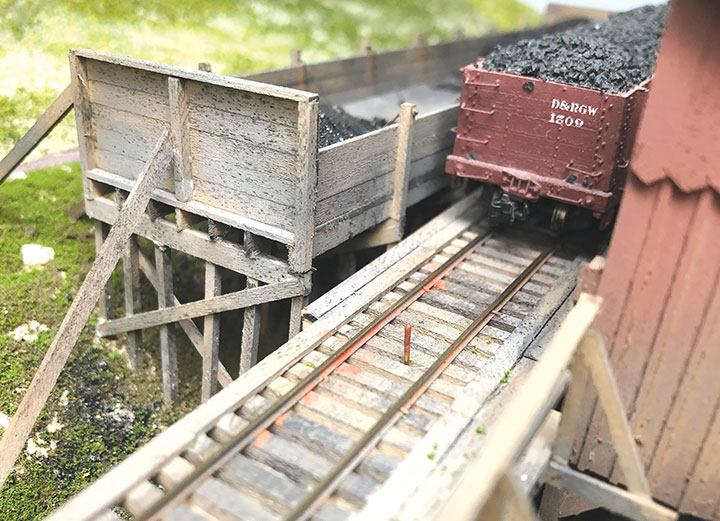
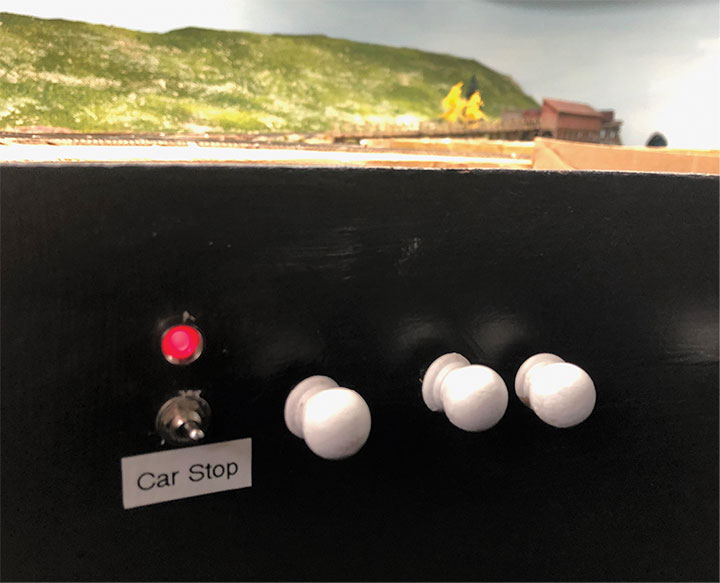
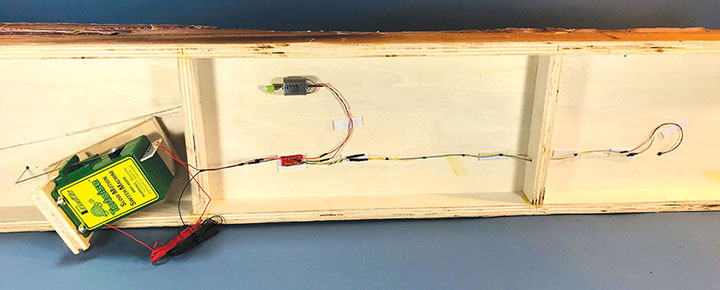
Using a surplus motor-only DCC decoder, DC motor and some 0402 LEDs, I prototyped a circuit to simulate the light from a flickering fusee. The LEDs were coated with Tamiya clear red paint to change their light from white to red. Resistors were added to the LED leads and were independently wired to the forward and reverse headlight functions of the decoder. I programmed the decoder to have both lights on all the time with a firebox flicker effect. The motor was wired to the motor power leads so that I could see it pulse to acknowledge the programming inputs. The decoder was programmed to locomotive number 9999 since I’d never have a locomotive with that number. With this proof of concept successful, I moved forward with installing it on my coal pocket.I built my coal pocket on a removable base. The decoder and motor were mounted to the underside of the base using double stick foam tape. I added a masking tape flag to the motor shaft so that I could see and hear the motor running. This has proved helpful for diagnosing problems with the decoder since I can hear the motor turning where it is hidden under my layout. It can be controlled from any of my wireless throttles as if it were installed in a locomotive.The resistors and 0402 LEDs were installed in the tracks from the underside of the coal pocket base. I used double stick foam tape to mount the wires in place.The LEDs were placed between the ties on the approach to the coal pocket trestle. These will warn my operators that the car stop is in the up position and to be careful spotting cars at the coal pocket. Combining the two separate firebox flicker effects creates a pleasing effect that simulates a fusee burning. I tried to set the LEDs below the rail height so that they wouldn’t get damaged when I’m cleaning the track.I mounted a Tortoise switch motor on its side to control the rod that will be used as a car stop on the coal pocket trestle. A switch that’s built into the Tortoise is used to turn the power to the DCC decoder on and off. When the rod is in the up position, the decoder gets power from my DCC system. When it’s down, the power is off. This in turn toggles the fusee LEDs on and off.When I was building the coal pocket, I had anticipated adding the car stop, so I hid a brass tube in the model so that I could install the moving car stop wire later. This photo shows the wire used to align the brass tube. I later painted it black to hide it.The finished car stop, in its up position, is just high enough to catch the brake beam or axle on my coal cars. I painted it rust to hide it, but I may go back and paint it fluorescent orange so my operators can see it. I aligned the pin near the edge of the coal pocket bin so that my operators know to not let their locomotives past this point.On my layout fascia I installed a DPDT switch to control the car stop. Toggling it up lifts the car stop, turns on the fusee flicker and lights the adjacent LED on the fascia. Toggling down has the opposite effect. This photo also shows how far back into the layout the coal pocket is and how it would be impossible to manually stop the cars on the ramp. From toggle switch to coal car is an actual six feet! Spotting cars will require the use of the delayed coupler action on my Kadee couplers.This closeup view of the coal pocket shows the lit fusee and some coal cars resting against the car stop. The trestle grade is more than 6 percent which is the reason for the car stop.This view shows the wiring under the coal pocket before it was installed in my layout. I tried to do as much work at my workbench as possible.Wiring diagram for the circuits described in this article.