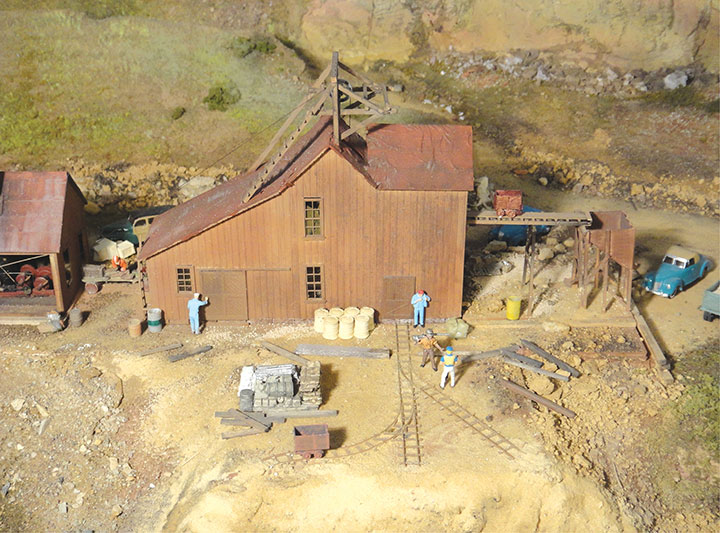
One of the great intriguing details of any mine scene is the tiny mine track. Actually, spindly little track is appropriate around sawmills, construction sites, and a lot of industrial complexes. On my HOn3 Rio Grande Southern layout I have six locations where I handlaid 18-inch gauge track. Well, approximately 18 inches — my experienced modeler’s eye isn’t experienced enough to discern an HO inch!
How do you hand-lay 18-inch gauge track in HO? I’d love to tell you that I hand-hew each little tie from oak and drive microscopic spikes with robotic surgical instruments. But no, I’ll stick to the facts; and the facts are quite straight-forward and simple, I have two methods of laying tiny track.
All-Plastic Track
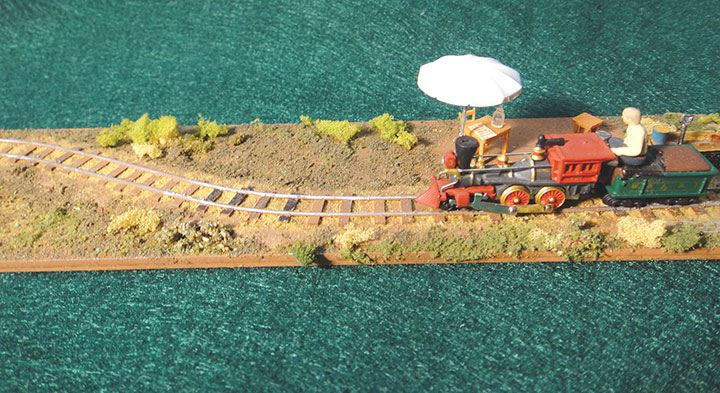
The simplest method of hand-laying 18-inch gauge track is to build it on a styrene roadbed where roadbed, ties, and rails are all styrene bonded together with liquid cement. This all started when I was cruising the aisles of a greeting card store. There I spied a tiny Christmas tree ornament that was a 4-4-0 steam locomotive. Model railroaders are a creative lot, and I instantly recognized the track gauge as 18 inches (or close to it) and concluded it would be perfect for an HO scale backyard live-steam railroad. I bought the little engine in an instant.
When I bought the little ornament engine, I was building a layout that still had lots of unfinished scenery. It was easy to see where a backyard live-steam railroad could go. I prefer to build “workbench scenes.” It’s easier to detail a small scene at the comfort and convenience of the workbench than on the layout. My completed workbench scenes are placed on the layout and blended in with scenery materials. When it’s time to revamp or dismantle the layout, the workbench scene neatly pops out with the pry of a putty knife, and the little live-steam railway shown here has been on three layouts, and will soon be incorporated into a fourth.
Here’s how I did it. The little ornament engine with tender measures two inches long and has a track gauge of 18 inches. I modified the tender with a seat for an HO person. I made the scene base to easily fit a piece of real estate on my layout and arbitrarily made it two inches wide and eleven inches long. I made the base out of 40 mil plain Evergreen styrene sheet. Then I cut a second identical piece and laminated them. I didn’t want the scene to warp or flex and pop the track.
After looking at some Grandt Line cast styrene mine track, I determined that the ties were about six inches wide and 30 inches long. So, I cut my ties out of Evergreen scale 6- x 6-inch-square strip stock. The ties were glued to the base (roadbed) by eye, spacing about a scale foot apart.
Rails? I took a piece of Grandt Line cast plastic mine track and compared it with Evergreen strip stock. I found that the HO scale two-inch by two-inch stock was a very close match. An HO 2x2 has a fine cross-section. I held the rail in place with thumb and finger about three inches apart along the rail and ran a liquid cement applicator brush along it. The second rail was glued down with the same brush one or two ties at a time as I gauged the track with a scale ruler. Mine cars are available from several makers and it would be good to buy the cars first and match the track gauge to them.
With the plastic rails glued to plastic ties, glued to a plastic base, I sprayed the entire assembly with Model Masters Dark Tan. Individual ties were then painted with track color Floquil paint pens. I wanted the backyard railroad to look like it is being currently used, so I painted shiny rail heads with aluminum paint applied with a fine brush. For mine track, I painted the rail heads with the Floquil Rust paint pen.
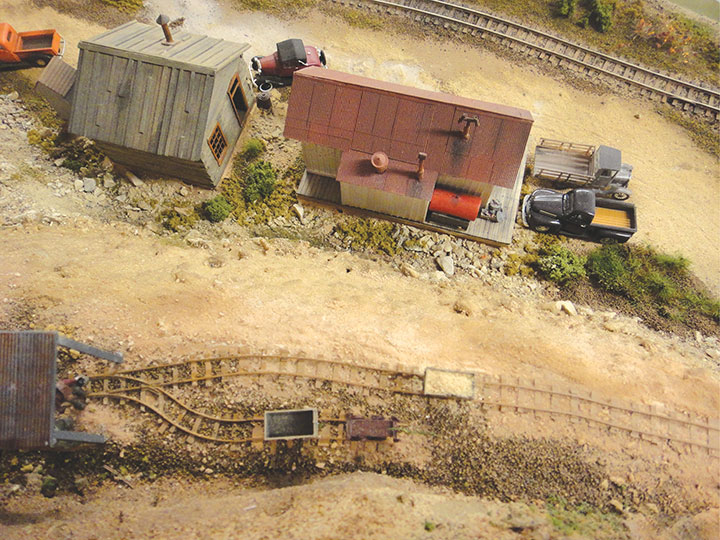
Most of my 18-inch gauge track is on a roadbed of 40 mil styrene. Just one layer of the roadbed suffices for small installations. Most of my mine track is a mix of Grandt Line products and my handlaid track. I mostly use Grandt Line turnouts and sharply curved track, and my handlaid track for longer straight stretches.
With the “workbench scene” track in place, a final layer of scenic materials is applied the same as the surrounding layout areas. Most of my mine track is ballasted with the finest siftings of dirt from prototype mine scenes.
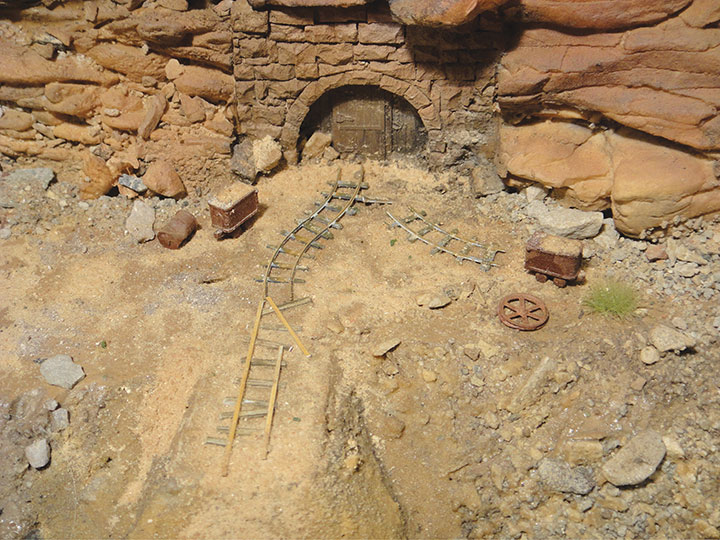
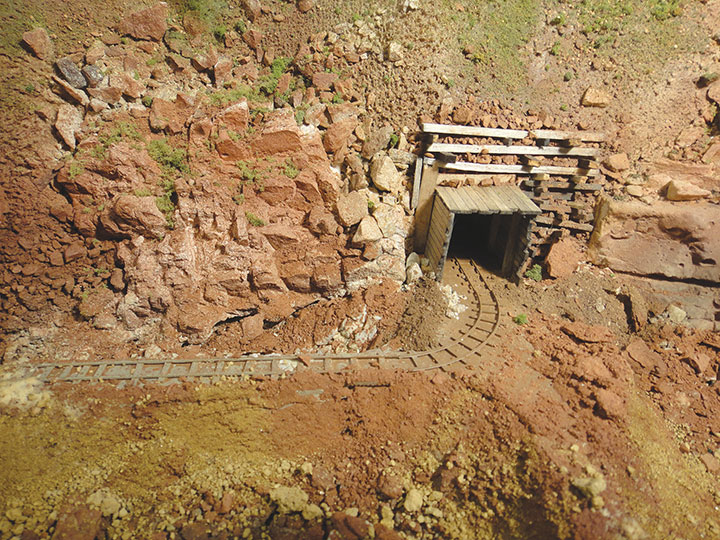
Free-Sstanding Mine Track
In a few instances I have wanted to add mine track to a timber trestle or a location where the scenery was nearly completed. These sections of track have been built without integral base roadbed and upside down. Thin strips of masking tape are taped to a flat surface and the two-by-two rails are laid to gauge on the tape. Next, scale 6x6 ties are glued to the rails. After the glue has dried, the track is carefully removed from the tape by sliding a hobby knife between tape and rails. The track is turned right-side-up and painted as described above. The track is then installed in its intended place.
Conclusion
Hand-laying 18-inch gauge mine track is fun. Since it doesn’t have to actually do anything except sit there and look good, no great precision is necessary. It’s basically another element of our artistry by which we finish scenery. You’ll have fun with it!