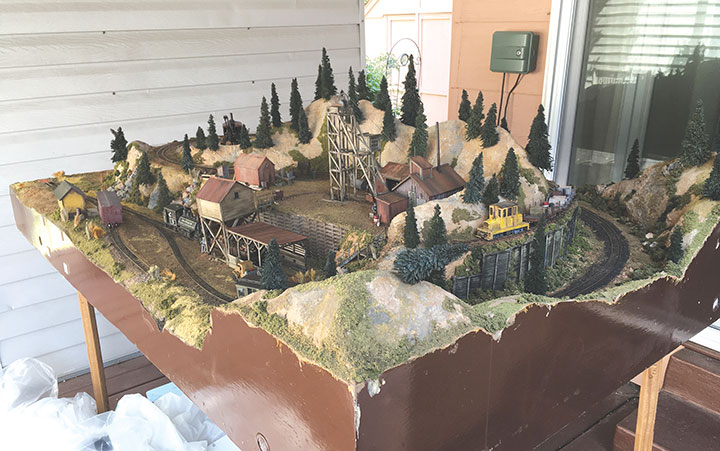
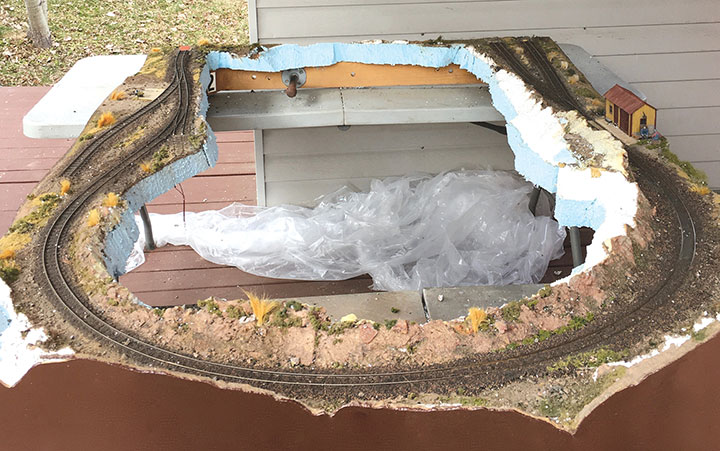
For several years I have been threatening to rebuild my Pine Cliff mining and rock quarry module. It is part of our four person On30 group known as the Gold Creek, Pine Cliff and Elk Springs group. Our basic modules were built decades ago on frames made by Mike Harris. They were 1- x 4-inch frames, with Masonite edging, blue foam board, and removable 2- x 2-inch legs. These modules were light, easy to move, and work on. We started adding track, carving mountains out of foam insulation boards, adding scenery, structures and details right away. Over the years our modules have been modified several times, mine likely has the most changes made to it. A mine and quarry track were added to the side of my mountain above the mainline. It used a shuttle unit to add some animation. Scratchbuilt structures were added, trees were put in place and so on. All of this is part of my enjoyment of the hobby.
The author’s On30 Pine Cliff module ready to enjoy.
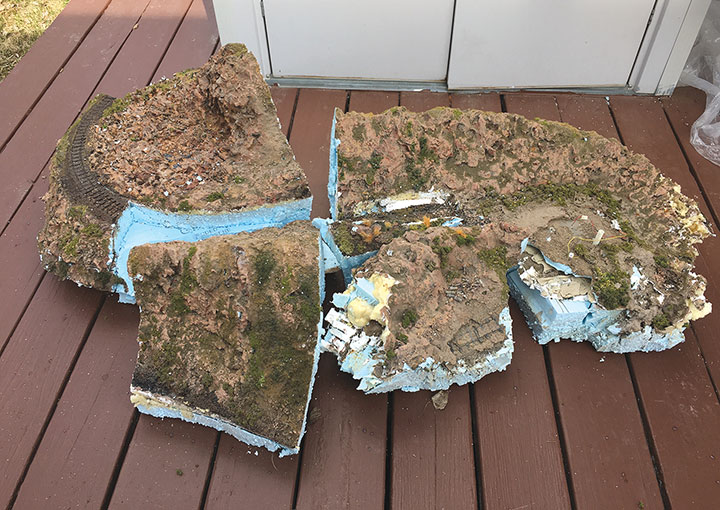
I am also involved in garden railroading. I use crusher fines, made up of small chips of granite and dust, for ballast outdoors, and decided to use these to quickly add realistic looking rocks on my module. The fines looked great, so I kept adding more, but this made my module by far the heaviest in our group. However, this extra weight was no problem when I stored my module between shows. At one point I rigged up a rope and pulley system to store my module up near the rafters in my workspace, I also had tables that had large casters so I could simply lower my module onto one of these tables and roll it out to my vehicle for loading. Unloading it after the show was just as easy, and weight was not an issue.
Then, one of our members, Bransford Banks, offered his basement as a place to store the modules. This would allow us to assemble the complete layout and actually operate it between shows, and do any work needed. A very nice offer that was quickly accepted.
For a long time, this worked out well, but as we got older, moving the modules on edge up and down the stairs to the basement got harder to do. I decided to bite the bullet and rebuild my module to make it lighter. I brought my module home and put it on our covered deck. Then Covid-19 struck, and trips to the local hardware store became difficult. Another issue was that the local supplier had only four 2- x 8-foot pieces of blue foam in stock. I bought all of them, went home, and got to work.
The day I started the project, it was 42 degrees, and I found it a challenge to work outdoors on our covered deck, so I carefully removed the trees, structures and details and brought them inside.
Many days the module sat under a tarp covered with snow. The neighbor’s cat, Eve, found it interesting and visited on a regular basis. As I went along on the rebuild, I kept finding things to add or change. Each added to the character of the module. The day I finished the rebuild, it was 100 degrees.
Thanks to my wife, Wanda, for allowing me to make endless trips for several months in and out of our sliding patio door.
In the following photos and captions, I describe in more detail how I rebuilt my module.
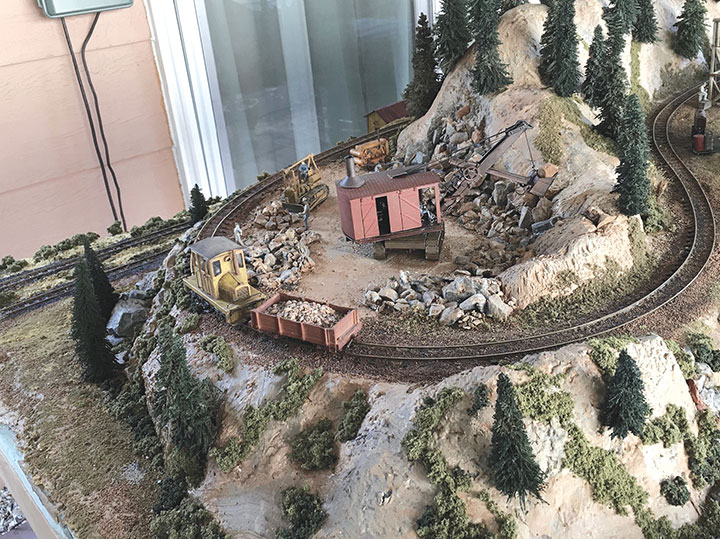
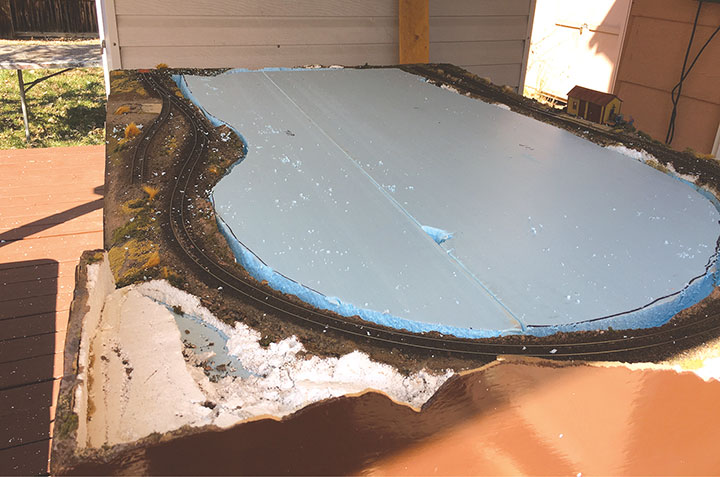
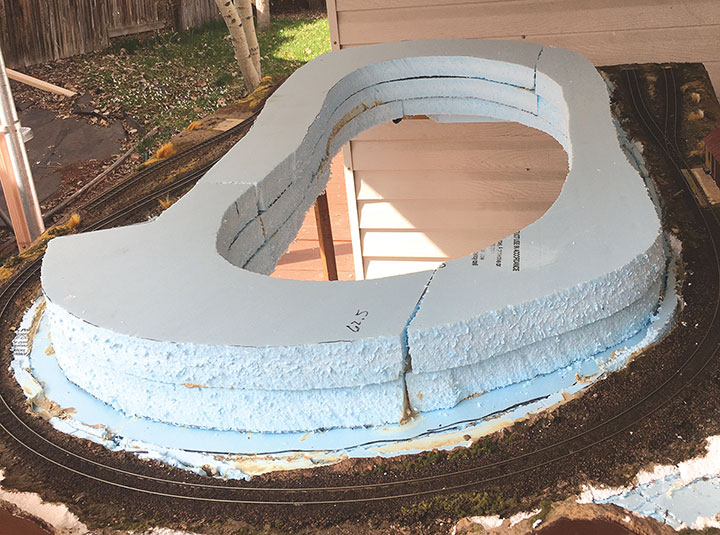
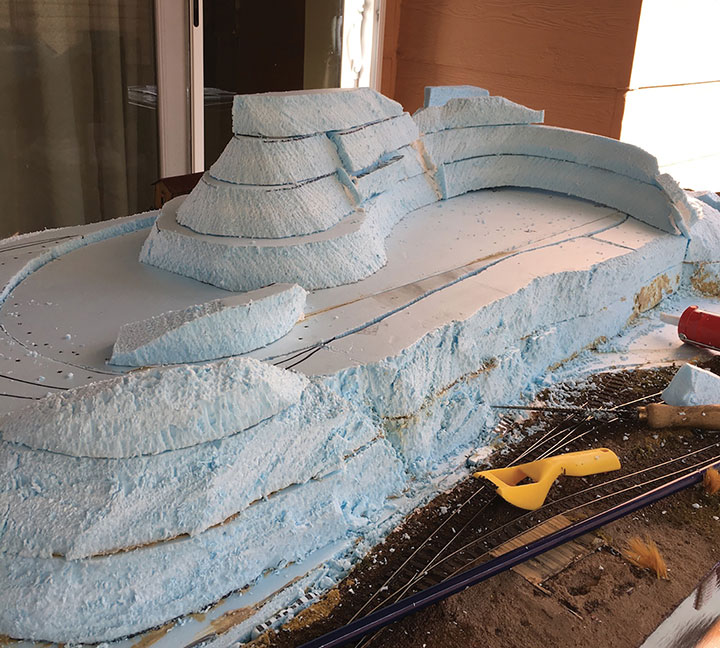
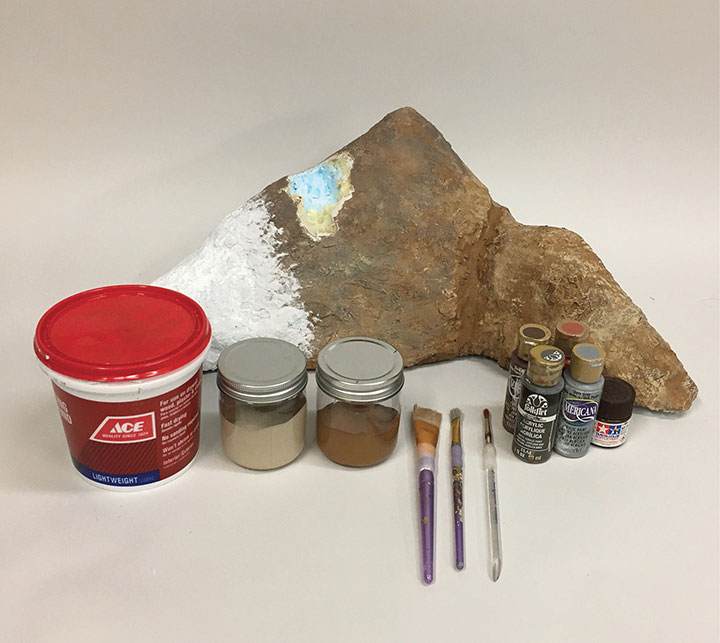
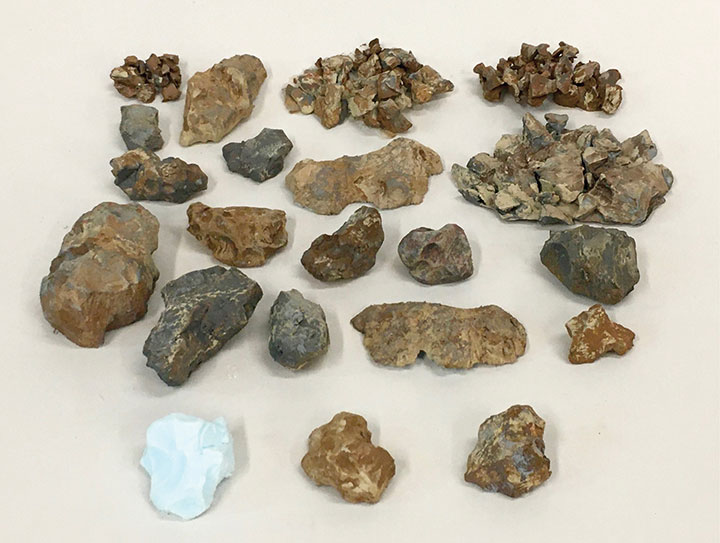
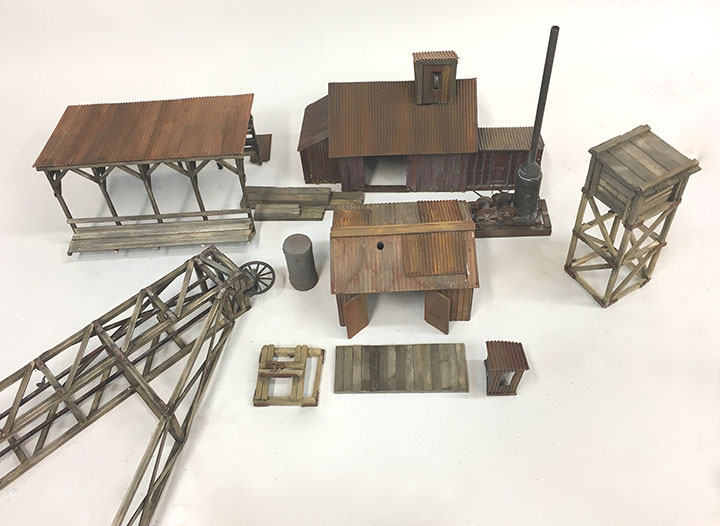
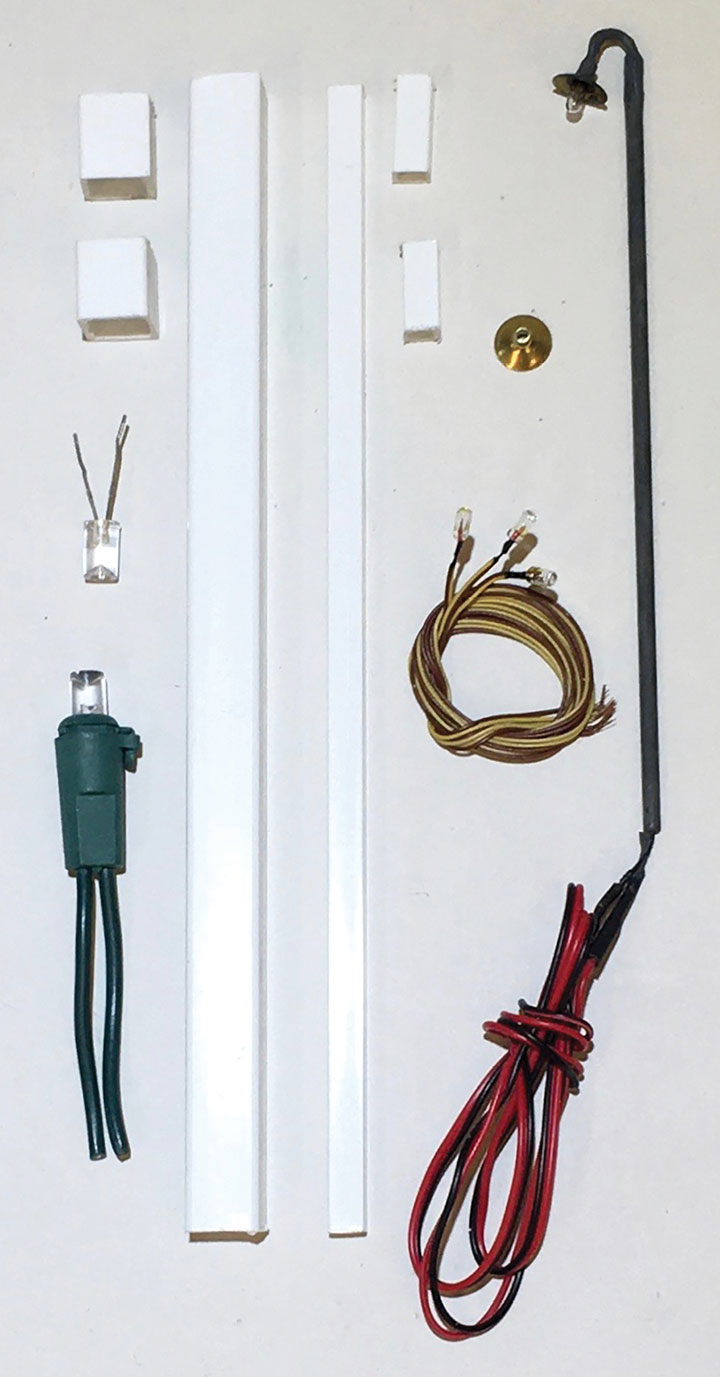
The quarry end of the Pine Cliff module complete with steam shovel.Two of the 2- x 8-foot sheets of blue foam were glued in place to fill the center of the module.Once the glue had dried, I cut out a kidney shaped section that would be later used for the base of the table mountain that the mine structures would sit on. This would be removable so that I could work on it and the hills indoors.The track laid around the center of the module.The basic ridge form is ready for placement of the mine track and structures. It is sitting on the removable center plug. Shaping was done with a hack saw blade, SureFoam file, 80 grit sandpaper and various knives.The start of the hollow ridge and hill structures using rings of the dwindling supply of blue foam. The removable center table section has been cut out from the third layer. It will support most of the mine complex and quarry. All of the exposed surfaces for the new ridge and hill shapes were lightly sanded with 80 grit sandpaper. This was done to help the Ace Hardware brand Fast ‘N’ Final Light Weight Spackling adhere to the foam for texturing. A spatula was used to apply a thin coat over the shaped foam. Texturing was done using a sponge and wadded up paper towels. I let this dry a few days before the painting started. At a big box hardware store, I found some medium Sienna and light Beige flat latex paint for base colors in the mismatched color return shelf. The two colors were applied over large areas in a random manner using various techniques including blending plus vertical and flat stippling. I then blended in small amounts of hobby store bottle paint including warm grays and several earth tones to add interest. I wanted rock retaining walls, large boulders and lots of rocks for the quarry. I decided to make them out of leftover chunks of foam which turned out to be fairly easy. It also would be easy to custom carve them to fit specific locations. I took several pictures of rip rap granite walls to use as a guide for colors and shapes. The same basic color pallet was used for the rocks as for the mountains. Blocks of foam were cut up into several sizes, then I used needle nosed pliers, a hobby knife, and my fingers to rip chunks out of the bigger blocks to match some of the photos that I was using as guides. These chunks then became smaller rocks. One of the things that bothered me about my buildings was that they all had closed doors and very few windows, so I decided to modify them. Shown are several of my scratchbuilt structures at the start of modifications. A modified Bachmann donkey engine for the hoist house, and a steam engine for the pump house were added as interior details. Roofs were modified, foundations and windows were added, colors were changed, and more details were added, including a larger sheave for the head frame.1.5 volt incandescent bulbs with shades were used for the exterior lighting and some interiors. It soon became apparent that even with several of the incandescent bulbs installed in each building, the amount of light was minimal. To solve this problem, I ended up using warm white LEDs from a string of lights used to decorate for the holidays. They put out a good amount of light and were used to highlight areas. Various sizes of thin wall, square and round styrene tubing are available in bundles of various sizes on e-bay at a good price. I used small sections of them as chases to keep the wiring neat under the module.